Did you know that over 5.3 billion photos are taken daily worldwide?
And smartphones now account for about 92.5% of all photos captured.
Have you ever wondered how to safely convert a binder full of fading family photos into something you can store, share, and preserve for generations?
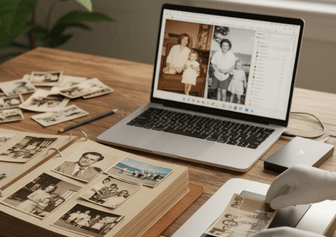
Old family photo albums and binders often hold a lifetime of memories—from black-and-white portraits of grandparents to colorful snapshots from school plays, vacations, and weddings. But time isn’t kind to paper. Heat, humidity, mold, and repeated handling can cause these memories to fade, curl, or disintegrate.
And here’s the real issue: once a photo is lost, there’s no way to recreate it.
That’s why more families are turning to professional photo digitization—preserving fragile prints using high-resolution scanning, metadata tagging, and archival formats like TIFF. It’s not just about backup—it’s about legacy, access, and peace of mind.
At eRecordsUSA, we specialize in binder and album photo scanning using non-destructive equipment and museum-grade standards. Whether you have a collection in sticky pages, corner mounts, or acid-worn sleeves, our team handles each photo with the care it deserves—right here in Northern California.
This guide walks you through:
- How to prepare your photo binder for scanning
- What resolution, format, and equipment professionals use
- How to organize, store, and back up your digital memories
So if you’re asking Google:
- “How can I scan an entire photo album without ruining it?”
- “Best way to digitize old family photos?”
- “Where can I get my photo binder professionally scanned?”
—you’re in the right place.
Let’s get started on protecting what matters most.
What Equipment, Software & Storage are Needed to Digitize Old Family Photos?
Thinking about digitizing a binder full of cherished family prints—but not sure where to begin? Whether you’re planning to DIY or considering a professional photo scanning service, it’s important to understand the tools, technology, and storage strategies that make the process both safe and effective.
1. Scanning Equipment That Respects the Originals
Not all scanners are created equal—especially when it comes to delicate, aging prints stored in photo binders or sticky albums. Here’s how different options compare:
- Flatbed Scanners (Preferred for Albums & Fragile Photos) – These scanners gently scan without contact pressure, ideal for photos still mounted in sleeves or on archival pages. They offer edge-to-edge accuracy and high optical resolution without risking damage.
- High-Speed Feed Scanners (Best for Loose Prints) – Designed for bulk processing, these scanners are fast and accurate—but not suitable for glued or fragile items.
- Smartphone Apps (Low-End Convenience) – Apps like Google PhotoScan or Adobe Scan are fine for casual use but fall short on archival resolution, color depth, and preservation-grade formats.
At eRecordsUSA, we use calibrated flatbed and archival-grade scanners with non-destructive lighting to preserve photos exactly as they appear—cracks, tones, edges, and all.
2. Image Correction & Enhancement Tools
After the scan, professional post-processing software ensures every image looks its best. At eRecordsUSA, we apply:
- Cropping and straightening
- Contrast and fading adjustment
- Color correction and balance
- Dust, scratch, and crease removal (non-destructive)
This gentle enhancement helps restore aging photographs while respecting their original character.
3. Where & How Are Scanned Photos Stored?
Safe photo digitization isn’t complete without smart digital preservation. That’s where long-term storage strategy comes in:
- File Formats: We recommend uncompressed TIFF for archiving, and JPEG for sharing with family and friends.
- Storage Locations:
- Primary file set stored locally (e.g., external drive)
- Backup on a second medium (e.g., USB, NAS)
- Third copy stored in the cloud (Google Drive, Dropbox, etc.)
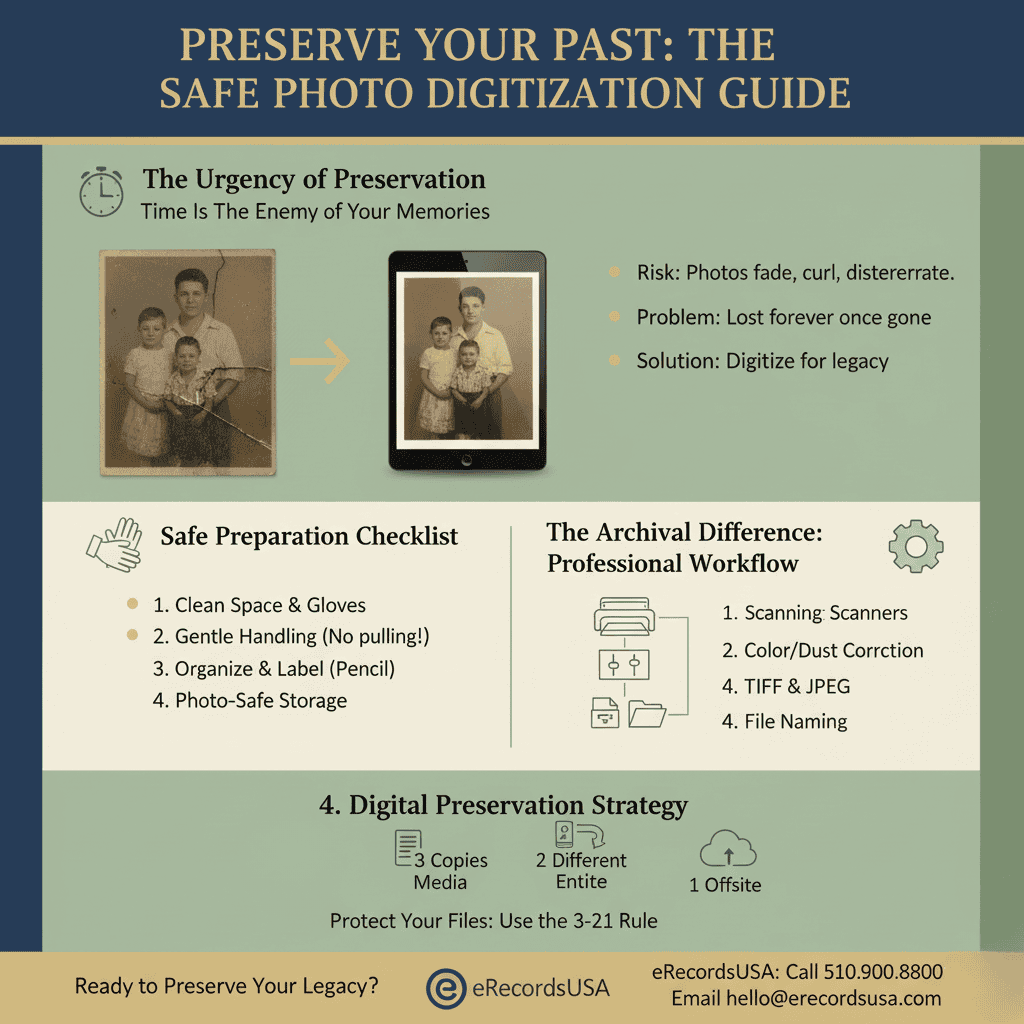
Following the 3-2-1 rule (3 copies, 2 different formats, 1 offsite) is a gold standard in digital preservation—and something we help families implement.
How Do You Safely Prepare an Old Photo Binder for Scanning?
Before scanning begins, careful preparation is essential. Old family photo binders often contain fragile prints that can tear, fade, or break if handled carelessly. Whether you’re working with vintage color photos, black-and-white prints, or mounted albums from decades ago, these preservation steps help ensure safe digitization—without damage.
1. Set Up a Clean & Photo-Safe Workspace
Start by creating an environment that mimics what archivists use:
- Choose a flat, clutter-free surface (like a desk or large table).
- Wipe it down with a lint-free microfiber cloth—no cleaning sprays or chemical wipes.
- Ensure the room has indirect lighting (avoid sunlight or halogen lamps that emit heat).
- Wash your hands thoroughly or wear nitrile or white cotton gloves to avoid leaving fingerprints or skin oils on prints. This is standard practice in photo conservation, supported by archival institutions like the Library of Congress.
If the photo binder has a tight or brittle spine, don’t force it flat—you may damage the pages or binding.
2. Remove Photos Only If It’s Safe
Many binders use photo corners, sticky pages, or sleeves. Here’s how to approach removal:
- For sleeved photos, gently slide from one corner—supporting the photo as it exits.
- If any photos appear stuck, curled, or flaking, leave them untouched and consult a professional like eRecordsUSA. Pulling can damage emulsion layers or leave irreversible cracks.
- Use a manual air blower (like those used for camera lenses) to gently remove dust. Never use canned air, brushes, or cloths on fragile prints.
3. Sort, Group & Label Photos Intelligently
Creating a clear system before scanning helps preserve context and simplifies digital organization later:
- Sort photos by event, year, family side, or location (e.g., “Dad’s 1960s military photos”).
- For handwritten notes, use soft graphite pencils (HB–2B) on the back border of prints—not markers or pens, which may bleed or etch through.
- Use archival-grade folders or sleeves (acid-free, PAT-tested) to separate fragile or loose photos.
- Draft a basic photo inventory or index listing names, page numbers, or descriptions. This helps match physical photos to digital file names later in the process.
4. Monitor Storage & Environmental Conditions
Before scanning, stabilize and check where the photo binder is stored:
- Ideal temperature: 65–70°F (18–21°C); humidity: 30–50%—too much moisture can cause photos to stick or mold.
- Avoid basements, garages, and attics where heat, humidity, and pests are common.
- Replace any plastic photo pockets made from PVC with polypropylene, polyester (Mylar), or polyethylene sleeves—look for products labeled “photo-safe” or “archival.”
- Remove or avoid using rubber bands, paper clips, and tape, as they degrade over time and may stain or tear images.
Now that your binder is prepped with professional-level care, you’re ready for the scanning phase. In the next section, we’ll cover:
How eRecordsUSA Digitizes Binder Photos with Archival Precision?
Digitizing a binder of family photos isn’t just a task — it’s a preservation effort. At eRecordsUSA, we follow a carefully engineered scanning workflow designed for archival quality, accuracy, and longevity. Every step is optimized to respect the fragility of your originals while delivering results that stand the test of time.
Professional Scanning Workflow Includes:
- Non-Destructive Image Capture – We use high-resolution flatbed and planetary scanners that eliminate contact pressure and avoid roller feeds — crucial for delicate, binder-mounted or glossy prints.
- Archival-Grade Settings for Long-Term Quality – Every image is scanned at 600 DPI resolution in 24-bit color or 8-bit grayscale, depending on the original. We deliver both TIFF files for long-term archiving and high-quality JPEGs for easy sharing.
- Gentle Handling Protocols – Our technicians use anti-static gloves, padded supports, and climate-controlled conditions to ensure every photo is scanned safely — whether loose or still mounted.
- Post-Scan Enhancements – Without over-editing, we apply subtle adjustments like cropping, color correction, scratch/dust removal, and tonal balancing. This maintains the photo’s character while improving clarity.
- Organized, Searchable Output – We structure files based on your album chronology or event history, naming them with logic like LopezFamily_1988_Graduation_01.jpg. Optional metadata embedding ensures your memories remain discoverable by future generations.
How Are Digital Photo Files Named and Organized?
Digitization isn’t complete without a system to keep your images accessible and meaningful — now and years from now. That’s why we go beyond scanning by offering smart file organization that mirrors how your memories were stored.
Here’s how we keep your collection searchable and structured:
- Custom File Naming – Based on year, family name, or event.
Example: “LopezFamily_1988_Graduation_01.jpg” - Organized Folder Hierarchy – Sorted by decade, theme, or original album title.
- Optional Metadata Tagging – Includes embedded tags like names, dates, or locations for future searchability and context.
The goal? When you look through your digital files, it should feel just like flipping through a well-organized photo album — only faster and safer.
Why Just Scanning Isn’t Enough: The Importance of Safe Digital Preservation
Think scanning your old photos once means they’re safe forever? Unfortunately, digital files come with their own risks:
- Hard drives crash.
- Cloud accounts expire.
- File types go obsolete (think CD-ROMs or flash drives).
Without thoughtful digital preservation, your newly digitized memories could still be lost.
How eRecordsUSA Preserves Your Memories with Confidence?
At eRecordsUSA, our job doesn’t stop at scanning. We take a preservation-first approach that ensures your images are protected for decades to come:
Here’s how we deliver confidence with every project:
- Archival Formats: TIFF files for durability, JPEGs for everyday use.
- Reliable Storage: Delivered via enterprise-grade USB drives or SSDs, tested for long-term resilience.
- Searchable Digital Archives: With clean file names, nested folders, and optional metadata to help future generations know who’s in each photo — and when it was taken.
Whether you’re a parent preserving childhood milestones or a genealogist safeguarding a family’s visual legacy, your photos deserve more than just a quick scan — they deserve lasting protection.
Ready to Preserve Generations of Family History?
Call us at 510.900.8800 or email [email protected] to get a free quote for professional photo scanning services.
We’ll turn your binder of fading prints into a searchable, shareable digital archive — one that lasts well beyond your lifetime.

