How to Make PDFs Searchable with OCR: A Step-by-Step Guide
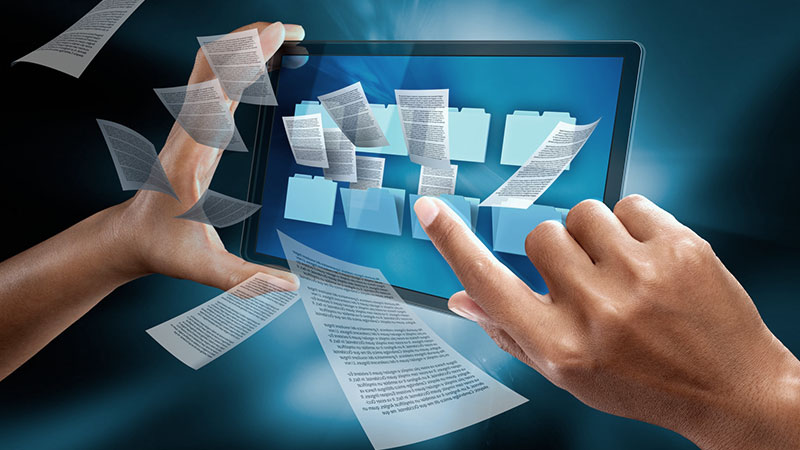
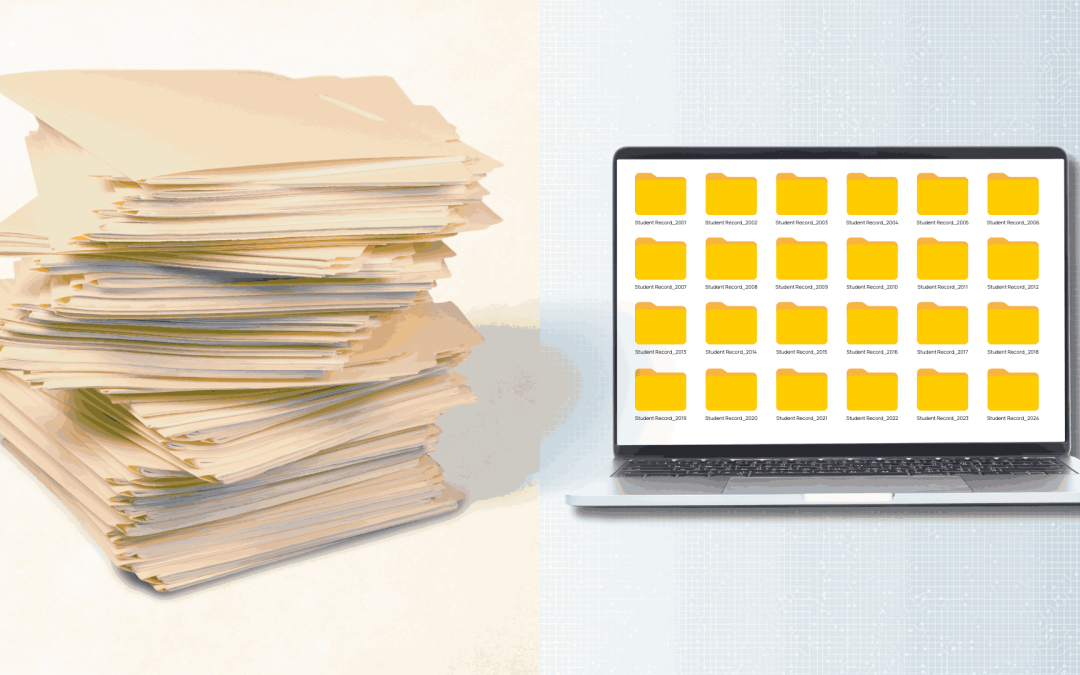
Have you ever searched for a word inside a scanned PDF and found nothing? That’s because many PDFs, especially those generated from scanned documents, are essentially image files. They contain visual representations of text but no actual characters that can be searched, copied, or indexed.
This limitation affects everything from basic keyword lookup to document retrieval, making the file nearly invisible to search engines and inaccessible for users relying on digital tools.
This is where Optical Character Recognition (OCR) comes in. OCR is the technology that converts image-based content into searchable text, enabling full-text search, copy-paste functionality, and screen-reader compatibility.
Tools like Adobe Acrobat, Google Drive OCR, and Tesseract make it possible to transform scanned documents into searchable PDFs, enhancing usability and accessibility.
Did you know that the global Optical Character Recognition (OCR) market was valued at $13.95 billion in 2024 and is projected to reach $46.09 billion by 2033, growing at a 13.06% CAGR?
If you’re looking for a hassle-free way to make PDFs searchable, eRecordsUSA offers professional document scanning and OCR services that convert your static PDFs into intelligent, searchable files.
Whether you’re dealing with legal files, medical records, or large-scale archives, our solutions ensure accuracy, security, and compliance. With advanced OCR processing and high-resolution scanning, eRecordsUSA helps businesses unlock the full potential of their documents with precision and speed.
In this step-by-step guide, you’ll learn how to make your scanned PDFs searchable using professional services, software tools, and mobile applications – all tailored to improve document management and digital accessibility.
Ready to get started? Let’s walk through the exact steps to make your PDFs searchable using today’s best tools and methods.
Step-by-Step Guide to Making PDFs Searchable
This guide will walk you through multiple methods of converting a scanned or image-based PDF into a searchable PDF.
Method 1: Using Adobe Acrobat Pro DC (Recommended)
Adobe Acrobat Pro DC remains one of the most robust and reliable tools to make PDFs searchable. Here’s how you can do it:
Open your scanned PDF in Adobe Acrobat Pro DC.
Navigate to Tools and select Enhance Scans.
Click on Recognize Text and choose In This File.
Set your document’s language and adjust recognition settings.
Under output options, select Searchable Image (Exact) to preserve the layout.
Click Recognize Text, then save the newly searchable PDF.
Acrobat’s OCR engine ensures high accuracy and maintains formatting, making it ideal for business-critical documents. It also supports batch OCR, advanced language detection, and high compatibility across all major web browsers.
Method 2: Google Drive OCR (Free and Cloud-Based)
Google Drive includes a built-in OCR feature when opening PDFs with Google Docs.
Upload your scanned PDF to Google Drive.
Right-click the file and select Open with → Google Docs.
The system automatically applies OCR.
Go to File → Download → PDF Document (.pdf) to save your searchable PDF.
While this method is free and convenient, formatting may be affected, especially with complex layouts.
Method 3: Tesseract OCR (For Developers and Power Users)
Tesseractis an open-source OCR engine ideal for those comfortable with command-line tools.
Install Tesseract OCR on your machine.
Use a terminal or script to execute: tesseract input.tif output pdf
The result will be a searchable PDF file containing recognized text.
Tesseract supports over 100 languages and is highly customizable but requires technical knowledge to operate effectively.
Method 4: Online OCR Tools (Fast and Accessible)
If you’re looking for a quick solution without installation, tools like Smallpdf, PDF2Go, and iLovePDFoffer cloud-based OCR processing.
Visit the OCR tool’s website.
Upload your PDF file.
Select the output format (e.g., searchable PDF) and language.
Start the OCR process and download your file.
These tools are convenient, but always verify their data security policies before uploading sensitive documents.
Method 5: Mobile OCR Apps (Perfect for Scanning on the Go)
OCR is either applied automatically or can be triggered manually.
Save/export the file as a searchable PDF.
These apps are ideal for quick digitization needs, especially when traveling or working remotely.
Want the accuracy of Adobe with the convenience of cloud-based tools?
eRecordsUSA offers professional OCR services to make PDFs searchable with the highest fidelity. We handle everything from large document batches to sensitive compliance-driven archives, ensuring your files are secure, accessible, and easy to manage.
Now that you’ve seen how to make PDFs searchable using different tools, you might be wondering what exactly is happening behind the scenes.
How OCR Works (Quick Look)
Earlier, we mentioned that Optical Character Recognition (OCR) is the technology that transforms scanned PDFs into searchable documents. If you’re curious about how that transformation actually happens beyond just clicking “Recognize Text.”
Here’s a quick overview.
OCR tools follow a structured process that includes image cleanup, text detection, and embedding a hidden searchable layer into your PDF.
This process allows functions like Ctrl+F, copy-paste, and screen-reader accessibility to work seamlessly on previously static documents.
Now that you understand what happens behind the scenes, let’s explore why making PDFs searchable with OCR is more than just a convenience—it’s a powerful upgrade for productivity and accessibility.
Why Make Your PDFs Searchable?
Converting scanned files into searchable PDFs isn’t just a tech upgrade; it’s a strategic move that enhances efficiency, accessibility, and compliance.
Here’s why it matters:
1. Instantly Find What You Need
Using Ctrl+F (or Cmd+F) in a searchable PDF saves you from scrolling through pages. Whether you’re scanning legal contracts, tax forms, or technical manuals, finding exact keywords in seconds is a game-changer.
2. Make Documents Accessible to Everyone
Accessibility is a growing priority, especially in regulated industries. OCR enables screen readers to detect and read text aloud, making documents usable for individuals with visual impairments or cognitive disabilities.
3. Improve Document Organization and Management
With text-based indexing, searchable documents can be sorted, categorized, and retrieved by keyword or content tags. This streamlines workflows across legal, medical, financial, and academic sectors.
4. Enable Smart Collaboration
When multiple users can search, copy, and reference exact text in a PDF, team collaboration improves dramatically. This is especially useful for contract negotiations, research, and compliance reviews.
5. Stay Compliant and Audit-Ready
Searchable documents are easier to verify and extract during audits or legal proceedings. They meet modern standards for digital document management and record retention policies.
At eRecordsUSA, we help businesses transform their unsearchable PDFs into fully optimized, secure, and accessible documents using advanced OCR solutions. Whether you’re managing a small archive or digitizing thousands of records, our service ensures that your files are ready for search, compliance, and future-proof digital storage.
Now that we’ve covered why searchable PDFs matter, let’s go over how to prepare your documents so the OCR process delivers the best possible results.
How to Prepare PDFs for Accurate Optical Character Recognition?
Even the best OCR software relies on one key factor i.e., input quality. A poorly scanned document can lead to missed characters, jumbled words, or unusable outputs. That’s why taking a few moments to properly prepare your PDFs can significantly enhance OCR accuracy.
1. Use High-Resolution Scans
For best results, scan your documents at 300 DPI (dots per inch) or higher. Low-resolution scans may blur text, making it harder for the OCR engine to distinguish letters and numbers.
2. Maximize Clarity and Contrast
Ensure that the background and text contrast well. Dark text on a light background works best. Avoid shadows, glare, or skewed pages, especially if capturing images with a smartphone or mobile scanner app.
3. Choose the Right File Format
PDF is the most commonly supported format for OCR tools, especially when maintaining layout is important. However, high-quality TIFF or JPEG files can also be used as source material for OCR conversion.
4. Set the Correct Language
Most OCR tools support multi-language recognition, but accuracy improves when you explicitly select the language of your document. This is especially important for accents, special characters, and non-English alphabets.
5. Eliminate Visual Distractions
Remove handwritten notes, stamps, or overlapping graphics from the page. If the document includes tables or multi-column formats, ensure they’re cleanly scanned and aligned to improve layout analysis during processing.
Need professional help optimizing large volumes of files for OCR? eRecordsUSA offers end-to-end solutions from high-resolution document scanning to OCR processing, ensuring that your searchable PDFs are accurate, compliant, and ready for digital use.
Now that your documents are properly prepared, let’s compare the best OCR tools available so you can choose the method that fits your needs and budget.
Comparing OCR Tools: Features and Use Cases
With so many OCR tools available, it’s important to select one that fits your specific document volume, accuracy needs, budget, and technical skill level.
Below is a comparison of the most popular and effective tools for making PDFs searchable.
Strengths: Auto-capture, OCR applied during scan, export as searchable PDF
Limitations: Best for single-page or light-use documents
Comparison Snapshot
Tool
Accuracy
Batch OCR
Platform
Ease of Use
Security
Adobe Acrobat
⭐⭐⭐⭐⭐
✅
All
Easy
High
ABBYY FineReader
⭐⭐⭐⭐
✅
Win/Mac
Moderate
High
Tesseract
⭐⭐⭐
✅
Cross
Advanced
Varies
Smallpdf / PDF2Go
⭐⭐
❌
Web
Easy
Medium
Adobe Scan
⭐⭐⭐
❌
Mobile
Very Easy
High
Not sure which tool to choose? At eRecordsUSA, we match your document type, volume, and industry standards with the right OCR platform, ensuring accuracy, compliance, and cost-effectiveness at every step.
Where Searchable PDFs Make the Biggest Impact
Whether you’re in healthcare, finance, education, or government, searchable PDFs are transforming the way industries manage and retrieve information. These OCR-backed document workflows enhance speed, compliance, and collaboration.
At eRecordsUSA, we specialize in delivering industry-ready, searchable PDF solutions that meet the demands of real-world use cases securely and at scale.
Conclusion: Transform the Way You Work with Searchable PDFs
Making your PDFs searchable with OCR technology isn’t just convenient; it’s essential for faster access, better compliance, and smarter document management. Whether you’re using Adobe Acrobat, Google Drive, or a professional OCR service, converting scanned documents into searchable PDFs unlocks their true potential.
Ready to Get Started?
Let eRecordsUSA take care of it for you.
We specialize in secure, high-accuracy OCR conversion for legal, healthcare, government, and corporate archives.
👉 Contact us today to convert your PDFs into fully searchable, compliant, and accessible digital assets.
Do you have stacks of handwritten notes that you can’t search, edit, or share easily? Whether you’re a student, a business professional, or someone who likes taking notes by hand, it can be frustrating to find something quickly or reuse your notes in a digital format when needed.
With the help of OCR (Optical Character Recognition), you can now turn your handwritten notes into editable digital text. This technology reads your handwriting from a scanned image or photo and converts it into computer-readable text.
Tools like Adobe Scan and Adobe Acrobat make this process simple. They let you scan notes using your phone or upload a file on your computer to get a clean, editable version of your writing in PDF format. If you have bulk documents with sensitive or important information, eRecordsUSA can handle the work. We use advanced OCR systems to convert handwritten pages into accurate digital files while keeping everything secure and organized.
In this guide, you’ll learn why converting handwritten notes is helpful, what tools work best, how to do it step by step, and how to get the best results. So, without further ado, let’s start!!!
Why Digitize Your Handwritten Notes?
There are several reasons why turning your handwritten notes into digital text is a smart move.
First, it makes your notes searchable. Instead of flipping through pages, you can type a word and instantly find what you need. That alone saves time, especially if you’re dealing with a lot of material.
Digitized notes are also editable. If you need to add more information, correct something, or reuse a section in a document, it’s much easier when your notes are in a digital format.
Most OCR tools let you save the results as a PDF or Word file so you can keep everything organized and easy to update.
Sharing your notes becomes simple too. Whether you’re sending them to a classmate, or a coworker, or saving them to the cloud, digital files are more flexible and professional. You can also back them up easily, so you don’t lose important information if the original paper gets damaged or lost.
Finally, going digital fits well with how most people work today. From syncing notes with project management tools to storing them in cloud folders, digital files help you stay efficient.
And if you’re handling sensitive content like legal or medical documents, eRecordsUSA ensures everything is handled with care and kept private. Next, let’s take a closer look at how OCR works and why it’s so useful for recognizing handwriting.
How Does OCR Work for Converting Handwritten Notes into Editable Text?
OCR stands for Optical Character Recognition. It’s a technology that helps your device read text from photos or scanned documents. For example, if you take a picture of a handwritten note, OCR software can turn that image into digital text that you can edit and search.
Can OCR read handwriting too?
Yes, modern OCR tools can now recognize handwritten text, not just printed letters. This is useful if you take notes by hand and want to make them digital. Software like Adobe Acrobat uses smart technology to understand different writing styles. If your handwriting is clear, the results are often very accurate.
Why is OCR useful for handwritten notes?
OCR makes your handwritten notes easier to use. It turns them into a machine-readable format, so you can copy, paste, and search through your text. You can also save the results as an editable PDF, which works well for school, work, or personal use.
What if I have a lot of handwritten pages to convert?
If you need to scan and convert a large number of handwritten documents, or if your notes are important or private, it’s better to use a professional OCR service. eRecordsUSA offers secure and accurate OCR conversion. We serve renowned businesses, schools, universities, public libraries, museums, and anyone who wants high-quality results.
Now that we know what OCR is and why it matters, let’s look at the best tools to convert handwritten notes into editable text.
What are the Best Tools to Convert Handwritten Notes into Editable Text?
There are plenty of tools that can help you turn handwritten notes into digital text, whether you’re using a phone, a computer, or an online service. Some apps are free and quick for everyday tasks, while others are more advanced and better suited for large jobs or high accuracy.
1. Adobe Scan (Mobile App)
What it does: Adobe Scan is a free OCR scanner app that lets you use your phone’s camera to capture notes. It automatically detects handwritten content and saves it as a PDF.
Why use it: It’s fast, easy, and works well on Android and iPhone. You can scan, convert, and share notes in just a few taps.
2. Adobe Acrobat (Desktop and Mobile)
What it does: Adobe Acrobat has built-in OCR features that can convert scanned handwritten notes into editable PDF files. It also includes the Edit PDF tool, which lets you fix or add content after conversion.
Why use it: It’s a powerful choice if you need more control over formatting or want professional-quality results.
3. Apple Notes App (iPhone and iPad)
What it does: The built-in Notes app on iPhones and iPads can detect handwritten text using the Live Text feature.
Why use it: It’s quick, and since it’s already on your device, there’s nothing extra to download.
4. Pen to Print (Handwriting OCR App)
What it does: This app is designed to read cursive and messy handwriting. It extracts text from scanned notes and allows you to edit or export it.
Why use it: It’s a good option if your handwriting isn’t neat or if other apps aren’t giving accurate results.
5. Google Drive + Google Docs
What it does: Upload an image of your handwritten notes to Google Drive, then open it with Google Docs. OCR runs automatically, and you get the text below the image.
Why use it: It’s free, cloud-based, and integrates with other Google tools.
6. Wondershare PDFelement
What it does: Desktop software with strong OCR capabilities. It supports batch scanning, high-resolution images, and accurate handwriting recognition.
Why use it: Ideal for office use or when you need clean and precise conversions.
7. eRecordsUSA (Professional OCR Services)
What it does: Offers secure and accurate OCR services for large or sensitive document projects.
Why use it: If you have hundreds of pages, handwritten forms, or business records, eRecordsUSA takes care of scanning, converting, and organizing everything for you.
These tools give you the flexibility to choose what works best for your device, the volume of notes, and how accurate you need the conversion to be. Next, we’ll walk through the step-by-step process of converting handwritten notes into editable text using some of these tools.
How Do You Convert Handwritten Notes into Editable Text?
Now that you know which tools to use, let’s go through the actual process. These steps work whether using a mobile app like Adobe Scan or a desktop program like Adobe Acrobat.
Option 1: Using Adobe Scan on Your Phone
Step 1: Open Adobe Scan and select “Document” mode.
Step 2: Use your phone camera to scan the handwritten page. Try to hold your phone steady and make sure there’s good lighting.
Step 3: The app will automatically crop and enhance the image.
Step 4: Save the file as a PDF.
Step 5: You can then open it in Adobe Acrobat to apply OCR and make it editable. Use the Edit PDF tool if you want to fix or format the text.
Option 2: Using Google Drive and Google Docs
Step 1: Take a clear photo or scan of your handwritten notes.
Step 2: Upload the file to Google Drive.
Step 3: Right-click the file and choose “Open with Google Docs.”
Step 4: Google will run OCR automatically. The text will appear below the image.
Step 5: Edit and format the text as needed.
Option 3: Letting Professionals Handle It (eRecordsUSA)
If you’re working with a stack of notebooks, forms, or sensitive documents, it’s worth using a professional service like eRecordsUSA.
Step 1: Contact eRecordsUSA through their website.
Step 2: Send them your handwritten documents securely.
Step 3: They scan and convert the files using high-accuracy OCR tools.
Step 4: You receive cleaned, editable PDFs ready for use.
Whether you prefer to do it yourself or get expert help, these methods cover both ends of the spectrum. Next, let’s talk about how to get the best possible accuracy from OCR when working with handwriting
What Are the Best Tips to Improve OCR Accuracy for Handwritten Notes?
If you want the most accurate results when converting handwritten notes into digital text, it helps to follow a few best practices. These simple tips can make a big difference in how well your OCR tool reads and understands your handwriting.
Write Neatly and Use Print Instead of Cursive – OCR software struggles more with cursive or sloppy handwriting. Try to write in clear, block letters with even spacing. The more consistent your letter shapes are, the easier it is for the software to recognize them.
Scan in Good Lighting – Make sure there’s enough light when you’re taking a photo or scanning your notes. Avoid shadows or glare on the paper. Natural daylight or a bright desk lamp usually works best.
Use High-Quality Images – A blurry or low-resolution photo will lead to more mistakes in the OCR output. Use a high-resolution camera, or a scanner if you have one, to get a clean, sharp image. Most OCR scanner apps like Adobe Scan include automatic enhancements, but starting with a good image helps.
Use Dark Ink on Light Paper – Black or dark blue ink on white paper gives the best contrast. Avoid writing with pencil, light-colored pens, or on colored paper, as this can confuse the OCR tool.
Keep the Page Flat – If you’re taking a picture of a notebook or journal, make sure the page lies as flat as possible. Wrinkles, curves, or folds can distort the letters and lower accuracy.
Choose the Right OCR Tool – Some apps are better than others at reading handwriting. Tools like Adobe Acrobat or Pen to Print are built to handle handwritten text. If you’re working with bulk documents or need a higher level of accuracy, using a professional service like eRecordsUSA is a smart option.
Following these tips will give you better results and reduce the amount of editing needed after the conversion.
What Should You Do After Converting Handwritten Notes to Text?
Once your handwritten notes have been turned into digital text, your job isn’t quite done yet. Now it’s time to clean things up and organize them, so your notes are easy to find and use in the future.
Review and Edit the Text – Even the best OCR tools can make small mistakes, especially with handwriting. Read through the converted text to fix spelling errors, strange characters, or missed words. If you used Adobe Acrobat, the Edit PDF tool makes it easy to click and fix anything directly in the file.
Format for Readability – Break up long blocks of text with headings, bullet points, or bold labels. This makes your notes easier to scan and reference later.
You can do this in Word, Google Docs, or even in the Notes app on your phone.
Save in the Right Format – PDF is a popular choice because it looks the same on any device and is hard to accidentally change. You can also save in Word or plain text format if you plan to copy and paste the content elsewhere.
Organize Your Notes Digitally – Create folders for different subjects, dates, or projects. If you’re using a note-taking app like Evernote, OneNote, or Apple Notes, use tags and notebooks to group related content together.
Backup Your Files – Don’t risk losing your work. Save your digital notes to a cloud storage service like Google Drive, Dropbox, or OneDrive. That way, you can access them from any device, anytime.
Consider Long-Term Storage Solutions – If you’re working with business records, academic material, or legal forms, professional OCR services like eRecordsUSA don’t just convert your notes—they also help with organizing, naming, and securely storing them for future access.
We make it easy to keep everything searchable, backed up, and easy to retrieve when you need it. It’s a smart choice for anyone who values accuracy, privacy, and long-term document management.
Conclusion
Converting handwritten notes into editable text is easier than ever. Whether you’re using mobile apps like Adobe Scan, desktop tools like Adobe Acrobat, or relying on built-in features on your iPhone, OCR technology can help you save time, stay organized, and work more efficiently. From quick edits to full digital archives, the right tool or service makes all the difference.
If you’re looking for a simple, secure, and professional way to convert large volumes of handwritten documents, eRecordsUSA offers trusted OCR solutions tailored to your needs.
Ready to go digital with your handwritten notes? Contact eRecordsUSA today and let the experts handle the conversion for you accurately, securely, and hassle-free.
Have you ever needed to copy text from a scanned document or extract details from an image-based PDF, but didn’t know how?
That’s where Optical Character Recognition (OCR) steps in – A transformative text recognition technology that converts printed or handwritten content from formats like scanned documents, invoices, or legal contracts into machine-readable text. In 2025, OCR will play an even more central role in automating data workflows, enabling searchable PDFs, and making content accessible for blind and visually impaired users through tools like synthesizers.
Driven by continuous advancements in Artificial Intelligence (AI) and Machine Learning (ML), today’s OCR tools, such as Adobe Acrobat and Abbyy, go far beyond basic text detection. They perform sophisticated image analysis, feature extraction, and post-processing to maximize accuracy and accessibility.
If you’re asking, “What is OCR and how can it benefit my organization?” services from eRecordsUSA provide real-world answers, offering enterprise-level OCR, content extraction, and secure document digitization for publishers, healthcare, legal, and business use cases.
Did you know that the AI-based OCR market is estimated to reach $11.369 billion by 2025 and grow at a CAGR of 15.59% to $23.456 billion by 2030?
This 2025 guide unpacks how OCR works, its powerful benefits, real-world applications, and where it’s heading next.
What is Optical Character Recognition (OCR)?
OCR—short for Optical Character Recognition—is the technology that lets computers understand printed or handwritten text from images, paper documents, or PDF files. It turns that content into machine-readable text, which you can search, edit, or automate in digital workflows.
How is OCR different from just scanning?
When you scan something, you get a picture of the page. But OCR goes further. It analyzes the scanned document, finds each letter or number, and uses AI and Machine Learning to figure out what the text says. It doesn’t just capture how the page looks—it understands what’s written on it.
Where is OCR used?
Today, OCR shows up in all kinds of tools. For example,
Adobe Acrobat uses it to make scanned PDFs searchable.
Businesses use it to extract data from invoices or contracts.
And for people who are blind or visually impaired, OCR works with synthesizers to read printed text out loud.
Why does OCR matter in 2025?
In a world driven by automation, OCR is essential. It’s how companies unlock data stuck in paper documents. It helps create paperless workflows and opens access to information—faster, smarter, and at scale. Now that we’ve defined what OCR is and why it’s critical in today’s digital landscape, let’s break down how it actually functions behind the scenes.
How OCR Works: Step-by-Step Breakdown
Understanding the inner mechanics of OCR—from capturing an image to generating editable, searchable text—reveals just how advanced and powerful this technology has become.
Let’s explore the complete process in detail:
How does OCR turn a scanned image into searchable text?
The process starts with a document—maybe a contract, a receipt, or a photo of a printed form. OCR systems follow a structured workflow to convert the image into machine-readable text.
1. Image Acquisition
The first step is capturing the document. This could be done with a scanner, smartphone camera, or fax input. The source might be a printed invoice, a legal document, or a multi-page PDF.
2. Pre-analyzation (Preprocessing)
Before the system can read anything, it needs to clean up the image:
Deskewing: Straightening crooked scans
Binarization: Turning colored or grayscale images into black-and-white for contrast
Noise Reduction: Removing specks, dust, and visual distractions
Layout Analysis: Detecting columns, headings, or tables to understand document structure
3. Feature Extraction and Character Recognition
Next, OCR identifies each character using pattern recognition algorithms and AI-ML models:
Segmentation splits the page into text lines, words, and individual letters.
Feature Extraction identifies shapes, angles, and curves unique to each character.
Classification compares those features to known characters in a database.
4. Post-processing
Once the text is recognized, OCR improves accuracy:
Contextual Spell Check: Uses dictionaries and grammar models to correct mistakes
Formatting: Reconstructs the original layout (e.g., line breaks, columns) in digital form
Output: Generates machine-readable formats such as searchable PDFs, plain text, or editable Word files
With a solid understanding of how OCR works at a technical level, it’s time to explore how the technology is rapidly advancing.
What Are the Most Advanced OCR Technologies in 2025?
In 2025, OCR will no longer be limited to basic character detection. Modern systems are infused with Artificial Intelligence (AI) and Machine Learning (ML), allowing them to interpret context, improve continuously, and operate in highly dynamic environments.
1. AI-Enhanced Accuracy
Traditional OCR relied on fixed pattern libraries. Today’s systems use deep learning models trained on vast datasets – including diverse fonts, languages, and handwritten samples—to recognize text with much higher precision. These models adapt over time by analyzing user corrections, detecting layout nuances, and improving feature extraction logic.
2. Multilingual and Handwriting Recognition
Global business demands multilingual processing. Modern OCR can accurately interpret dozens of languages, dialects, and stylized handwriting. This is especially important in sectors like healthcare, law, and logistics, where documentation often includes a mix of printed and handwritten inputs.
3. Synthetic Data Training
OCR accuracy depends on data diversity. Since real-world data is often limited or biased, developers now create synthetic training datasets to simulate edge cases such as distorted text, poor lighting, or rare character sets, ensuring robust recognition across unpredictable input types.
4. Context-Aware Recognition
Advanced OCR doesn’t just “read”—it understands. By using contextual prediction models, systems evaluate word relationships, detect formatting patterns (like tables and headers), and make intelligent corrections. This improves outcomes in complex documents such as contracts, invoices, or technical manuals.
5. Embedded Intelligence in Smart Tools
OCR is now built into tools like Adobe Acrobat, PDF editors, voice assistants, RPA platforms, and cloud APIs, allowing for seamless integration across industries. Whether extracting data from an image-based PDF or enabling real-time search in large document repositories, today’s OCR is faster, smarter, and more versatile than ever. Now that we’ve explored the cutting-edge advancements driving OCR in 2025, the next logical question is – where are all of these technologies being used? From finance to healthcare and even accessibility tools, OCR’s versatility is what makes it such a powerful force across industries.
Where Is OCR Used? Real-World Applications Across Industries
Where It’s Used
What OCR Helps With
Real-Life Tools or Features
Finance & Accounting
– Pulls numbers and text from bills, receipts, and tax documents
– Speeds up bookkeeping and saves time
– Helps with audits
QuickBooks OCR, Searchable PDFs, and automated data entry tools
Healthcare
– Turns patient records and forms into searchable digital files
– Makes it easier to share medical data
– Keeps documents secure
Medical scanning, HIPAA-friendly OCR, text readers
Law Offices & Courts
– Makes legal files and contracts easy to search
– Speeds up reviewing documents for cases
– Keeps legal archives organized
Digital case files, contract scanning
Retail & Shipping
– Reads barcodes, shipping labels, and receipts
– Keeps track of inventory and deliveries
– Reduces mistakes from manual typing
Barcode readers, shipping OCR tools, warehouse scanning systems
Schools & Universities
– Converts printed textbooks and handwritten documents to digital
– Makes class materials searchable
– Helps students with learning support
ICR software, PDF scanners, screen reader–friendly formats
Accessibility Tools
– Helps visually impaired people read printed text aloud
– Works with voice assistants and Braille displays
– Increases independence
Screen readers, text-to-speech apps, and Braille OCR converters
Looking for a reliable partner to help digitize and OCR your documents?
eRecordsUSA offers HIPAA & CJIS compliant, court-ready OCR scanning services for healthcare providers, legal firms, and enterprises, turning physical paperwork into secure, searchable digital assets. As you can see, OCR is being used across nearly every major industry—but what makes it such a valuable tool in the first place?
The real power of OCR lies in the benefits it delivers: speed, accuracy, accessibility, and significant cost savings. Let’s break down why more businesses are integrating OCR into their digital workflows.
What are the real advantages of using OCR technology today?
In 2025, OCR has moved beyond convenience—it’s become a critical driver of digital transformation, helping organizations streamline operations, improve data access, and support more inclusive experiences.
1. Saves Time and Boosts Productivity
OCR automates data entry, eliminating repetitive manual work.
Employees can find and use documents faster thanks to searchable text, and structured formats.
2. Reduces Costs
Cuts down on paper use, storage space, and printing.
Minimizes labor costs tied to filing, searching, and transcribing documents.
3. Improves Accuracy
Reduces human error in form processing, contracts, and invoices.
Advanced AI-ML models detect and correct mistakes automatically.
4. Enhances Accessibility
Helps visually impaired users by converting printed content into audio or digital Braille formats.
Supports synthesizers and screen readers for a more inclusive environment.
5. Supports Compliance and Security
Helps organizations meet data protection standards like HIPAA and GDPR by securing digital records.
Enables proper audit trails and controlled access to sensitive documents.
6. Powers, Automatio,n and Scalability
Integrates seamlessly with workflow automation, RPA, and cloud-based document systems.
Easily scales across departments, handling large volumes of documents efficiently.
Now that you understand how OCR delivers measurable value, the next step is choosing the right tool for your specific needs. With so many OCR solutions available—from open-source libraries to enterprise-grade platforms—it’s important to know what features and factors truly matter.
How Do You Choose the Right OCR Tool?
Not all OCR tools are created equal. Your ideal solution depends on the types of documents you handle, the volume you process, and how the tool fits into your existing workflow.
1. Accuracy and Language Support
Look for tools with high recognition rates, especially if you deal with handwritten text, non-standard fonts, or multilingual documents.
Choose OCR engines with AI and machine learning for better adaptability.
2. Document Type Compatibility
Some tools are optimized for invoices, contracts, or forms. Others are better for image-heavy PDFs or scanned books.
Ensure the tool supports structured, semi-structured, and unstructured documents.
3. Integration with Existing Systems
Can it connect to your cloud storage, RPA platform, or document management system?
Tools like Adobe Acrobat and eRecordsUSA’s enterprise solutions often offer robust integration options.
4. Security and Compliance
For sensitive data (healthcare, legal, finance), ensure the solution meets HIPAA, GDPR, or SOX standards.
Look for access control, encryption, and audit logging features.
5. Scalability and Performance
Can the tool handle bulk document processing?
Does it offer real-time OCR for mobile or cloud-based use?
For high-volume projects, digitization service providers like eRecordsUSA offer end-to-end bulk scanning and OCR services – ideal for organizations with thousands of paper records to digitize efficiently.
6. Usability and Cost
Is the interface user-friendly?
Compare one-time licenses vs. subscription plans, and evaluate long-term ROI.
As OCR continues to evolve, it’s not just improving – it’s transforming. From smarter AI models to real-time mobile recognition and even integration with augmented reality, the future of OCR is full of innovation that will reshape how we interact with physical and digital content alike.
What’s Next for OCR? A Look at the Future of Text Recognition
While OCR has already transformed document digitization, the future lies in how it blends with emerging technologies, creating smarter, more adaptive systems that go far beyond simply recognizing text.
1. Context-Aware Intelligence
Future OCR systems will understand document structure, semantics, and intent, not just words.
Powered by deep learning, OCR will detect meaning across tables, forms, and complex layouts -enabling use cases like automated legal reviews or contextual contract extraction.
2. Augmented Reality (AR) Integration
OCR and AR will work together to overlay translations, digital instructions, or product details onto real-world objects.
Picture scanning a shipping label with smart glasses and instantly seeing inventory status or route info—this is the direction OCR is heading.
3. Multilingual and Script-Agnostic Recognition
Upcoming OCR engines will natively support mixed-language documents, rare scripts, and stylized writing.
This is critical for industries like global trade, government, and education, where diverse document types are the norm.
4. Smarter Automation with RPA and AI
OCR will serve as the eyes of intelligent automation, automatically reading forms, flagging anomalies, or triggering decisions in RPA workflows.
Instead of just digitizing text, it will actively contribute to task execution, compliance checks, or real-time data analysis.
5. Expanded Use in Edge Devices and Wearables
While mobile OCR already exists, future deployments prioritize low-latency, real-time processing on edge devices like smart scanners, kiosks, and wearables.
These tools will enable instant access to printed data without an internet connection.
Conclusion: OCR Is More Than Just Text Recognition
In 2025, Optical Character Recognition has become much more than a tool for digitizing documents—it’s now a core technology powering automation, accessibility, and AI-driven decision-making across industries.
From legal contracts and invoices to healthcare records and educational materials, OCR is helping organizations unlock the full value of printed information. With advancements in real-time processing, AR integration, and context-aware recognition, the future of OCR lies in intelligent systems that not only read—but understand, act, and adapt. If you’re looking to bring your business into the digital age, investing in a reliable OCR solution—or partnering with experts like eRecordsUSA—could be the first and smartest step toward smarter, paperless operations.
FAQs About OCR
Is OCR 100% accurate?
Not always. OCR accuracy depends on factors like image quality, font type, and the tool being used. Advanced tools with AI and ML offer higher accuracy, especially for complex documents.
Can OCR read handwriting?
Yes, with Intelligent Character Recognition (ICR). While it’s not perfect, modern ICR systems can handle many types of handwritten text, especially when trained with custom data.
Is OCR safe for sensitive documents?
Yes—if you use secure, compliant OCR solutions. Tools like eRecordsUSA ensure privacy through encryption, controlled access, and compliance with HIPAA, GDPR, and more.
Can I use OCR on my smartphone?
Absolutely. Many apps now support mobile OCR for scanning receipts, business cards, or printed text using your phone’s camera—with some offering real-time recognition and cloud integration.
How does OCR work in PDF documents?
OCR software converts scanned PDFs into searchable, machine-readable text using pattern recognition and AI. It detects printed or handwritten text layers, enabling indexing, editing, and text selection within the PDF format.
What are common OCR formats for output?
OCR tools export data as plain text, searchable PDFs, Word documents, or structured XML. These formats allow editing, indexing, and integration with document management systems or workflow automation tools.
Can OCR be used for real-time language translation?
OCR systems capture and transcribe text, which translation engines convert to another language instantly. This combo supports travel, AR apps, and cross-language communication via mobile or smart glasses.
What is the role of OCR in digital transformation?
OCR digitizes physical documents, enabling automation, accessibility, and analytics in digital workflows. It’s foundational for going paperless and integrating unstructured content into enterprise systems.
Is OCR effective for historical document preservation?
OCR preserves historical records by converting aged or fragile texts into searchable digital formats. AI-enhanced tools correct degradation, font variance, and layout inconsistencies to retain content integrity.
Can OCR integrate with AI chatbots or virtual assistants?
OCR extracts user-submitted data, which chatbots interpret to deliver personalized responses. For example, reading receipts or ID cards and providing automated guidance or actions based on extracted info.
How is OCR used in mobile banking apps?
Mobile banking uses OCR to capture and process checks, ID cards, and forms directly via smartphone camera. It automates account setup, deposits, and KYC validation through real-time document scanning.
What is intelligent document processing (IDP) and how does it differ from OCR?
IDP combines OCR with AI, NLP, and RPA to classify, extract, and validate data from documents. OCR is just one step; IDP handles end-to-end automation from intake to workflow integration.
What’s the best way to display your favorite photos without using traditional frames?
Photos are more than just decorations—they’re a window into your most cherished memories. While framing pictures and hanging them on a wall is the classic way to showcase the people and moments that matter most, it’s not the only way.
In fact, some of the most creative and stylish ways to display photos don’t require frames at all!
From fairy-light garlands and washi tape collages to floating shelves and magnetic boards, there are endless ways to turn your photo collection into a statement piece. The best part? Many of these ideas are affordable, renter-friendly, and easy to change whenever you want a fresh look.
But preserving memories isn’t just about how you display them—it’s also about ensuring they last for generations. That’s why, in addition to frame-free photo display ideas, we’ll explore how to protect and digitize your collection so that your favorite moments never fade away. Let’s dive into some of the most unique, modern, and fun ways to display photos without frames!
Innovative Frame-Free Photo Display Ideas
Displaying photos without traditional frames opens up endless creative possibilities. Whether you’re looking for a boho-chic aesthetic, a sleek modern look, or an industrial vibe, there’s a frame-free display option to match your style.
Plus, many of these ideas are affordable, renter-friendly, and easy to update whenever you want a fresh look. Below, we’ll explore some of the most unique and visually striking ways to showcase your photos in a way that complements your home decor while keeping your walls damage-free.
1. DIY Hanging Displays with String and Clips (Whimsical & Interchangeable)
Want a playful and customizable way to display your photos? A hanging string display is perfect for a bohemian, rustic, or cozy aesthetic. This simple yet stylish approach transforms your walls into an interactive photo collage that you can update whenever inspiration strikes.
How to Create a DIY Hanging Photo Display?
Use twine, fairy lights, or wire as the hanging base.
Attach mini clothespins or decorative clips to secure your photos.
Use command hooks, nails, or pushpins to mount the string to the wall.
Get creative by incorporating dried flowers, postcards, or Polaroids for added charm.
Best For: Bedrooms, event decorations, gallery walls.
Materials Needed: Twine, mini clothespins, command hooks, LED string lights.
No nails? No problem! If you’re renting or simply love switching up your decor frequently, washi tape is a fantastic way to create a custom gallery wall without damaging your walls.
Creative Ways to Use Washi Tape
Geometric borders – Create triangles, rectangles, or grid patterns.
Layering effect – Overlap photos with colorful washi tape for a collage effect.
Best For: Dorm rooms, apartments, creative spaces.
Materials Needed: Washi tape, printed photos, and a ruler (for precision).
Aesthetic Vibe: Modern, playful, and easy to update.
3. Magnetic Photo Boards (Interactive & Functional)
A magnetic board is a sleek, damage-free way to create a dynamic photo wall. Whether it’s a custom magnetic wall paint, a pre-made board, or a refrigerator display, this method lets you rearrange and swap out photos instantly.
How to Set Up a Magnetic Photo Board?
Use magnetic paint to turn an entire wall into a photo display.
Opt for a metal sheet with a frame to create a movable gallery.
Attach photos using small magnets, magnetic strips, or custom magnetic prints.
Best For: Kitchens, home offices, studio spaces.
Materials Needed: Magnetic paint, magnets, metal sheet.
Aesthetic Vibe: Industrial, modern, and interactive.
For an industrial or minimalist look, consider using clipboards or pegboards to display your photos. This method blends functionality with aesthetics, making it an excellent choice for workspaces or home offices.
How to Use Clipboards for Photo Displays?
Arrange multiple wooden or metal clipboards in a grid formation.
Easily swap out photos, notes, or artwork without damaging them.
Combine with calendar pages, quotes, or sketches for a mixed-media effect.
Best For: Offices, creative studios, study spaces.
Materials Needed: Clipboards, wall hooks, pegboards, and binder clips.
Aesthetic Vibe: Industrial, structured, and adaptable.
5. Floating Acrylic or Glass Panels (Sleek & Modern)
If you’re looking for a high-end, contemporary look, floating acrylic or glass panels create a sophisticated, museum-like display.
How to Set Up a Floating Photo Display?
Use transparent acrylic sheets or glass panels with standoff mounts.
Arrange black-and-white or high-quality prints to enhance the sleek aesthetic.
Opt for UV-protected glass to preserve the photos over time.
Best For: Modern home decor, gallery-style walls, professional offices.
Aesthetic Vibe: Minimalist, gallery-like, and high-end.
6. Leaning Photos on Ledges & Shelves (Casual & Effortless)
Want a frame-free display that requires zero wall damage? Leaning photos on floating shelves or mantels is an effortless way to create a layered, adaptable display without committing to a fixed layout.
Ways to Style Photo Ledges
Mix different photo sizes and orientations for a dynamic look.
Incorporate plants, books, and candles for a curated feel.
Use transparent acrylic shelves for a sleek, contemporary touch.
Best For: Living rooms, hallways, mantel displays.
Love upcycling? Turn old trays, window frames, or repurposed wood into unique photo displays that blend history with creativity.
Ideas for Repurposed Photo Displays
Attach photos to antique window panes for a rustic aesthetic.
Use wooden serving trays as a tabletop photo collage.
Repurpose an old door or shutters for a farmhouse-style display.
Best For: Vintage decor, DIY home projects.
Materials Needed: Old window frames, wooden trays, Mod Podge, adhesive.
Aesthetic Vibe: Eclectic, farmhouse, and DIY-inspired.
8. Digital Photo Frames (Smart & Convenient)
If you’re looking for a high-tech way to showcase your photos, digital photo frames are an innovative solution that allows you to display hundreds of images in a sleek, compact frame.
Benefits of Digital Photo Frames:
Wireless connectivity – Syncs with cloud storage and Google Photos.
Custom slideshows – Rotate photos automatically.
Energy-efficient – Only lights up when someone is nearby.
Best For: Modern homes, tech-savvy users.
Materials Needed: Digital photo frame, digital photo library.
Aesthetic Vibe: Smart, modern, and clutter-free.
Displaying your photos in creative ways is just one part of the equation. While these ideas help you curate a beautiful and personalized space, it’s equally important to preserve your memories for the long term.
Over time, physical photos can fade, tear, or get lost, making digital preservation essential for ensuring they last for generations. In the next section, we’ll explore why digitizing your photos is crucial, how it protects your memories and the best ways to organize your digital collection.
The Importance of Digital Photo Preservation
While creative photo displays allow you to showcase your memories, they don’t protect them from time, fading, or deterioration. Many people assume that printed photos will last for generations. Still, studies have shown that color photographs degrade much faster than expected—sometimes in as little as 10 years under normal indoor conditions.
This is why digital preservation isn’t just a convenience—it’s a necessity. By scanning and storing your photo collection, you can ensure that your most valuable moments are preserved forever without the risk of fading, discoloration, or loss.
1. The Science of Photo Fading: Why Your Prints Are at Risk
Did you know color photos can start degrading in less than 10 years? Studies show that under normal indoor conditions:
Kodak Ektacolor and similar color-negative prints often exhibit fading, color shifts, and yellowish stains within a decade.
Most color negatives and prints made before 1985 have already suffered significant fading, with some completely losing their cyan and yellow dye layers.
Color slides like Kodachrome can lose noticeable image quality after just 20 minutes of projection, leading to permanent color shifts.
Early Kodacolor prints from the 1940s and 1950s have entirely deteriorated, meaning an entire era of amateur photography has been lost forever.
Why does this happen?
Unlike traditional black-and-white photographs, which rely on silver halide particles that are relatively stable, color prints are made from organic dyes. These dyes are highly unstable and react negatively to:
Light exposure – Even indirect sunlight accelerates fading.
Heat & humidity – Warm temperatures and high moisture levels break down dye structures faster.
Air pollution – Chemical reactions with airborne contaminants cause staining and discoloration.
Key Takeaway: Printed photographs are naturally unstable, and without proper preservation, they will deteriorate over time. The only way to prevent this permanent loss of history is through high-quality digitization and storage solutions.
2. Benefits of Digitizing Your Photos
Since color photos are chemically unstable, digitization ensures that your memories remain vibrant and intact for generations. Converting your photo collection into high-quality digital files protects against natural degradation and offers better accessibility and organization.
Key Benefits of Digital Preservation
Permanent Protection – Digital copies do not fade, tear, or discolor over time.
Easy Access & Sharing – View and share photos with family members anywhere in the world.
Enhanced Organization – Categorize images by date, location, or event for easier retrieval.
Backup & Disaster-Proofing – Store multiple copies on cloud services, external hard drives, and local devices.
3. Best Practices for Digitizing & Organizing Your Photos
Preserving your memories digitally is only effective if your files are properly organized and backed up. Here’s how to digitize and store your photos like a pro:
Step 1: Scan & Convert to High-Resolution Digital Files
Use a high-quality scanner or a professional photo-scanning service to create detailed, high-resolution copies.
Save in multiple formats – JPEG for sharing, PNG for quality, and TIFF for archival purposes.
Step 2: Organize & Tag Your Digital Photo Library
Sort photos by event, year, or location for easy retrieval.
Use metadata tags (e.g., “Mom’s Birthday 1995” or “Hawaii Vacation 2018”) to make searching effortless.
Create folders & albums based on specific themes (e.g., “Childhood Memories,” “Family Trips,” “Holiday Celebrations”).
Step 3: Store & Backup in Multiple Locations
Use a combination of cloud storage and external hard drives to protect against accidental loss.
Periodically update backups to prevent corruption or file degradation.
Store the original prints in acid-free archival storage boxes to slow further degradation.
Now that you understand the science of photo fading and how digital preservation ensures long-term security, let’s explore modern hybrid display solutions that blend physical and digital formats. These solutions allow you to showcase your memories while preserving them for generations.
Displaying Digital & Hybrid Photo Memories: Blending Technology with Tradition
Even though digital photos exist in a virtual format, they don’t have to remain hidden inside folders or cloud storage. With today’s smart technology and hybrid display options, you can seamlessly integrate physical and digital memories into your home décor.
Whether you prefer smart displays, interactive memory walls, or a mix of printed and digital formats, there are numerous ways to showcase your favorite moments while keeping them organized and easily accessible.
Best Ways to Display Digital & Hybrid Photo Memories
Method
Description
Best For
Unique Benefits
Digital Photo Frames
Wi-Fi-enabled smart frames that display rotating images from cloud storage.
Minimalist setups, tech-savvy users
Hands-free updates, syncs with cloud albums
Smart TVs & Digital Displays
Use a smart TV as a photo slideshow when idle. Some models mimic framed prints.
Living rooms, media centers
Transforms TV into an elegant, changing photo frame
Projection Walls
Project a moving photo slideshow onto a blank wall.
Family events, celebrations
Large-scale, immersive display without physical prints
Custom Digital Photo Books
Online-created books that can be printed on demand.
Keepsakes, gifts
Combines digital flexibility with physical nostalgia
QR Code Albums
Printed photos linked to digital albums via QR codes.
Hybrid photo displays
Expands storytelling beyond the printed image
Smart Scrapbooks
Physical scrapbooks with embedded NFC stickers linking to digital content.
Personalized storytelling
Adds multimedia elements (audio, video, animations)
Interactive Memory Walls
Mix of framed prints, digital screens, and QR codes to create a multi-dimensional display.
Home galleries, business displays
Creates an engaging, interactive storytelling space
Augmented Reality (AR) Prints
Printed photos that trigger hidden video clips when scanned.
Modern, tech-driven displays
Brings printed photos to life with motion and sound
Preserving Originals & Digital Copies
Ensuring physical prints are stored safely while using digital backups.
Long-term memory preservation
Prevents fading, and loss, and allows effortless retrieval
Preserving Originals While Enjoying Digital Copies
While digital displays offer convenience and longevity, many people still cherish the sentimental and historical value of printed photographs. Keeping both physical and digital copies ensures you can enjoy the best of both worlds without worrying about fading, damage, or loss.
Best Practices for Keeping Your Physical & Digital Photos Safe
Digitize Important Photos Regularly – Use a high-resolution scanner or professional scanning service to ensure physical prints are backed up online.
Use Acid-Free & Archival-Quality Storage: To prevent fading and deterioration, Store original printed photos in acid-free albums, humidity-controlled boxes, and UV-protected frames.
Invest in Cloud Backup Solutions – Store your digitized collection in multiple locations, including external hard drives, cloud storage (Google Drive, Dropbox, iCloud), and offline USB backups for maximum security.
Label & Tag Digital Files for Easy Searchability – Ensure every photo has a date, event, and keyword tag so you can quickly locate specific moments.
Pro Tip: If you feel overwhelmed with organizing your photos, professional services like eRecordsUSA can help scan, categorize, and securely store your collection for effortless, long-term preservation.
How eRecordsUSA Can Help Preserve Your Legacy?
Preserving your memories isn’t just about creatively displaying photos —it’s about protecting them for future generations. While DIY scanning and cloud storage options exist, professional digitization services ensure higher accuracy, long-term security, and preservation quality that surpass home solutions.
At eRecordsUSA, we specialize in high-quality photo scanning and secure digital storage. We help individuals and families safeguard their priceless memories with precision and care.
Why Choose Professional Scanning Over DIY Methods?
Many people attempt to digitize their photos at home, but home scanners and smartphone apps often result in:
Low-resolution scans that lose detail over time.
Uneven lighting and glare affect scanned images.
Manual labor—scanning and organizing hundreds (or thousands) of photos is time-consuming and tedious.
Lack of secure storage—backups may be scattered, lost, or unprotected in case of device failure.
With eRecordsUSA’s professional photo scanning and preservation services, you get:
High-resolution scanning – Capturing intricate details without distortion.
Color correction & enhancement – Restoring faded photos to their original vibrancy.
Metadata tagging & organization – Making retrieval of specific images easier.
The Benefits of eRecordsUSA’s Photo Preservation Services
Feature
How It Helps
Safe Handling
Experts handle fragile prints, preventing damage during scanning.
High-Resolution Scanning
Ensures sharp, detailed images for long-term preservation.
Organized Digital Files
Photos are categorized and labeled for easy access.
Cloud & External Backup Options
Prevents data loss by storing your digital collection securely.
Bulk Photo Scanning
Saves time by efficiently digitizing large collections.
Privacy & Security
All scanned photos are handled with confidentiality and encrypted storage solutions.
How eRecordsUSA Simplifies Your Photo Preservation Journey?
Step 1: Collect & Prepare – Gather old printed photos, albums, or negatives. Our experts assist in categorizing them.
Step 2: Professional Scanning – We digitize each image by using high-resolution, non-destructive scanners.
Step 3: Organization & Tagging – Photos are sorted chronologically or by event, with metadata for easy searchability.
Step 4: Secure Storage & Backup – Choose between cloud storage, external drives, or archival-grade formats.
Your family photos, vintage prints, and cherished memories deserve more than just being stacked in a shoebox or stored in a fragile album.
Don’t let time fade your history—preserve it today!
Have you ever wondered what to do with the mountain of artwork your child brings home every year?
Each small creation captures a moment in your child’s creative journey, from crayon drawings and finger paintings to school projects and birthday cards. But over time, those memories begin to pile up—literally. Many parents struggle to find a balance between preserving meaningful keepsakes and managing household clutter. That’s where modern high-resolution kids artwork scanning and cloud storage solutions offer a meaningful path forward.
According to the National Endowment for the Arts, nearly 18% of adults aged 18–34 participated in visual arts such as painting, drawing, sculpting, or printmaking, while 12% of individuals aged 18–24 engaged in creative writing. This early engagement often begins with childhood artwork—making it even more essential to preserve these foundational creative expressions.
In today’s era of data preservation, metadata tagging, and cloud-native organization, learning how to store, organize, and share your child’s artwork isn’t just about tidiness—it’s about building a digital legacy. Properly digitizing and structuring your child’s creations ensures they’re protected, searchable, and shareable for years.
If you’re seeking a secure, scalable way to manage this process, eRecordsUSA offers professional digital document management services, including kids’ artwork scanning tailored for families. As a leader in this domain, we help parents scan, archive, and categorize artwork collections using best-in-class archival-grade practices. Whether you’re just starting or sitting on boxes of memories, we provide the tools and expertise to transform clutter into a curated archive.
Let’s explore the steps to get started!
Digitizing and Organizing Kids’ Artwork: From Scan to Structured Archive
Preserving children’s artwork starts with transforming physical pieces into lasting digital formats. This process goes beyond snapping a photo on your phone—it involves choosing the right tools, file formats, and organizational structure to ensure quality, searchability, and longevity.
1. Start with High-Resolution Scanning
Flatbed scanners offer consistent lighting and resolution, making them ideal for preserving everything from fragile finger-paint masterpieces to three-dimensional school projects.
Research published by the National Institutes of Health reveals that 88.5% of children aged 9–11 exhibit specific preferences in their painting and visual art creations, underscoring how children develop distinctive artistic identities as they grow. Capturing and preserving these evolving styles can help parents track their child’s developmental journey through creativity.
For oversized or textured artwork, an overhead large-format scanner or even a DSLR camera setup with proper lighting can help capture detail without distortion. Always aim for 300–600 DPI resolution in formats like TIFF or PNG or PDF files for journals to maintain clarity for future reprints or enlargements.
2. Use Metadata to Make Art Searchable
Once scanned, the organization becomes key. Assign each image metadata tags like the child’s name, age, date, medium, and title of the artwork. This makes it easier to sort and retrieve specific pieces later. Many parents use folders categorized by year, school grade, or project type.
Embedded metadata ensures your child’s artwork remains searchable across platforms- No matter whether you’re using software like Adobe Bridge, Google Drive, or professional DAM (Digital Asset Management) systems. Implementing OCR (Optical Character Recognition) can also digitize handwritten notes or descriptions added by your child or teachers.
3. Back It Up – Twice
Saving files in just one location isn’t enough. Use a redundant backup strategy, with one copy on an external hard drive and another in the cloud (e.g., Dropbox, Box, Sharefile, Google Drive, or iCloud). Look for file versioning services to recover earlier versions (if something is accidentally overwritten).
By treating your child’s art as valuable digital content, you preserve memories and make them accessible and secure, now and in the future.
But digital preservation isn’t just about storage—it’s about storytelling. Once your child’s creations are organized and digitized, a world of creative possibilities opens up. From heartfelt photo books to personalized gifts, let’s explore how you can transform those digital files into lasting, tangible keepsakes that celebrate your child’s creativity in unforgettable ways.
Creative Keepsakes: Turning Kids’ Art Into Books and Gifts
Let’s explore some of the creative ideas that you will admire for years to come.
1. Create Annual Photo Books
One of the most popular ways to preserve digital artwork is by compiling yearly photo books. These albums can chronologically showcase your child’s artistic growth from preschool to high school. Use platforms like Shutterfly, Mixbook, or Blurb, which allow you to drag and drop scanned images, add captions, and customize layouts.
Adding notes about the age, inspiration behind the piece, or school assignment context helps each page tell a story. This also increases the emotional value for parents and children as the collection evolves year-over-year.
2. Turn Artwork Into Personalized Gifts
Your child’s artwork doesn’t have to stay confined to screens or albums. With just a few clicks, you can turn digital scans into personalized gifts like:
Coffee mugs for grandparents
Pillowcases for bedtime comfort
Calendars for family members
Puzzle sets featuring their favorite doodles
These services ensure your scanned files are color-accurate and print-ready, preserving artistic integrity in every gift. Whether you’re preparing for a holiday, birthday or simply want to surprise a loved one, using your child’s art in this way enhances connection while celebrating creativity.
And if you’re ready to take things a step further, why not bring their art to life on screens and walls? Let’s explore the most intuitive and private ways to share digitized creations with family and friends.
Sharing Digitized Artwork: From Smart Displays to Private Albums
Once you’ve preserved and personalized your child’s artwork, sharing it becomes a joyful extension of the experience. Whether you’re showcasing it at home or with loved ones across the globe, digital sharing tools make it easy to celebrate creativity while maintaining privacy and control.
1. Display Art on Digital Frames
Smart digital frames like Aura, and Nixplay allow you to upload high-resolution scans and rotate them like a gallery. These frames bring color and personality into everyday spaces—from living rooms to grandparents’ kitchens—while offering the ability to update content remotely.
2. Create Curated Albums for Family Sharing
Platforms such as Google Photos, Apple Shared Albums, and Amazon Photos enable families to build secure, curated albums that can be privately shared. This is especially helpful for extended families who live far apart but want to stay connected to a child’s artistic milestones.
Set albums by year or theme, and consider including short voice recordings or typed stories from the child to give each piece more depth and emotional value.
3. Respect Privacy with Smart Sharing Practices
While sharing everything on social media is tempting, protecting your child’s privacy is important. Avoid posting artwork with names, school details, or identifying features. Instead, use closed platforms or password-protected sharing links. Watermarking and metadata stripping tools can add another layer of security when needed.
Professional Archival Services: Why eRecordsUSA is a Smart Choice
For many parents, knowing how to store, organize, and share your child’s artwork is only part of the challenge—the real hurdle is finding the time to do it. That’s where professional services like eRecordsUSA step in, offering a streamlined, secure, and scalable solution to preserve your child’s creative legacy.
1. Digitization with Professional Precision
At eRecordsUSA, we use high-resolution scanning equipment, archival-grade file formats, and metadata tagging standards that mirror enterprise-level document preservation. Every piece of artwork is carefully captured, labeled, and stored in a structured digital repository—ready for cloud storage, print, or private sharing.
2. Custom Organization That Grows with Your Collection
We help parents move beyond ad-hoc file naming or folder chaos. Our services include custom taxonomies, indexed tagging, and search-friendly formats that evolve as your child produces more artwork. Whether it’s sorting by date, subject, or age, your archive remains future-ready and accessible.
3. Privacy-First, Cloud-Secure Solutions
Our infrastructure follows strict data privacy protocols, ensuring your child’s creative work stays protected. With secure cloud access, encrypted backups, and optional physical media delivery (USB or DVD), your files are both safe and readily accessible whenever you need them.
Whether you’re a parent with a single box of artwork or a digital collection spiraling out of control, eRecordsUSA provides end-to-end support that transforms clutter into a permanent, searchable legacy.
Final Thoughts: Preserve Creativity, Protect Memories
Your child’s artwork tells the story of their imagination, growth, and personality—each piece a snapshot of who they were at that moment in time. With the right tools and approach, you can go beyond simply saving drawings—you can build a structured archive, a family legacy, and a way to revisit those memories whenever you want.
Whether you prefer DIY digitization or need help with secure storage and professional-grade organization, the key is taking that first step. And if you’re looking for a trusted partner to simplify the process, eRecordsUSA offers custom archival solutions tailored to families—turning piles of artwork into a lasting, searchable digital collection.
Preserving creativity shouldn’t feel like a chore—it should feel like honoring a legacy.
Find Us on Google Maps
FAQs
1. What file format is best for archiving children’s artwork digitally?
Use TIFF or PNG for lossless image quality; PDF/A is preferred for multi-page archival. These formats retain color fidelity and are ideal for long-term digital preservation.
2. How do I create a searchable digital archive for my child’s art?
Tag each file with metadata (name, age, date, medium) and use cloud platforms like Google Drive with OCR or DAM systems to enable full-text and attribute-based search.
3. What is the best resolution to scan kids’ drawings for printing or storage?
Scan at 300 DPI for print and 600 DPI for archival use. This ensures detailed reproduction and long-term clarity across physical and digital formats.
4. How do I involve my child in organizing their digital artwork?
Let them choose titles, record voice notes, or create themed folders. This builds engagement and enriches metadata for searchability and future storytelling.
5. Is it safe to store kids’ artwork in the cloud?
Yes—if you use secure platforms with encryption, 2FA, and data privacy compliance. Choose providers with backup redundancy and role-based access control.
6. How often should I back up a digital kids’ art archive?
Back up after each new addition or monthly. Use a 3-2-1 strategy: 3 copies, 2 locations, 1 offsite (cloud + local drive) to prevent data loss.
7. What’s the cost of professional kids’ art digitization services?
Pricing for kids’ artwork digitization depends on the volume, format, and level of customization required. Services like eRecordsUSA offer tailored quotes based on project size, file naming needs, and whether physical originals are returned or shredded. Sharing complete details helps us provide a more accurate estimate.
8. Can I turn my child’s art into NFTs or digital collectibles?
Yes, scanned artwork can be minted as NFTs on platforms like OpenSea. Ensure you own the IP rights and use platforms that allow family-safe publishing.
9. How can teachers or schools preserve student artwork digitally?
Use school-wide scanning stations and folder hierarchies by class or project. Platforms like Seesaw or custom LMS integrations help archive student creativity at scale.