When a fire destroys a school building, what goes up in flames besides walls and chalkboards?
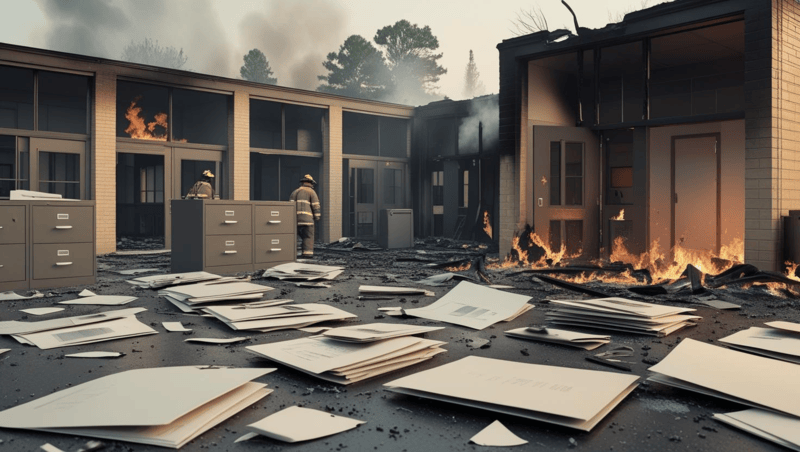
In the wake of devastating events like the Palisades Fire and the Eaton Fire, communities in Los Angeles witnessed the heartbreaking loss not only of physical school structures but also of decades of educational heritage.
Institutions such as St. Matthew’s Parish School, Village School, Pasadena Waldorf School, and Eliot Arts Magnet Academy saw more than classrooms reduced to ash—they lost student yearbooks, graduation records, faculty rosters, student transcripts, school newspapers, event photographs, alumni directories, and historical enrollment data that tell the story of every generation that passed through their doors.\
These aren’t just files—they’re community memory, critical for alumni identity, historical research, accreditation documentation, and intergenerational connections. As natural disasters grow more frequent, so does the risk of losing this irreplaceable information.
That’s where eRecordsUSA steps in. As a trusted partner of the Los Angeles Unified School District (LAUSD) and a digitization specialist, eRecordsUSA is committed to preserving California’s school legacies. Through the digitization of fragile and archival documents—including complete yearbook collections, administrative files, student assessments, and even PTA meeting minutes—schools like Paul Revere Charter Middle School, Palisades Charter High School, and Polytechnic School have turned their paper-based history into searchable, cloud-accessible digital archives.
The Importance of School History: More Than Just Nostalgia
When students are asked to bring in their old yearbooks, it’s not just for sentimental value—it’s about safeguarding a school’s cultural and academic legacy. Yearbooks, student publications, report cards, class rosters, and archival photographs represent far more than memories; they are official records of student life, identity, and achievement.
These documents form a living history that reflects the academic rigor, social dynamics, and community evolution captured within a school’s walls. From Board of Education-mandated documentation to PTA-driven school newsletters, every archived piece contributes to a larger narrative of educational impact.
In the wake of tragedies like the Palisades and Eaton Fires, the role of recovered student contributions becomes crucial. Donated materials—such as yearbooks, classroom photos, and club directories—are helping to reconstruct what was lost. Each recovered record supports the Los Angeles Unified School District (LAUSD) and its affiliated schools in their efforts to preserve institutional memory.
Preserved digitally through partners like eRecordsUSA, these records serve broader, future-oriented functions:
Genealogical Research for families tracing lineage or heritage
Accreditation Support for maintaining compliance with educational standards
Alumni Engagement for school fundraising, event planning, and legacy building
Historical Analysis by educators, journalists, and researchers studying community change and educational trends
Without digitization, many of these analog materials face natural degradation—fading ink, brittle paper, and storage limitations make them increasingly vulnerable, even without a catastrophic fire.
The Vulnerability of Physical Archives: What Disasters Reveal
As students and schools rally to reconstruct their historical collections, the fragility of physical archives becomes painfully evident. Whether tucked away in administrative offices or basement storage rooms, paper-based materials remain susceptible to a long list of threats, including wildfires, water damage from sprinklers, earthquakes, mold, and even the passage of time itself.
In the case of the Palisades Fire, entire campuses were reduced to ashes, taking with them decades of unscanned transcripts, faculty rosters, student publications, and photographic negatives. These tangible links to the past are often irreplaceable without a digital backup. Moreover, physical yearbooks and school records are difficult to access and share:
One copy often serves an entire institution.
Limited hours and manual searching make retrieval a tedious process.
Geographical constraints prevent remote alumni or researchers from engaging.
Digitization is not simply a modernization tactic—it is a defensive strategy against future loss and a proactive way to ensure democratized access to school legacies. That’s why eRecordsUSA stepped in—not just as a service provider, but as a partner in safeguarding history.
eRecordsUSA’s Solution: Safeguarding School History Through Digitization
At eRecordsUSA, we recognize that when physical archives are lost to disasters, digital preservation becomes the last—and often only—lifeline for institutional memory. That’s why we’ve made it our mission to help schools, public and private districts, academic institutions, historical societies, museums, government agencies, libraries, and community organizations protect their archival records and institutional memory for future generations.
We don’t just scan—we preserve, catalog, and future-proof valuable content. Here’s how we do it:
Archival Assessment & Handling – Our team begins by meticulously evaluating materials, including yearbooks, photographs, and administrative records. Items are treated with conservation-grade care, especially those that are fragile or donated by alumni.
Non-Destructive High-Resolution Scanning – Using cradle-based scanners and flatbed digitizers, we ensure every image—from a club photo to a dedication page—is captured, safely, and in full fidelity.
OCR & Metadata-Enhanced Indexing – We convert scanned content into searchable, structured digital archives using optical character recognition (OCR) technology. Custom metadata tagging enables easy retrieval by school year, student name, event type, or publication date.
Secure Digital Delivery & Archival Options – Our clients receive encrypted cloud access or offline delivery on request, with all files formatted for long-term preservation and integration into local systems.
In partnership with Paul Revere Charter Middle School and Palisades Charter High School, part of the Los Angeles Unified School District (LAUSD), we recently helped rebuild their historical yearbook archive. This effort not only recovered irreplaceable records but also created a resilient digital library now immune to fire, water, or time.
Partnering with LAUSD: A Model for Resilience and Preservation
In collaboration with the Los Angeles Unified School District (LAUSD)—one of the largest and most culturally diverse districts in the U.S.—eRecordsUSA has worked to ensure the preservation of student memories and institutional heritage, especially in the wake of disasters like the Palisades and Eaton Fires.
This partnership reflects a shared mission: to safeguard student records, academic history, and archival content that might otherwise be lost to fire, time, or decay. Through this initiative, eRecordsUSA has:
Digitized Legacy Yearbooks from schools like Paul Revere Charter Middle School, converting vulnerable print volumes into searchable digital archives.
Developed FERPA-Compliant Digitization Protocols, aligning all digitization workflows with federal privacy laws and California Board of Education retention guidelines to ensure regulatory integrity.
Established Custom Metadata Frameworks that enhance record discoverability, assist alumni access, and support school administrative continuity.
By building this framework with LAUSD, eRecordsUSA offers a proven model for other districts seeking long-term solutions for digital resilience.
Conclusion: From Recovery to Resilience—Why Digitization Matters
In a region as wildfire-prone as Southern California, preserving the academic and cultural legacy of schools is no longer optional—it’s essential. Fires like those in Palisades and Eaton have proven just how vulnerable physical archives are. But through strategic partnerships, like the one between eRecordsUSA and LAUSD, districts can safeguard irreplaceable records and student history with purpose-driven digitization.
At eRecordsUSA, we understand that behind every yearbook is a story, a face, a milestone worth preserving. Our secure, FERPA-compliant digitization services empower schools not only to recover from loss but to build a resilient foundation for the future.
🔍 Interested in protecting your school’s historical records?
Contact us to schedule a consultation and explore how we can support your district’s digital preservation goals.
Tired of managing multiple PDF documents for a single task or project? Whether you’re a legal professional bundling case files, a healthcare provider assembling patient records, or simply merging receipts and invoices for tax season, the need to merge PDF files online has become both frequent and essential.
Over 68% of enterprises have digitized their document workflows, with 72% utilizing PDF tools for secure document handling and 64% demanding collaborative PDF editing solutions.
Online PDF merging tools make it easy to combine documents without installing software. However, if your process starts with physical papers, digitizing them into searchable, high-quality PDFs is the first essential step. This is where eRecordsUSA excels—providing professional document scanning, OCR services, and compliant digital conversion for industries like healthcare, legal, and government.
In this guide, you’ll learn:
How to merge PDF files online using popular tools.
What features to look for in a PDF merger.
When and why to consider digitization before merging.
How eRecordsUSA supports digital transformation with accurate PDF-ready outputs.
So, let’s explore the step-by-step procedure to merge PDF files online along with the must-have features.
Step-by-Step Guide to Merge PDF Files Online + Must-Have Features
Below is a step-by-step guide followed by the most important features to consider when selecting a PDF merging tool.
Choose a Reliable PDF Merging Tool – Begin by selecting a well-known PDF combiner such as Smallpdf, iLovePDF, or Adobe Acrobat Online. If your documents are not already in digital format, scan them first using eRecordsUSA to ensure they are high-quality, searchable PDFs.
Upload Your PDF Documents – Use the tool’s drag-and-drop feature or upload from cloud storage like Google Drive or Dropbox.
Organize the File Order – Rearrange files to appear in the desired sequence. This is especially important for contracts, legal packets, or project documentation.
Click the “Merge” or “Combine” Button – After arranging the files, begin the merge process with a single click.
Download the Merged PDF File – Save the final document to your device or share it directly through email or cloud storage.
Before you decide which PDF merging tool to use, it’s important to evaluate which features truly matter for your specific needs. While the merging process is usually simple, choosing a tool with the right capabilities can save time, protect sensitive information, and ensure a professional outcome.
Key Features to Look For in Online PDF Merging Tools
Cross-check whether your shortlisted online PDF merging tool have all the below-listed features:
Data Privacy and Encryption – Use tools that support SSL encryption and automatic file deletion after merging, especially when dealing with sensitive information.
No Upload or Size Limits – Free platforms often limit file size and number of uploads. For large projects, ensure the tool can handle bulk documents efficiently.
No Watermarks or Branding – Look for tools that provide clean PDF outputs without unwanted logos or watermarks.
Cross-Device and Mobile Compatibility – Choose platforms that work seamlessly on desktops, tablets, and smartphones.
OCR Functionality – If you’re starting with scanned images or physical documents, opt for solutions that support Optical Character Recognition. eRecordsUSA can help prepare these files by converting hard copies into searchable PDF format.
Industry-Specific Requirements – If you operate in a regulated industry, tools may not meet all your compliance needs. eRecordsUSA specializes in HIPAA-compliant document conversion, ensuring your digitized files are secure and regulation-ready before any online merging step.
Now that you know what to look for in a reliable PDF merging tool, it’s helpful to compare some of the most popular platforms available today. Each option offers different strengths, depending on whether you need basic merging functionality, advanced features, or privacy-focused solutions.
Best Free Online PDF Mergers (With Pros and Cons)
Below is a breakdown of the best free tools to help you choose the right PDF combiner for your workflow.
PDF Tool
Key Features
Pros
Cons
Best For
Smallpdf
Drag-and-drop, cloud support, file format mixing
Intuitive UI, mobile-friendly, fast
Limited free usage, upsells for advanced features
General users needing quick merging
iLovePDF
All-in-one toolset, integrates with cloud platforms
Offers compression, editing, and conversion in one
Ads, size limits on free tier
Users wanting an all-purpose solution
Adobe Acrobat
Brand trust, secure, integrates with Adobe tools
Professional quality, reliable
Requires sign-in, limited free tools
Adobe ecosystem users
PDF24 Tools
Desktop version, offline merging, privacy focus
Free desktop version, auto-deletion of files
Less polished UI, fewer extras
Privacy-focused and offline users
When Simplicity Isn’t Enough?
If you’re handling more than just basic digital files such as large document sets, scanned images, or materials that require indexing, consider preparing your PDFs in advance for the best merging outcome. Starting with clean, well-organized digital files can significantly improve merging accuracy and reduce errors.
For businesses dealing with complex documentation, having a reliable pre-merging workflow in place helps ensure everything aligns smoothly before combining files online.
Pro Tips and Security Guidelines for Merging PDF Files Online
While merging PDF files online is typically straightforward, overlooking key steps can lead to misplaced pages, formatting issues, or unintended data exposure. Moreover, about 75% of data breaches related to document sharing are attributed to inadequate PDF data management practices.
This indicates the importance of implementing the below-discussed best practices for merging PDFs that can help ensure your merged PDFs are accurate, professional, and secure.
Organize Files Before Uploading – Rename your files clearly and logically. Using labels like “Project_Proposal_Q1.pdf” or “Signed_Contract_April.pdf” helps maintain order and ensures documents appear in the correct sequence when uploaded.
Verify the Document Order – Most online PDF tools offer a preview function. Use it to confirm that all files are arranged properly before initiating the merge. This is especially important for structured documents such as applications, legal packets, or financial reports.
Ensure a Stable Internet Connection – If you’re working with multiple large files, a weak internet connection can cause upload failures or incomplete merges. Using a secure and reliable connection helps avoid interruptions and ensures successful processing.
Review the Final Merged PDF – Before saving or distributing the file, scroll through each page to confirm that all content has merged correctly. Check for any formatting errors, missing pages, or duplicated content.
Choose Trusted Tools – Only use established PDF merging platforms that support HTTPS encryption and have clear data privacy policies. Avoid lesser-known tools that may not provide adequate security or could retain your uploaded documents.
Prepare Physical Documents Correctly – If your PDFs are scanned from paper sources, make sure they are clean, readable, and properly digitized. Scanning documents using a professional service ensures your files are optimized and searchable, which enhances the overall quality and usability of your merged PDFs.
Conclusion
Merging PDF files online is a fast and practical way to streamline document management. Whether you’re combining reports, contracts, or forms, using the right PDF tools ensures accuracy, security, and convenience. Start with clean, searchable PDFs, especially if you’re working from physical documents and choose platforms that align with your privacy and formatting needs. If your documents begin in paper form or require OCR before merging, partner with a professional digitization service provider like eRecordsUSA to prepare them properly.
FAQs
How do I split a PDF file into multiple parts?
Upload it to a PDF splitter tool, select page ranges, and export separate files. Use tools like Smallpdf or Adobe Acrobat Online for accurate page separation.
Can I merge password-protected PDFs?
You must first unlock them using a secure unlock tool, then merge. Encrypted files can’t be combined unless the password is removed.
What is the maximum file size for merging PDFs online?
Most free tools allow 50 to 100 MB per session. Use premium plans or offline tools like PDF24 or Adobe Acrobat for larger files.
Can I merge PDFs and images together?
Yes, tools like Smallpdf convert images (JPG, PNG) into PDF pages and combine them with your existing PDFs.
Is it safe to upload confidential documents to online mergers?
Choose services with SSL encryption and auto file deletion. For sensitive data, offline tools or secure enterprise solutions are safer.
How do I rearrange pages within a PDF before merging?
Upload to an editor like Sejda or iLovePDF, reorder using the preview pane, save, and then proceed with the merge.
What’s the best way to compress a merged PDF file?
Use PDF compressors like ILovePDF or Adobe Compress to reduce file size while preserving content quality.
Can I merge PDFs on my smartphone?
Yes, mobile apps like Adobe Acrobat, Smallpdf, and iLovePDF let you merge PDFs on both Android and iOS devices.
“How can I scan a document to PDF and save it directly to my iCloud Drive without using any third-party app?”
If this sounds like something you’ve asked or Googled you’re not alone.
With more users managing work, school, and personal records from their smartphones, the ability to scan documents straight into PDF format using an iPhone has become essential. And the best part? You don’t even need to download anything.
Thanks to the built-in Notes App and Files App, scanning is now natively supported on all modern iPhones. These tools allow you to:
Instantly scan paper into sharp PDFs
Save files to local folders or cloud storage like iCloud Drive
Automate multi-step workflows using iOS Shortcuts
Enable text recognition with apps like Adobe Scan, using Optical Character Recognition (OCR)
In this guide, we’ll walk through the exact steps and advanced options to handle questions like:
“Why does the Files app not show a scan button on my iPhone?”
“Can I batch scan multiple pages and save them as one PDF?”
“Is there a way to trigger document scans automatically to specific folders using Shortcuts?”
“Which method gives me the best quality: Notes App or Adobe Scan?”
You’ll also learn when your iPhone is enough and when a professional scanning partner like eRecordsUSA is your best bet for large-scale, secure, or compliance-driven document digitization.
How to Scan Documents into PDF Files Using Your iPhone – 3 Easy Methods
Turn your iPhone into a powerful document scanner using built-in tools or advanced apps.
Below are three simple methods to scan and save your documents directly as PDFs – fast, clean, and paper-free.
Method 1 – Scan Documents Using the iPhone Notes App
Now that we know scanning is built right into iOS, let’s start with the most accessible option: the iPhone’s built-in Notes App.
It’s free, pre-installed, and integrates directly with iCloud and the Files app, making it ideal for quick, clean scans that you can save or share as PDF files instantly.
Step-by-Step: How to Use the Notes App for Scanning
Open the Notes App
Launch the Notes app from your home screen or app library.
Tap the Compose button (square with pencil icon) to start a new note.
Access the Scanner
Tap the camera icon above the keyboard.
Select Scan Documents from the menu.
Position and Capture the Document
Hold your iPhone camera over the document.
The app automatically detects edges and captures the scan. You can also tap the shutter manually.
Tip: Lay the paper on a contrasting background and keep the lighting even for the best results.
Edit the Scan
After capturing, tap the thumbnail to:
Adjust corners
Apply a filter (Color, Grayscale, B&W, Photo)
Rotate or retake the scan
Save as PDF
Tap Save to store your scans in the note.
Tap on the scanned document → Share icon → choose Save to Files to export it as a PDF file.
While the Notes app is perfect for casual use, what if you want to scan a document and immediately store it in a specific folder on your device or cloud drive—without needing to open Notes at all? That’s where the Files App comes in.
Method 2 – Save Scanned Documents as PDFs Using the Files App
If you’re looking for a more file-centric workflow where scans go straight into a specific folder on your device or in the cloud, the Files App is your best option.
Unlike Notes, this method bypasses note creation and saves your scanned PDF directly where you want it, whether iCloud Drive, Dropbox, or “On My iPhone.”
Step-by-Step: Scanning with the Files App
Open the Files App
Launch the Files app and navigate to the folder where you want to save your scanned document (e.g., iCloud Drive > Documents).
Access the Scanner
Tap the three-dot icon (•••) in the top-right corner of the screen.
Select Scan Documents from the dropdown menu.
Capture the Document
Align your paper within the camera frame.
The app will automatically detect edges and capture the image. You can manually tap the shutter if needed.
Review and Edit
Edit options appear immediately after each scan:
Adjust corners
Apply color filters
Add or delete pages
Once finished, tap Save to name the file and confirm the folder location.
Your Scan is Now a PDF
The document is saved as a PDF file right in your chosen folder.
You can now share it via email, attach it to apps, or upload it to cloud platforms.
While Apple’s built-in tools are perfect for quick scans, what if you need more like OCR, batch processing, or edge-enhancing AI? That’s where professional-grade apps like Adobe Scan come in.
Method 3 – Use Adobe Scan for Pro-Quality PDFs and OCR Features
For users who want more than just basic scans—like optical character recognition (OCR), auto-cropping, and advanced file editing—Adobe Scan is the go-to choice. Available for free on the App Store, it’s ideal for creating searchable, shareable, and high-resolution PDFs right from your iPhone.
How to Scan with Adobe Scan: Step-by-Step
Install and Open Adobe Scan
Download from the App Store and sign in with your Adobe or Google account.
Point and Capture
The app automatically detects the edges of your document and captures the image.
You can manually trigger the shutter or scan in batch mode.
Edit and Enhance
Crop, reorder pages, apply cleanup filters, or mark up text.
Save and Export
Adobe Scan saves your document as a PDF.
You can export it to iCloud, Google Drive, or Adobe Document Cloud.
Now that you’ve explored the three main scanning methods, let’s go one level deeper into expert tips that can help you capture crisp, clean scans every time, whether you’re digitizing a receipt or a 10-page form.
Tips for High-Quality iPhone Document Scans
No matter which method you choose, the quality of your scan depends largely on your environment and technique. Whether submitting a legal form or archiving a multi-page report, these pro-level tips ensure your iPhone scans are sharp, readable, and professional.
Getting a clear and readable scan isn’t just about the app you use; it’s also about how you take the scan. If your documents look blurry, cropped poorly, or hard to read, try these quick fixes.
Use bright, even lighting. Natural daylight works best, but a steady desk lamp will also do the job.
Avoid shadows or direct glare from overhead lights.
Place your document on a background that contrasts with it.
If scanning a white paper, use a dark table or folder underneath. This helps the app detect the edges correctly.
Clean your iPhone camera lens. A simple wipe with a soft cloth can improve image clarity instantly.
Hold your phone steady and keep it parallel to the paper. This keeps the scan straight and avoids distortion.
For Adobe Scan users, make sure the document is well-lit and flat. OCR works better when the text is visible and evenly lit.
Now that your scans are sharp and professional-looking, let’s explore how to rename, organize, and mark up your PDF files so they’re easy to find and ready to send.
Managing and Editing Your Scanned PDFs on iPhone
Once you’ve scanned your document, the next step is to ensure it’s named correctly, stored in the right place, and ready to be shared or signed.
Thankfully, your iPhone gives you all the tools you need.
To rename a PDF, open the Files App, find your scanned document, press and hold the file name, then tap “Rename.” Give it a clear title like “Signed_Contract_May2025.pdf” so it’s easy to locate later.
To organize your scans, create folders inside the Files App. You can drag and drop scanned PDFs into categories like “Work,” “Receipts,” or “Medical.” If you’re using iCloud, these folders sync across your devices.
If you need to mark up a document, open it in Files or the Notes app, then tap the Markup icon (a pen inside a circle). You can draw, highlight, add text, or even insert your signature.
Sharing is just as easy. Tap the share icon and choose where to send it—email, AirDrop, cloud services, or messaging apps.
If you’ve ever struggled with blurry scans, missing files, or saving issues, you’re not alone. In the next section, we’ll walk through common problems people face while scanning and how to fix them fast.
Troubleshooting Common Scanning Issues on iPhone
Even with the best tools, things don’t always go smoothly. If your scan didn’t turn out the way you expected, here are the most common problems and how to fix them quickly.
Scans look blurry. This usually happens when your lighting is uneven or your iPhone isn’t steady. Try scanning in brighter light and hold your phone flat and still.
Pages are cut off or crooked. Make sure the document is flat and not folded. Use a high-contrast background so your iPhone can detect the edges correctly.
You can’t find your scanned PDF. If you scanned with the Notes app, your file is saved inside the note. To export it, tap the scan > share icon > Save to Files. If you used the Files app or Adobe Scan, check the selected folder.
The file is too large to email. Re-scan using grayscale or black-and-white filters. You can also compress the PDF using Adobe Acrobat Online or similar tools.
Auto-capture doesn’t work. If your iPhone won’t trigger the scan, move the document slightly, ensure there’s good lighting, or switch to manual capture.
At this point, you know how to scan, clean up, organize, and troubleshoot your documents. But what if you’re dealing with stacks of legal files, books, or oversized blueprints? That’s when it’s time to bring in expert help.
When to Use Professional Scanning Services like eRecordsUSA?
Your iPhone is powerful, but it’s not built for everything. If you’re dealing with fragile documents, high volumes, or compliance-heavy files like medical records or legal paperwork, a professional scanning service is a smart choice.
eRecordsUSA is a trusted document scanning partner offering high-speed digitization for businesses, law firms, healthcare providers, government agencies, and more. Our team uses secure, enterprise-grade equipment like Kodak and Epson scanners that capture documents in crisp, searchable PDF format.
We also specialize in:
Large-format scanning for blueprints, maps, and engineering drawings
Destructive/Non-destructive book scanning using V-cradle and overhead scanners
OCR-enhanced PDFs that make even old or handwritten documents searchable
HIPAA-, FERPA-, and PCI-compliant processing for sensitive files
If you’re handling cabinets full of documents, or need a full digital transformation project, eRecordsUSA can digitize, index, and organize everything then deliver your files securely via cloud or hard drive.
Conclusion: Scan Smarter from Your Pocket or Professionally
Whether you’re scanning a single receipt or managing an archive of legal files, your iPhone is a powerful tool for turning paper into PDFs. With built-in apps like Notes and Files, and enhanced tools like Adobe Scan, you can digitize, organize, and share documents in seconds—anytime, anywhere.
For quick everyday use, the steps in this guide will help you scan clearly, name files properly, and share them with confidence.
But when the job is bigger or requires security, compliance, or archival-level quality, eRecordsUSA is here to help.
From oversized blueprints to fragile books, they provide fast, accurate, and secure document scanning services trusted by businesses across the U.S.
Now it’s your turn:
Try scanning a document using the Notes or Files app today.
Need help with bulk scanning or compliance-focused digitization? Get in touch with eRecordsUSA to request a quote or free consultation.