Maintaining accurate and accessible blueprints is vital—especially for regulatory compliance. This is essential in industries governed by HIPAA, OSHA, and other stringent standards.
Blueprints detail:
Critical infrastructure
Safety protocols
Operational workflows
Proper archiving ensures quick retrieval for:
Audits
Inspections
Incident investigations
Think of blueprints as living documents that must be managed carefully throughout their lifecycle.
Informational Gain
Blueprint archiving:
Reduces regulatory risk
Enhances compliance
Acts as insurance against penalties
Understanding Regulatory Requirements
HIPAA (Health Insurance Portability and Accountability Act)
Focus: Patient data and facility security
Relevance: Server room layouts, emergency exits, security zones
Must be securely archived to ensure compliance
OSHA (Occupational Safety and Health Administration)
Requires: Recordkeeping of workplace safety measures
Blueprints must show:
Hazardous material storage
Ventilation systems
Evacuation routes
Other Regulations
May include:
EPA standards
Local building codes
Require:
Secure blueprint storage
Access control
Version tracking
Developing an Archiving Strategy
An effective strategy includes:
1. Digitization
Convert paper blueprints to TIFF or PDF/A
Use high-resolution scanning (300–600 DPI)
Protects original documents and improves accessibility
✅ Accessibility – Easy retrieval for authorized users
✅ Integration – Should work with current systems
Best Practices for Blueprint Archiving
Standardize Naming Conventions Simplifies file retrieval and sorting.
Regular Archive Audits Ensure completeness and accuracy.
Employee Training Teach proper protocols for digitizing and storing documents.
Stay Updated on Regulations Adjust practices based on new rules.
The Benefits of Effective Blueprint Archiving
Archiving blueprints properly delivers:
✅ Reduced Risk of Non-Compliance – Avoid costly fines
✅ Improved Efficiency – Quick access speeds up workflows
✅ Enhanced Security – Sensitive data stays protected
✅ Better Decision-Making – Reliable data aids strategy
✅ Simplified Audits – Makes regulatory checks easier
Conclusion
Blueprint archiving is more than storage—it’s a strategic investment.
To stay compliant and operationally efficient:
Develop a sound archiving strategy
Choose the right technology
Follow proven best practices
Doing so protects your business and prepares you for audits, emergencies, and growth.
FAQ
Q: What file formats are best for archiving blueprints? A: Use TIFF or PDF/A. These formats preserve quality and ensure long-term accessibility.
Q: How often should I back up my digital blueprint archive? A: Perform daily or weekly backups, depending on how frequently blueprints are updated. Use automated systems for consistency.
Q: What security measures should I implement for digital blueprint archives? A: Use access controls, multi-factor authentication, encryption, and security audits. Choose platforms compliant with ISO 27001 or SOC 2.
Q: How long should I retain archived blueprints? A: Depends on your industry. Consult legal teams to set retention periods that comply with regulations.
Q: Can I use cloud storage for archiving blueprints? A: Yes, but ensure providers are certified (SOC 2, ISO 27001) and offer data encryption and secure environments.
Q: What metadata should I include when archiving blueprints? A: Include:
Project name
Date of creation
Revision number
Author
Keywords and regulatory tags
Q: How do I handle obsolete or outdated blueprints? A: Clearly label them as obsolete, archive them separately, and follow disposal policies in accordance with your retention schedule.
Digitally preserving 20th-century involves blueprint scanning or photographing them at high resolution (300 DPI or more), using archival-quality formatslike TIFF, applying metadata, and storing them securely with regular backups. Large-format scanners, flatbed scanners, or non-contact digital photography are common methods based on blueprint condition and size.
The 20th century marked an era of groundbreaking innovation, producing countless architectural and mechanical blueprints. These documents are more than technical plans—they are historical records, reflecting the evolution of design, engineering, and culture.
Unfortunately, their physical form makes them vulnerable to fading, tearing, and decay. Digital preservation is the key to protecting these invaluable assets. This guide walks you through the most effective methods and best practices for digitizing and preserving 20th-century blueprints.
Why Digitize Blueprints?
Digitizing blueprints offers a host of benefits that go far beyond just backup. It ensures longevity, improves accessibility, and enhances usability.
Key Benefits:
Preservation: Protects against fading, tearing, water damage, and other forms of physical degradation.
Accessibility: Enables instant sharing and collaboration across locations.
Searchability: Allows keyword searches within documents, saving time and effort.
Restoration: Damaged or faded blueprints can be digitally enhanced and restored.
Cost-Effectiveness: Digital storage reduces physical archiving expenses.
Methods for Digitizing Blueprints
Different digitization techniques suit different types of blueprints. Here’s an overview:
1. Flatbed Scanning
Ideal for: Smaller or less fragile blueprints
Pros: High-resolution output at low cost
Cons: Time-consuming; may damage fragile blueprints
2. Large-Format Scanning
Ideal for: Oversized or thick documents
Pros: Fast and efficient for large blueprints
Cons: Expensive equipment required
3. Digital Photography
Ideal for: Extremely delicate or damaged documents
Pros: Non-contact method; minimal handling
Cons: Requires photographic expertise; prone to distortion if not done correctly
Step-by-Step Blueprint Digitization Process
Follow these six essential steps for reliable, high-quality results:
1. Assessment and Preparation
Inspect for tears, stains, or fading
Gently clean with a soft brush
Flatten using weights or a flattening table if needed
2. Choosing the Right Equipment
Match scanning method to blueprint size and condition
Use at least 300 DPI resolution
Calibrate devices for accurate color reproduction
3. Scanning or Photographing
Work in a clean, dust-free environment with good lighting
Use color targets for accurate color correction
Perform multiple scans at different settings for best results
4. Post-Processing
Crop, rotate, and straighten images
Adjust brightness and contrast
Remove blemishes with software like Adobe Photoshop
Save files in high-quality formats such as TIFF or JPEG
5. Metadata Tagging
Add details like title, date, creator, and keywords
Use consistent metadata schemas for organization and searchability
6. Storage and Backup
Store files securely on a server or cloud storage
Maintain multiple backups in separate locations
Recommended Tools and Software
Scanning Software:
Epson Scan
ScanSoft PaperPort
Image Editing Tools:
Adobe Photoshop
GIMP
Metadata Management:
ExifTool
Adobe Bridge
Cloud Storage Platforms:
Google Drive
Dropbox
Amazon S3
Best Practices for Long-Term Digital Preservation
Use Archival-Quality Formats: TIFF is the gold standard for lossless, long-term storage
Maintain High Resolution: Minimum 300 DPI to preserve fine detail
Data Migration: Regularly transfer files to newer media to prevent degradation
Disaster Recovery Plan: Ensure you have a documented plan in place
Access Control: Limit access to trusted personnel to avoid accidental changes
Insight
A study by the National Archives and Records Administration (NARA) reveals that digital preservation can extend the lifespan of documents by several centuries. Moreover, transitioning to digital archives can reduce physical storage costs by up to 80%, making it a financially sound solution.
FAQs
Q: What is the best resolution for scanning blueprints?
A: A minimum of 300 DPI is recommended for high-detail preservation and legibility.
Q: What file format should I use for long-term blueprint preservation?
A: Use TIFF for archival purposes due to its lossless compression. JPEG is suitable for quick viewing or web display.
Q: How do I clean blueprints before scanning?
A: Gently brush off dust and debris with a soft brush. Avoid water or chemicals to prevent damage.
Q: What if a blueprint is torn or fragile?
A: Consider using digital photography or consulting a conservator before attempting to scan.
Q: How often should I back up my blueprint archive?
A: Perform backups at least once a month and store them in a separate, secure location.
Conclusion
Digitizing 20th-century historic old blueprints is more than a preservation strategy—it’s a way to honor and safeguard our design heritage. By following the right techniques, using proper tools, and implementing best practices, you can ensure these vital documents remain intact, accessible, and usable for generations to come.
Which file format is best for storing and protecting blueprints in today’s digital world?
With construction workflows shifting from paper to pixels, choosing the right file format isn’t just about convenience—it’s about safeguarding data integrity, enabling collaboration, ensuring legal compliance, and future-proofing your documentation systems.
Whether you’re scanning legacy drawings, sharing construction documents across stakeholders, or editing master plans in real time, your decision between TIFF (Tagged Image File Format), PDF (Portable Document Format), and DWG (Drawing File Format) carries long-term implications.
Each format represents a different data structure and use-case priority:
TIFF, a raster-based image format, excels in archival preservation.
PDF, a hybrid vector-raster format, is ideal for distribution and annotation.
DWG, the native format of AutoCAD, holds the raw design intelligence needed for continuous editing and CAD modeling.
We’ll break down each format’s strengths and weaknesses in this guide, helping architects, engineers, and construction professionals determine the most efficient blueprint storage strategy based on project lifecycle, accessibility, and legal or technical demands.
In fact, approximately 93% of construction industry professionals agree that digitization impacts every process, reinforcing the urgent shift toward reliable, scalable digital blueprint formats.
Understanding File Formats
Choosing the right file format for storing blueprints is crucial in architecture, engineering, and construction (AEC). TIFF, PDF, and DWG are popular choices, each with unique strengths and weaknesses. This guide helps you decide which format best suits your needs for archiving blueprints.
TIFF is a raster-based image format renowned for its high-quality image preservation. It supports lossless compression, ensuring no image data is lost during the compression process.
This makes TIFF ideal for archiving detailed scans of blueprints and technical drawings. However, TIFF files tend to be large, which impacts storage and sharing efficiency. Additionally, TIFFs are not inherently searchable unless processed with OCR software.
PDF is a versatile format that can encapsulate both vector and raster data, making it suitable for a wide range of documents, including blueprints.
PDFs are universally accessible and viewable across platforms without specialized software. They support annotations, password protection, and text searchability. PDF/A, a subset, ensures documents remain accessible over the long term.
DWG is the native format for AutoCAD and is widely used in design and engineering. It stores comprehensive design data including 2D and 3D vector graphics, layers, and metadata.
DWG files are essential for ongoing design work, enabling precise editing and collaboration. However, they require specialized CAD software and are not ideal for archival stability due to versioning issues.
TIFF for Blueprints
Advantages:
High Image Quality: Retains excellent image quality, crucial for detailed blueprints.
Lossless Compression: Preserves image data without quality loss, ideal for archival.
Disadvantages:
Large File Sizes: Requires more storage space and slows down transfer/access.
Limited Compatibility: Some systems may need specific codecs or plugins.
Use Cases:
Archiving historical blueprints to maintain original quality.
Scanning blueprints for long-term storage and preservation.
PDF for Blueprints
Advantages:
Universal Compatibility: Works across all platforms and devices.
Compact File Size: Smaller than TIFFs, ideal for emailing and saving storage.
Security Features: Supports password protection and access controls.
Disadvantages:
Potential Quality Loss: Especially when converting complex drawings.
Editing Limitations: Requires specialized software for significant edits.
Use Cases:
Sharing blueprints with clients and contractors.
Creating digital archives with a balance of quality and file size.
DWG for Blueprints
Advantages:
Precision and Scalability: Vector-based for accurate modifications and infinite zoom.
CAD Software Integration: Seamless use with AutoCAD and CAD workflows.
Detailed Design Data: Includes layers, objects, and metadata.
Disadvantages:
Software Dependency: Requires CAD software, which may be costly.
Large File Sizes: Can be storage-heavy for complex blueprints.
Use Cases:
Active design and blueprint modification.
Collaboration among CAD-based teams.
Choosing the Right Format
Choose a format based on your specific blueprint needs:
For Archiving: Choose TIFF to maintain original detail.
For Sharing: Use PDF for compatibility and smaller file sizes.
For Active Design: Opt for DWG when working with CAD tools.
Best Practices for Blueprint Storage
Standardize File Naming: Use clear, consistent conventions.
Implement Version Control: Track all revisions and updates.
Regularly Back Up Files: Prevent data loss with consistent backups.
FAQ Section
Q: What are vector graphics?
A: Vector graphics use mathematical equations to define shapes, making them scalable without loss of quality. DWG files are vector-based.
Q: What are raster graphics?
A: Raster graphics are pixel-based. Quality depends on resolution. TIFF files are raster-based.
Q: Which CAD software is best for viewing DWG files?
A: AutoCAD is the standard, but alternatives include DraftSight and DWG TrueView.
Q: What is a Document Management System (DMS)?
A: A DMS helps store, manage, and retrieve digital documents, streamlining blueprint access.
Q: How does file compression affect blueprint quality?
A:Lossless compression (TIFF) preserves all data, while lossy compression (PDF) may sacrifice some detail to reduce size.
Q: What security features should I consider for blueprint storage?
A: Look for password protection, access controls, and encryption—all available in PDF formats.
By carefully evaluating the pros and cons of TIFF, PDF, and DWG, you can select the best blueprint format for your project goals. Pair your choice with strong file management, blueprint scanning and backup strategies to keep your data secure and accessible.
Efficient document management is vital in construction. It keeps projects organized and on track.
Large-format construction plans pose unique challenges. Flatbed and sheet-fed scanners offer viable solutions for digitizing these plans.
This guide helps construction professionals choose the right scanner for large format document scanning. It considers their specific needs and document types.
Understanding Flatbed Scanners
Flatbed scanners have a flat, stationary scanning surface. The document rests on this surface during scanning. They are ideal for fragile or bound documents.
Advantages of Flatbed Scanners for Construction Plans
Handles Fragile Documents: Flatbed scanners protect delicate blueprints and site maps.
Offers High Image Quality: They capture detailed architectural plans accurately.
Limitations of Flatbed Scanners
Slower Scanning Speeds: Flatbeds are not the fastest option for large volumes.
Higher Cost: Large-format models can be expensive.
Use Cases
Archiving historical blueprints requires a flatbed’s gentle touch.
Scanning delicate site maps ensures preservation of details.
Understanding Sheet-fed Scanners
Sheet-fed scanners use a roller system to pull documents through. They are best for stacks of loose, standard-sized papers. Automatic Document Feeders (ADF) enable batch scanning.
Advantages of Sheet-fed Scanners for Construction Plans
High Scanning Speeds: Sheet-fed scanners quickly digitize large quantities of documents.
Compact Size and Lower Cost: They are generally smaller and more affordable than flatbeds.
Limitations of Sheet-fed Scanners
Cannot Handle Fragile Documents: They are unsuitable for delicate or bound materials.
Potential for Paper Jams: Wrinkled or folded documents may cause jams.
Size Limitations: They are designed for standard-sized documents.
Use Cases
Digitizing invoices becomes more efficient with sheet-fed scanners.
Scanning contracts and standard-size documents is their forte.
Factors to Consider When Choosing a Scanner
Choosing the right scanner involves several key considerations. These range from document size to budget constraints.
Document Size and Format
Consider the range of document sizes used in your projects. Large-format scanners are essential for blueprints and oversized drawings. The best scanner for construction drawings often means a large-format option.
Document Condition
Use flatbed scanners for fragile or historical documents. Prepare documents for sheet-fed scanning by unfolding and flattening them.
Scanning Volume
Sheet-fed scanners with ADF are ideal for high-volume scanning.
Flatbed scanners are better for low-volume, high-quality scans.
Image Quality and Resolution
High resolution (DPI) is crucial for capturing fine details. Aim for at least 300 DPI for construction plans. A high-resolution scanner for technical drawings ensures clarity.
File Format Compatibility
Save scanned documents in compatible formats like PDF, TIFF, or JPEG.
Scanners with OCR capabilities convert images into editable text.
This aids in creating easily searchable digital archiving for construction projects.
Budget
Balance scanner capabilities with your budget. Prices vary widely based on features and size.
Here’s a quick comparison table to summarize the pros and cons:
Feature
Flatbed Scanner
Sheet-fed Scanner
Document Handling
Fragile, Bound, Oversized
Loose, Standard-sized
Speed
Slower
Faster
Volume
Low to Medium
Medium to High
Quality
High
Good to High
Cost
Higher (especially large-format models)
Lower
Conclusion
Flatbed and sheet-fed scanners each have unique strengths. Choosing the right one depends on your specific needs. Consider document types, volume, and budget. For scanning construction documents best practices, match the scanner to the task.
Flatbed vs. Sheet-fed Scanners FAQs
Q: What DPI is recommended for scanning construction plans?
A: Aim for at least 300 DPI to capture fine details accurately. Higher resolutions (e.g., 600 DPI) may be necessary for intricate drawings.
Q: Can I scan oversized blueprints with a standard flatbed scanner?
A: No, standard flatbed scanners are limited by their scanning area. You’ll need a large format scanner for blueprints designed for oversized documents or consider scanning in sections and stitching them together digitally using software.
Q: Is OCR software necessary for scanning construction documents?
A: OCR software is beneficial if you need to edit or search the text within scanned documents. It converts scanned images into editable text formats.
Q: Are sheet-fed scanners suitable for scanning old, wrinkled construction documents?
A: Sheet-fed scanners may struggle with wrinkled or fragile documents, leading to paper jams or damage. Flatbed scanners are more suitable for such documents.
Q: How do I choose between color and monochrome scanning for construction plans?
A: Color scanning is essential if the documents contain color-coded information or markings. Monochrome scanning is sufficient for documents with only black and white text and lines and can reduce file sizes.
Q: What file format is best for archiving scanned construction documents?
A: PDF/A is generally recommended for long-term archiving due to its preservation-focused design, ensuring the document remains accessible and unaltered over time. Consider construction document scanning services if archiving is a primary concern.
What would happen if your handwritten lab notebooks were lost in a fire, flood, or accidental mishap?
For many research labs, years of critical data — experiment records, methodology notes, sample tracking, and observations — are still captured in physical lab notebooks. While they hold immense intellectual value, they remain vulnerable to disasters, degradation, or human error, with no reliable backup. In a worst-case scenario, the permanent loss of such documentation could set back years of research, compromise reproducibility, or even violate compliance protocols.
Disaster recovery strategies for lab data must begin with securing your most irreplaceable records — and that starts by digitizing handwritten lab notebooks into high-quality, searchable, and preservable formats. By converting analog data into accessible digital formats, labs can ensure better data continuity, improved access control, and long-term protection against physical data loss.
This article explores the key strategies for building a disaster recovery plan centered around data digitization and retention. It includes how services like eRecordsUSA help labs protect valuable intellectual property by providing secure, high-resolution scanning and digital archiving solutions tailored specifically for scientific and research environments.
Why Lab Data Requires Specialized Disaster Recovery Strategies?
Lab data isn’t just information — it’s the backbone of discovery, intellectual property, regulatory accountability, and scientific credibility. But many labs still rely on handwritten notebooks, paper-based protocols, and physical documentation that are fragile, irreplaceable, and often siloed.
Unlike typical digital files, physical lab records are prone to degradation, accidental damage, environmental exposure, and organizational loss. More importantly, they often hold the only copy of original experiments, calibration notes, and observations that are required for audits or reproducibility.
A single event — such as a fire, flood, chemical spill, or even simple misplacement — can result in irreversible data loss.
Here’s what makes lab data uniquely vulnerable:
Volume & Complexity – Labs generate large volumes of data — from experimental notes to sample identifiers — often distributed across binders, boxes, and handwritten pages with no centralized repository.
Compliance Sensitivity – Regulatory frameworks like Good Laboratory Practices (GLP) and GxP require that original data, including lab notebooks, be retained, legible, and accessible for audits. Loss or degradation of these records can lead to non-compliance or data integrity issues.
Reproducibility Requirements – Scientific validation relies heavily on the ability to reproduce experimental results. If original handwritten documentation is lost or illegible, the scientific value of the data is compromised.
No Built-in Redundancy – Unlike digital systems with automatic backups, physical records have no recovery mechanism unless they’ve been professionally scanned and digitally archived.
This is why disaster recovery strategies for lab data must begin with a data digitization plan — one that converts vulnerable analog records into secure digital formats. With services like eRecordsUSA, labs can professionally scan handwritten notebooks into indexed, searchable, and compliance-friendly digital archives, ensuring long-term preservation and protection against physical loss.
Key Components of a Lab Disaster Recovery Plan
Once the risks to handwritten lab data are understood, the next step is building a disaster recovery plan (DRP) specifically tailored for physical-to-digital data workflows. A well-crafted DRP ensures that vital research documentation is digitized and protected, accessible, and recoverable in the event of disruption.
Below are the essential components that make a disaster recovery plan effective for lab environments still reliant on handwritten records:
1. Data Identification & Prioritization
Begin by identifying which lab notebooks and physical records are mission-critical, compliance-sensitive, or irreplaceable. Prioritize scanning based on:
Experimental value
Regulatory relevance
Frequency of use
Pro Tip: eRecordsUSA helps labs audit and organize large volumes of historical notebooks before digitization.
2. High-Resolution Digitization & Indexing
Once prioritized, the records must be professionally scanned using high-resolution imaging, ensuring:
Legibility under magnification
Support for faded ink, smudges, or damaged pages
Inclusion of metadata for searchability (e.g., researcher name, date, project)
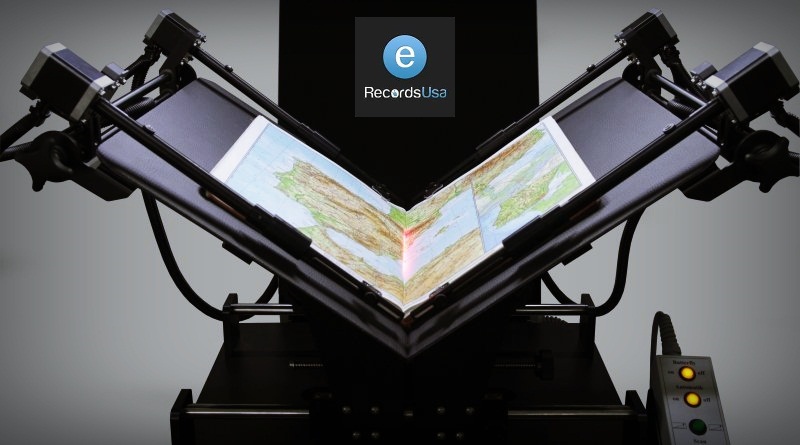
Use of a specialized book scanner that performs non-destructive scanning, ensuring books are returned in the same condition they were received
Pro Tip: eRecordsUSA uses advanced imaging technology designed specifically for biotech lab notebook preservation, enabling accurate research data scanning without risking any physical damage.
3. Secure Digital Archiving
Digital files should be stored in redundant, secure repositories with role-based access and encryption where possible.
4. Retention & Retrieval Policies
A disaster recovery plan should define:
How long digitized records are retained?
How and who can retrieve them?
How file integrity is monitored over time?
This ensures data governance and supports audit readiness.
5. Testing and Validation
At regular intervals, labs should simulate retrieval or file recovery scenarios. Test:
Whether digitized records are intact
Whether files are retrievable by intended users
Whether SOPs for data access are up to date
By incorporating these core components into your disaster recovery planning, you create a foundation of data resilience — where scientific records are preserved and protected even if the originals are lost. This approach safeguards research and positions your lab to meet evolving compliance and reproducibility standards.
In research and scientific labs, disaster recovery isn’t just about safeguarding data — it’s also about maintaining compliance with regulatory and quality standards that require accurate, secure, and accessible documentation.
For labs that still rely on handwritten notebooks, physical damage or data loss could mean more than lost research — it could mean regulatory violations, audit failures, or legal liability.
Why Regulatory Compliance Depends on Proper Recordkeeping?
Regulatory frameworks require that lab documentation be:
Accurate and complete
Legible and durable over time
Protected against unauthorized changes or damage
Accessible during audits or inspections
If a notebook is lost, water-damaged, faded, or misfiled — and there’s no digital backup — the lab could face:
Loss of data integrity
Inability to reproduce experiments
Compliance breaches
Key Standards That Emphasize Data Preservation
Standard or Framework
🔍 Relevance to Lab Notebooks
GLP (Good Laboratory Practice)
Requires proper storage and handling of original research records
GMP / GxP
Emphasizes traceability, legibility, and documentation integrity
HIPAA (for clinical research)
Requires secure and accessible records for any health-related data
ISO 9001 / ISO 13485
Requires control over quality documents and long-term access
How Digitization Supports Regulatory Expectations?
By converting handwritten lab notebooks into high-quality digital formats, labs can:
Ensure permanent legibility, even if originals degrade
Enabling quick retrieval of records during audits or inspections
Protect against physical loss due to fire, flooding, or human error
Through secure scanning services, eRecordsUSA helps labs create searchable, organized, and audit-ready digital archives of their physical notebooks — preserving compliance-critical records without requiring full digital lab management systems.
Moreover, eRecordsUSA emphasizes non-destructive scanning techniques using specialized book scanners, ensuring compliance standards are met while books are returned in the same condition as received.
We ensure that books integrity is maintained, and not destroyed in the digitization process. In the eyes of regulators, if it’s not retrievable, it doesn’t exist. A disaster recovery plan that includes professional digitization ensures that your records remain verifiable, accessible, and inspection-ready, no matter what threats your physical documents may face.
Real-World Example: When Records Are Gone, They’re Gone
Real-world events have highlighted the irreversible risks of not digitizing important records. In 2014, the Boles Fire in Weed, California, destroyed the Holy Family Catholic Church, resulting in the complete loss of its sacramental registers — documentation that held decades of irreplaceable information.
This incident is a sobering reminder: whether in religious institutions or scientific laboratories, physical-only records remain vulnerable to disaster. Digitization is the only way to preserve their integrity and ensure recoverability.
Check out the complete information about this incident here:
Disaster Recovery Methods – Why Digitization Comes First?
When it comes to protecting lab data, especially from handwritten notebooks, digitization is the foundation upon which all other disaster recovery strategies are built. Without converting physical records into digital formats, recovery isn’t possible — no matter how advanced the infrastructure.
Below is a breakdown of key recovery concepts and how digitization plays a vital role in each:
Recovery Method
What It Means
Why Digitization Is Essential
How eRecordsUSA Supports It
Digitization
Scanning handwritten lab notebooks into searchable, high-resolution files
Creates the baseline digital format for any backup, recovery, or archive strategy
Provides secure, high-quality scanning & file output optimized for long-term use
Local Storage
Files stored on internal servers, external hard drives, or NAS devices
Only works if data exists digitally; physical notebooks can’t be “backed up”
Digitized files can be easily stored on local lab infrastructure
Offsite Storage
Storing data at a secondary physical or cloud-based location
Protects against local disasters (fire, theft, etc.)
Delivers portable digital files that can be uploaded to any secure platform
Disaster Recovery Software
Tools that automate file backup, version control, and failover
Can’t include paper documents unless digitized
Digitization enables seamless integration with any DR software
All recovery methods depend on one thing: the data must already be in a digital format. Without digitization, labs are at risk — no matter how advanced their infrastructure.
Services like eRecordsUSA help research teams secure their most vulnerable records by providing professional digitization — the critical first step in any lab disaster recovery plan.
Lab Data Lifecycle & Retention – Planning for Long-Term Integrity
Digitizing your lab notebooks is just the first step. Once physical records are converted into digital assets, labs must think about how those files will be managed over time — from secure storage to future retrieval and eventual archiving or expiration.
This is where a well-defined lab data lifecycle and retention policy come in — ensuring your digitized records remain accessible, compliant, and protected for the long haul.
What Is the Lab Data Lifecycle?
The lab data lifecycle refers to the stages your lab records go through, from their creation to their final disposition. In the context of digitized notebooks, this includes:
Stage
Description
Capture
Scanning handwritten notebooks into digital files
Classify & Index
Adding metadata: experiment type, project, author, date
Store & Protect
Saving files in secure storage locations (on-site or offsite)
Access & Retrieve
Controlled access for audits, analysis, or reproducibility
Archive or Dispose
Long-term storage or secure deletion after the retention period ends
Why Retention Policies Matter in Labs?
Many labs operate under compliance mandates that require data to be:
Retained for specific timeframes (5, 10, or even 25 years)
Not altered or overwritten
Available on demand during audits or investigations
Failing to retain research documentation properly can:
Jeopardize grant funding
Lead to failed regulatory audits
Undermine scientific reproducibility
How eRecordsUSA Supports Lifecycle Management?
With eRecordsUSA’s high-quality scanning and indexing, labs can:
Create searchable digital archives aligned with their retention policy
Easily sort or filter documents by project, researcher, or date
Store files in formats compatible with institutional or offsite storage systems
Even though eRecordsUSA doesn’t host data, our digitization service ensures that labs can plug files into any preferred storage solution, setting the stage for consistent long-term management.
Tools & Technologies – How Digitization Enables Resilient Data Management
While many labs today are exploring digital transformation, a large number still rely on handwritten notebooks, physical binders, and paper-based records. For these labs, implementing disaster recovery strategies doesn’t begin with software — it starts with technology that converts physical data into digital assets.
That’s where high-resolution scanning, metadata tagging, and structured archiving become essential tools in the disaster recovery toolbox.
Digitization Tools: Laying the Foundation
Before any backup, archiving, or disaster recovery system can function, the data must exist digitally. Here’s how digitization acts as the enabler:
Technology
Purpose
Role in Disaster Recovery
High-Resolution Scanners
Captures handwritten records in exact detail
Ensures legibility and accuracy for long-term use
OCR (Optical Character Recognition)
Converts scanned images into searchable text
Enables quick retrieval during audits or reviews
Indexing & Metadata Tagging
Categorizes files by project, date, researcher, etc.
Improves organization and traceability of lab records
PDF/A & Archival Formats
Ensures long-term compatibility & standardization
Prevents file format obsolescence in future systems
Secure Delivery Mechanisms
e.g., encrypted drives or institutional uploads
Maintains data integrity from scan to storage
Unlike generalized IT systems, scientific documentation has specific requirements: records must be legible, verifiable, organized, and preserved with full context. Tools provided by digitization partners like eRecordsUSA are designed with this in mind — offering:
True-to-source scans that preserve handwriting, margins, and annotations
Structured file naming for easy integration into lab record systems
Searchable file formats that make audits and reference work efficient
Even if your lab plans to store files on local servers, institutional drives, or third-party platforms, the quality of the scanned documents determines their future usability.
Implementation Best Practices and Operational Considerations
Transitioning from handwritten lab notebooks to a secure digital archive requires more than just scanning pages — it requires a structured, thoughtful approach that ensures your records are preserved, accessible, and audit-ready. A strong disaster recovery plan isn’t effective without strategic implementation and ongoing information governance.
Below are best practices labs should follow to maximize the long-term effectiveness of their digitization efforts.
Best Practices for Digitizing and Protecting Lab Records
Step
Description
Purpose
1. Identify and Prioritize Critical Records
Start with notebooks containing experimental data, regulatory documentation, or long-term research
Ensures vital data is digitized first and properly preserved
2. Establish a Metadata and File Indexing System
Tag digital files with project names, dates, researcher IDs, and study types
Improves future access, traceability, and internal organization
3. Define Retention and Archiving Rules
Align document retention periods with regulatory guidelines and institutional policies
Supports compliance, reproducibility, and documentation control
4. Partner with a Qualified Scanning Provider
Choose a service experienced in handling scientific, handwritten materials
Ensures scan fidelity, legibility, and structured file delivery
5. Validate Accessibility and Retrieval Processes
Test how easily users can find and retrieve digitized records when needed
Prepares your lab for audits, inspections, and collaboration needs
Labs can also benefit from bulk scanning options, where scanning can be done in batches, streamlining large-scale digitization without overwhelming daily operations.
eRecordsUSA supports these best practices by delivering digitized lab notebooks in professionally indexed, high-resolution digital formats.
We also accommodate bulk scanning, allowing scientific institutions to efficiently digitize large volumes of records in one go or in manageable batches. This enables labs to organize, store, and protect their historical records confidently.
Final Checklist and Disaster Recovery Readiness Summary
Implementing an effective disaster recovery strategy for lab data begins with a simple but critical realization: if your records exist only on paper, they are at risk. From environmental threats to compliance obligations, laboratories today need more than just protocols — they need digitally accessible documentation that protects institutional knowledge, satisfies regulators, and supports research reproducibility.
Below is a quick-reference checklist to help your lab assess its current preparedness and identify immediate areas for improvement.
Disaster Recovery Readiness Checklist for Labs
Checklist Item
Status
Have you identified which handwritten notebooks are most critical to research continuity or regulatory compliance?
☐ Yes ☐ No
Are your physical lab records digitized into high-resolution, organized digital files?
☐ Yes ☐ No
Are your digital files indexed with metadata (e.g., researcher, project, date) for easy retrieval?
☐ Yes ☐ No
Do you have a secure storage location for digital versions of lab notebooks (local or offsite)?
☐ Yes ☐ No
Do you have retrieval processes in place in the event of data loss, audit, or disaster?
☐ Yes ☐ No
Are retention policies in place for long-term digital file management based on lab type or compliance needs?
☐ Yes ☐ No
Final Thoughts
Disaster recovery is not only about anticipating what can go wrong — it’s about ensuring what matters most is never lost. For labs still relying on paper-based records, digitization is a foundational step toward continuity, compliance, and operational readiness.
Partnering with a trusted provider like eRecordsUSA enables you to:
Secure your legacy research
Create organized, compliant digital archives
Prepare your lab for modern data requirements
Take the first step today by evaluating the state of your lab’s physical records. If you’re ready to convert handwritten lab notebooks into secure, audit-ready digital archives, eRecordsUSA is ready to help you move forward.