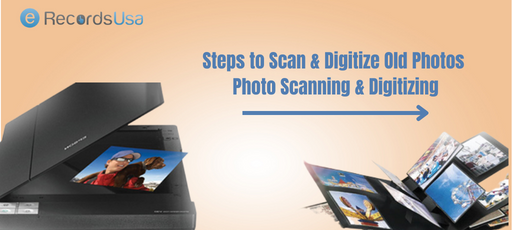
Steps to Scan & Digitize Old Photos – Photo Scanning & Digitizing
Last Updated on March 12, 2026
Do you have stacks of fading family photos gathering dust in albums or boxes, at risk of being lost forever to time and elements?
Yes, countless families do.
88% of surveyed parents report feeling closer to their loved ones when viewing printed family photos, underscoring an emotional power in preserving generational stories and heritage. (Source)
Scanning and digitizing old photos transforms these fragile prints, negatives, slides, and transparencies into durable digital assets, safeguarding irreplaceable memories against deterioration – yellowing, fading, and scratches that accelerate above 60% relative-humidity. (Source)
This complete guide covers everything from why photo preservation matters in our digital photography era, where the market hit $75.99 billion in 2030, to step-by-step methods, equipment, restoration techniques, and cost comparisons.
For seamless, professional results, eRecordsUSA offers:
- Expert steps to scan & digitize old photos,
- Ensuring high-resolution archival quality tailored for family history enthusiasts.
Physical photos hold irreplaceable memories, but they won’t last forever without action. Understanding their vulnerability leads to exploring which types of images can actually be saved.
Why Digitizing Old Photos Is Important?
Physical family pictures fade 30-50% within 20 years from light and humidity exposure, risking permanent loss of irreplaceable memories like grandparents’ weddings or childhood milestones. Converting prints, negatives, and slides to digital files creates disaster-proof backups and enables instant sharing across generations.

What It Means to Digitize Old Photos?
Digitizing old photos means converting physical prints, negatives, or slides into digital files using scanners or apps. This creates backups that resist environmental damage while enabling easy sharing and editing.
Benefits of Converting Photos to Digital Format
The top benefits of converting photos to digital formats are:
- Disaster-proof backups protect against fire, flood, or theft that destroys physical copies
- Instant sharing via email, social media, or cloud links connects generations effortlessly
- AI restoration revives faded colors, scratches, and dust automatically
- Endless copies without quality loss—print, edit, or enlarge anytime
This preservation transforms fragile heirlooms into enduring digital legacies accessible forever. With so many photo formats at risk, knowing your options is key before selecting tools.
Types of Photos That Can Be Digitized
Several types of photos can be digitized, including:
- Printed Photographs and Photo Albums – Standard prints from albums scan easily on flatbeds, capturing family snapshots and portraits. Multi-photo scanning speeds up album processing.
- Film Negatives – The next are negatives that require specialized scanners or adapters to invert into positives. Editing software adjusts lighting and color post-scan.
- Slides and Transparencies – 35mm slides use dedicated scanners for great detail. Higher volumes benefit from professional handling to avoid dust.
- Large Format or Fragile Photos – Oversized or delicate items need camera setups or pro services to prevent damage during capture.
Choosing the right gear sets the foundation for success. Now, let’s walk through the precise steps to execute a flawless image digitization process.
Methods and Equipment for Digitizing Old Photos
There are series of equipment and methods to digitize old images, like:
- Flatbed Photo Scanners – Epson models like Perfection V200 offer 4800 DPI for detailed scans without computer dependency in some cases. These scanners are ideal for home use with batch capabilities.
- Smartphone Photo Scanning Apps – Apps like Photomyne detect edges and process multiples quickly. On the other side, Google PhotoScan reduces glare via multi-angle capture. The choice of selection completely depends on your scanning requirements.
- DSLR or Camera Copy Stand Setup – Professional setups use even lighting and stands for superior quality, fragile items. Common in services for archival results.
- Professional Photo Digitization Services – Services like eRecordsUSA handle bulk photo scanning requirements with high DPI.
Following these steps ensures quality results every time. Fine-tuning your scanner settings takes this process to professional levels.
Step-by-Step Process to Scan & Digitize Old Photos

Here is the 8-step process to scan and Digitize Old Photos
- Step 1: Sort and Organize Your Photo Collection – Group by event, date, or person; discard duplicates to streamline. Label boxes for reference.
- Step 2: Clean and Prepare Photos Before Scanning – Gently dust with microfiber; avoid liquids on emulsions. Flatten curled edges under weight.
- Step 3: Choose the Best Digitization Method – Match to volume: scanners for quality, apps for speed, pros for bulk.
- Step 4: Set Scanner Resolution and Color Settings – Aim for 600 DPI at 24-bit color for balance. Use 36-bit for pros.
- Step 5: Scan or Photograph Each Photo – Place face-down; preview for alignment. Batch where possible.
- Step 6: Crop, Rotate, and Enhance the Image – Use software to trim edges and fix orientation. Basic edits revive clarity.
- Step 7: Save the Image in the Correct File Format – TIFF for lossless archiving; JPEG for sharing.
- Step 8: Organize and Back Up Your Digital Photos – Tag with metadata; store multiple.
Optimal settings maximize detail and longevity. But is a scanner always necessary? Compare it directly to smartphone alternatives.
Recommended Scanner Settings for Digitizing Photos
Let’s explore the DPI Settings, resolution, and much more in detail:
- Best DPI Settings for Photo Scanning – 600 DPI suits most prints for editing flexibility; 1200+ for small or restoration needs. 300 DPI for basic viewing.
- Understanding Resolution and Color Depth – DPI measures detail; 24-bit captures 16 million colors standardly, 36-bit for precision pros.
- Choosing Between JPEG, TIFF, and PNG Formats – TIFF preserves all data losslessly; JPEG compresses for the web; PNG suits transparency but less for photos.
Each method has strengths, especially for varying collection sizes. For larger hauls, learn strategies to handle volume efficiently.
How to Digitize Large Photo Collections?
Digitizing a large photo collection is less about individual images and more about designing an efficient workflow. The goal is to balance time, quality, and cost so you can move thousands of prints, negatives, or slides into a reliable digital archive without burning out.
How Long Does It Take to Digitize Old Photos?
The time required to digitize old images depends on your method, resolution, and the amount of cleanup you want per image. A detailed DIY workflow, including cleaning, scanning, and basic edits, can average 3–7.5 minutes per photo, which means a 3,000-photo collection can easily require 300+ hours of hands-on work.
Even with a more streamlined approach, home users often scan only 20–30 photos per session, stretching large projects across weeks or months.
Digitizing Hundreds or Thousands of Photos Efficiently
Efficiency comes from batching every step instead of treating each photo as a separate project.
- Sorting and cleaning in large groups,
- Using auto-cropping or auto-rotation tools, and
- Scanning multiple prints in one pass significantly reduce time spent per image.
For collections in the hundreds or thousands, plugging high-volume sessions into your weekly schedule or outsourcing a portion of the work to a bulk photo scanning service like eRecordsUSA helps you reach the finish line much faster.
Batch Scanning Techniques
Batch-capable scanners and feeders can transform the pace of your project.
- Dedicated photo feeders such as Canon’s imageFORMULA RS40 can scan up to 40 prints in a single batch at around 30 photos per minute, dramatically outperforming traditional flatbed scanners and manual smartphone captures.
- Another effective tactic is to place multiple prints on a flatbed, scan them together at high resolution, and then use software to auto-detect and crop each photo into separate files, which is especially effective for smaller prints.
When Bulk Photo Scanning Services Make Sense?
Once your project crosses a few hundred images, the time cost of doing everything yourself becomes significant, especially when a 1,000–2,000 photo collection can easily demand dozens of hours of sorting, cleaning, scanning, and basic editing.
Bulk photo scanning labs often price larger jobs on a sliding scale, with sample rates in the 0.25–0.50 USD per-photo range for 500–1,000 prints, and even lower pricing as quantities increase, particularly when you ship entire boxes or albums together.
For busy families or anyone with tens of albums to preserve, outsourcing ensures consistent quality, high-speed batch scanning, and delivery on USB or cloud while you focus on organizing and sharing the results.
This is where eRecordsUSA’s bulk photo scanning services become especially valuable, offering professional-grade resolution, careful handling of fragile prints, and flexible delivery options tailored to large family archives and legacy projects.
What to Look for in a Photo Digitization Company?
When choosing a photo digitization company, focus on trust, quality, and how safely they handle your originals. A reliable provider should clearly explain how they protect, scan, and deliver your memories, not just advertise low prices.
Key things to look for include:
- Proven experience and reputation: Check independent reviews, testimonials, and any media or professional mentions that show a consistent track record of careful handling and good results.
- High-quality scanning standards: Look for clearly stated resolution options (at least 300–600 DPI or higher), examples of scan quality, and included services like dust removal, rotation, and basic color correction.
- Safe handling and security: Confirm how your photos are tracked, stored, and transported, whether they stay in-country, and what protocols exist to prevent loss or damage.
- Transparent pricing and deliverables: The company should list what is included in the price (resolution, file format, organization, basic edits) and how your files are returned (USB, cloud download, or both), without hidden add‑ons for essential features.
- Responsive customer support: Look for knowledgeable support via phone, email, or chat, with clear communication before, during, and after the project, plus a satisfaction guarantee or re-scan policy.
A partner like eRecordsUSA that combines archival-quality scanning, careful chain-of-custody, and transparent communication will give you far more confidence than a low-cost provider that treats your photos like ordinary documents
Preserve Your Memories Forever
Digital copies of your family photos ensure they endure beyond physical decay, ready for generations to share effortlessly. You’ve mastered the steps to scan & digitize old photos—now protect those irreplaceable moments with erecordsusa.com’s professional photo digitization services for high-resolution, archival-quality results.
Ready to safeguard your family history? Call us at 1.510.900.880, or write us at [email protected] today for a free quote on bulk photo scanning services —start preserving your legacy today!!!
FAQs About Photo Digitization Services
Q: What should I do with original photos after digitizing them?
- A: Store prints in acid-free boxes in a cool, dark, dry space, off the floor and away from attics or basements, so physical photos stay protected even after you’ve created a digital archive.
Q: How can I name and organize photo files for easy searching?
- Use consistent file names with date, event, and key people (for example, 1998-06-15-family-reunion-smith.jpg) and mirror that structure in folders so search and filtering stay fast and intuitive.
Q: Are there privacy risks when storing digitized photos in the cloud?
- Cloud storage adds redundancy but can raise privacy concerns, so choose services with strong encryption, clear ownership terms, and regular account reviews to avoid lockouts or unwanted data access.
Q: Is it legal to share old family photos of children online?
- Parents usually control minors’ image rights, but oversharing can still raise privacy or legal issues, so always check the privacy policy of the websites or platforms before doing so.
Q: How can I share digitized photos with family without oversharing?
- Create curated private albums, share via invite-only links or encrypted drives, and confirm everyone’s comfort level so your family can enjoy memories without sacrificing control or privacy.