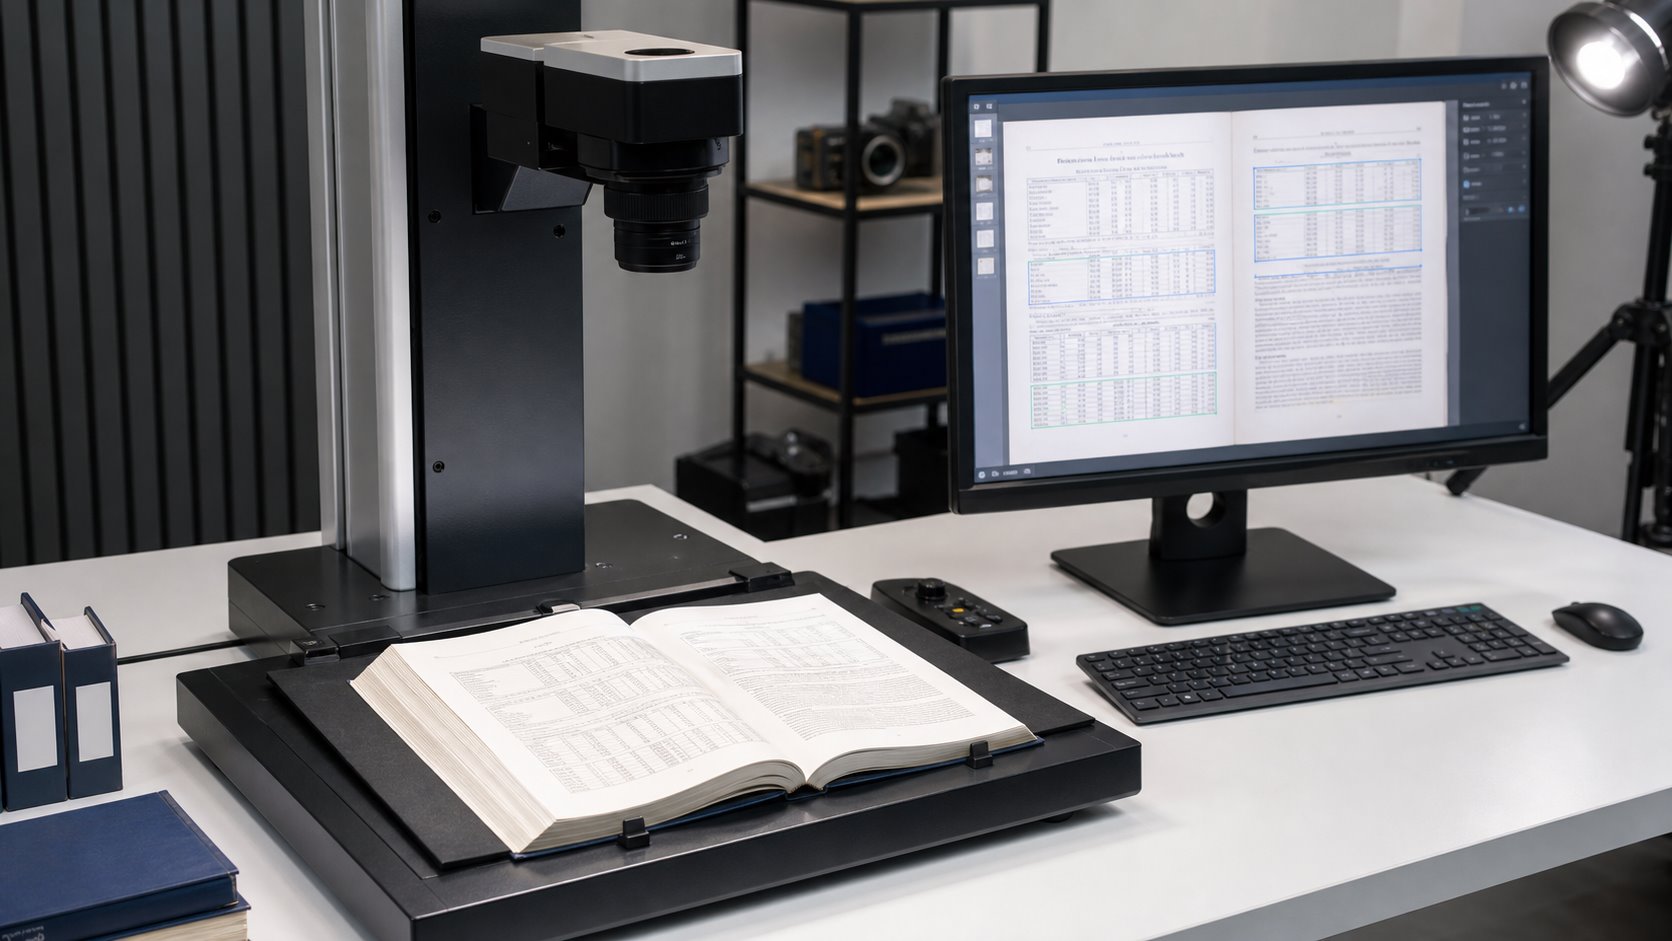
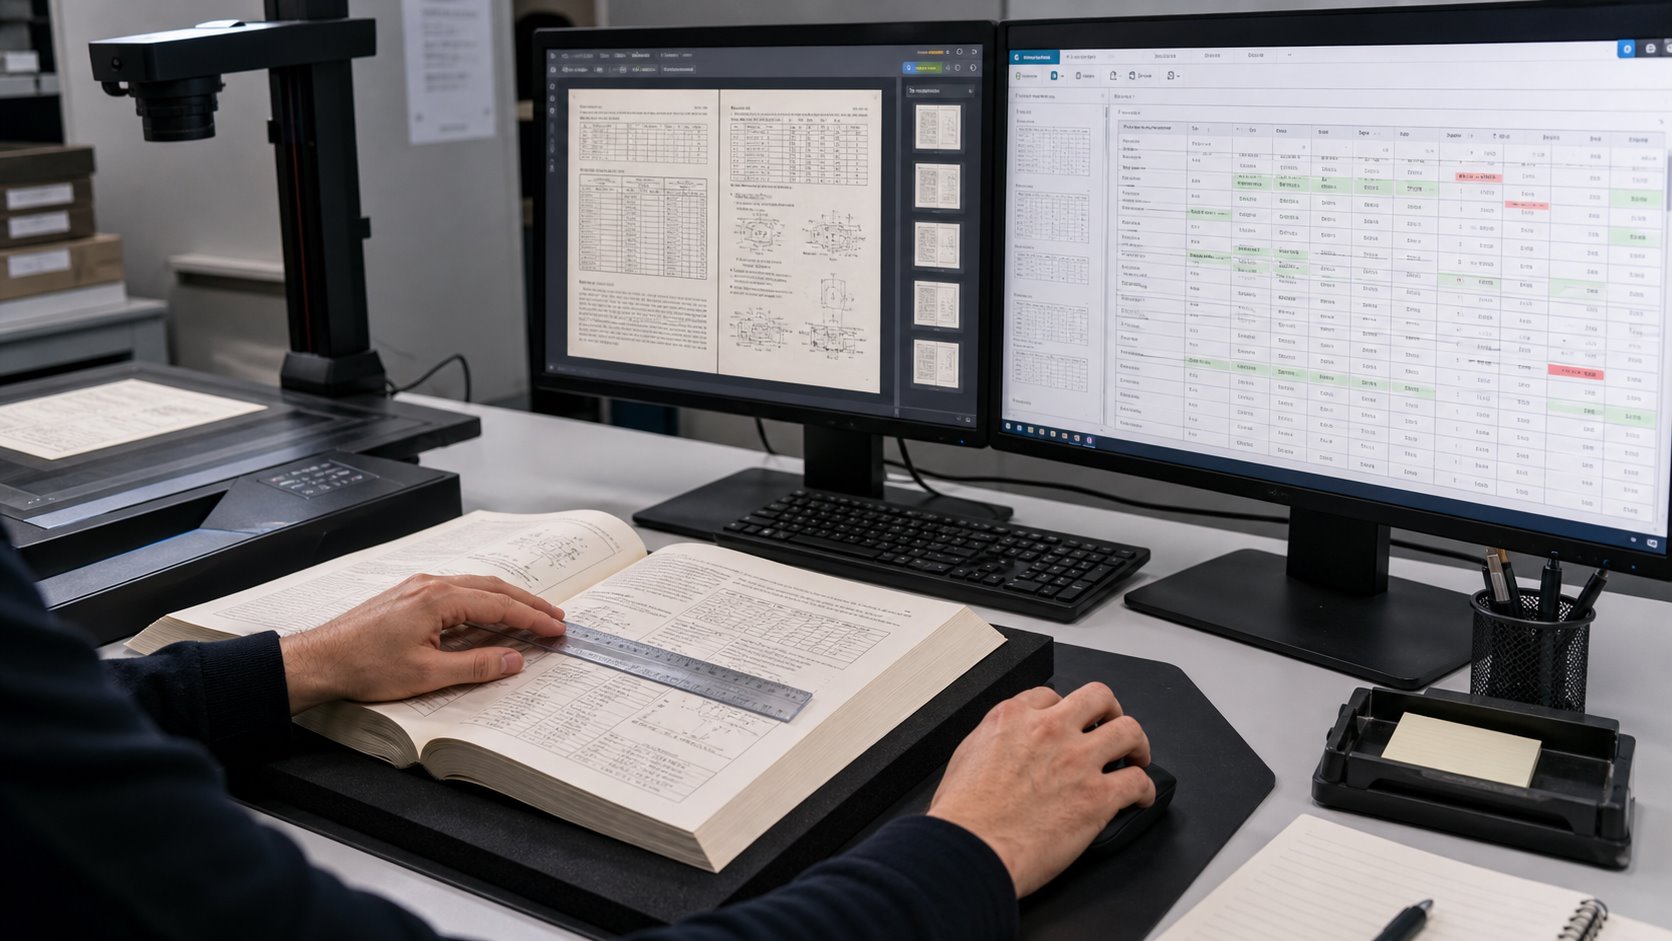
OCR can preserve tables and numbers in scanned manuals, but only when the workflow recognizes page structure as well as individual characters. A basic text layer may make a PDF searchable while still placing a quantity under the wrong column, dropping a decimal point, or reading a table row in the wrong order. For estimating manuals, technical references, price books and standards, those structural errors can matter more than an occasional misspelled word.
The reliable approach combines a clear source image, layout-aware OCR, representative-page testing and targeted human quality control. The goal should be defined before scanning begins: do you need to search the original page, extract reusable table data, prepare text for an internal knowledge base, or produce all three?
Direct answer: OCR table accuracy depends on two separate tasks: recognizing the characters and preserving the relationships among headings, rows, columns, units and page references. A successful project validates both.
Why Are Tables and Numbers Harder for OCR to Recognize?
Ordinary paragraphs give an OCR engine helpful context. If one letter is uncertain, the surrounding word and sentence may help resolve it. A numerical table offers less linguistic context. A single character may be a quantity, part number, measurement, percentage or currency value, and several alternatives may look visually plausible.
Structure creates a second challenge. A person can see that a value belongs beneath a particular heading. Basic OCR may instead flatten the page into a stream of text. This can disconnect values from their labels, merge adjacent columns or insert a footer between rows. Modern document-analysis systems address this by identifying cells, merged cells, column headers, table titles and other layout elements. For example, Amazon Textract documents separate table objects for cells, merged cells, headers, titles and footers.
OCR challenge
Possible error
Why it matters
Similar characters
0/O, 1/I, 5/S or 8/B substitutions
Changes quantities, identifiers and reference codes
Small punctuation
Lost decimal points, commas or currency symbols
Can materially alter prices and measurements
Dense or faint gridlines
Split cells or merged rows
Moves data away from its correct heading
Multi-column pages
Incorrect reading sequence
Produces confusing search results and text exports
Repeated headers and footers
Page furniture inserted into table data
Pollutes exports and AI retrieval results
Layout-aware analysis identifies table regions, headings, rows and columns before the text is used for search or extraction.
What Is the Difference Between Searchable OCR and Structured Table Extraction?
A searchable PDF and a spreadsheet are not equivalent deliverables. Searchable OCR normally places an invisible text layer behind the page image. Readers still see the original table and can search for a phrase or number, but the hidden text may not reproduce every row-and-column relationship outside the PDF.
Structured extraction goes further. It attempts to represent each table as rows, columns and cells that can be exported to CSV, Excel, JSON or another machine-readable format. This requires layout analysis and usually demands more validation. Google describes the same distinction in its layout-parser documentation: standard OCR can flatten documents and lose context, while layout-aware parsing preserves elements such as tables, headings and lists.
A sample should test the hardest pages, not merely the cleanest ones. Processing ten easy pages successfully says little about a 3,000-page manual containing faded schedules, small footnotes, landscape tables and color reference sections.
Select representative pages before approving the full production workflow. The test should use the proposed capture settings, OCR configuration, output format and quality-control method. Review the results against written acceptance criteria so that “accurate OCR†has a project-specific meaning.
Test page
What to inspect
Acceptance question
Dense numerical table
Decimals, symbols, row labels and totals
Do values remain under the correct headings?
Small type or footnotes
Character separation and superscripts
Can critical qualifiers be searched and read?
Multi-column page
Reading order and section boundaries
Does exported text follow the intended sequence?
Grayscale or color page
Contrast, captions and visual references
Are visual distinctions retained without obscuring text?
Damaged or faint page
Background noise and low-confidence regions
Will the page be corrected, flagged or manually reviewed?
Test the hardest pages before the full production run
Validate dense tables, small numbers, page order and required exports with a representative OCR sample.
How Does Layout Analysis Preserve Table Structure?
Layout analysis divides a page into meaningful regions before or alongside character recognition. It can distinguish a table from surrounding paragraphs, identify headers and footers, and represent cells by row and column. This prevents a visually correct page from becoming a disorganized text export.
The required level of structure depends on the final use. A searchable PDF may only need reliable text coordinates that follow the original page. A data project may need explicit cells, column names and relationships. A knowledge-base project may need headings, page numbers and tables retained together so retrieved passages still make sense when separated from the full manual.
Complex layouts still require testing. Merged cells, nested headings, tables continuing across pages and notes placed inside a table can be interpreted differently by different tools. The purpose of the sample is therefore not to select software by reputation alone; it is to determine whether the proposed workflow handles the actual manuals.
Which Image-Processing Steps Improve OCR Table Accuracy?
OCR quality begins with the image. Cropping removes irrelevant borders. Deskewing straightens baselines and gridlines. Orientation correction prevents rotated pages from being analyzed incorrectly. Controlled contrast can help separate type from a faded background, while overly aggressive cleanup may erase punctuation or thin table rules.
Resolution should be selected according to character size, source condition and intended output. This article does not repeat the full resolution decision because eRecordsUSA already provides a dedicated comparison of 300 versus 600 DPI for document scanning and OCR. For a table-heavy manual, the practical rule is to confirm the chosen setting against small numerals, decimals and fine rules during the sample test.
Blank-page handling also needs a written rule. Automatic deletion can be efficient, but a nearly blank separator, intentionally blank numbered page or faint reverse side may carry meaning. Flagging uncertain pages for review is safer than deleting them without verification.
How Should Numbers and OCR Tables Be Quality-Checked?
Quality control should test completeness, visual fidelity, text recognition and table structure as separate dimensions. A file can pass one and fail another. For example, every page may be present and readable while an exported table contains shifted columns.
NARA’s guidance for digitization quality management requires agencies to inspect digital records for technical compliance and identify problems caused by equipment, software settings, metadata capture or human error. Its quality-management guide describes automated checks as a useful first pass and human visual inspection as a second pass for issues such as missing pages and loss of source information. The same two-level model is practical for complex manuals: automate what can be measured, then inspect the areas where context matters.
Targeted visual review checks whether recognized values remain aligned with the original rows, columns and page references.
QC layer
Checks
Typical method
Escalation trigger
Completeness
Missing, duplicated or out-of-order pages
Page reconciliation and sequence checks
Count mismatch or unexplained gap
Image quality
Crop, skew, orientation, clipping and readability
Automated checks plus visual review
Lost content or unreadable characters
Character accuracy
Digits, punctuation, symbols and identifiers
Confidence review and source comparison
Low confidence or invalid value pattern
Table structure
Row, column, merged-cell and header alignment
Cell-level comparison and export testing
Value appears under the wrong heading
Search and retrieval
Known terms, numbers and page references
Predefined search test set
Known value cannot be found reliably
Confidence scores can help prioritize review, but they should not be treated as proof of correctness. Microsoft explains that document-intelligence confidence scores express statistical certainty and can be returned for words, fields and, in supported configurations, tables and cells. A project can use lower-confidence regions to route pages for human inspection, while also applying deterministic checks for expected formats such as currency, percentages, dates or part numbers.
Can OCR Output Be Used in an AI Knowledge Base?
Yes, but a searchable PDF alone may not be the most useful ingestion package. An internal search system or retrieval-augmented generation application benefits from clean text, stable page references, descriptive filenames and metadata that identify the manual, edition and section.
Tables should remain connected to their headings and explanatory notes. When a parser separates a row from the column labels that define it, an AI system may retrieve a correct number without enough context to explain what the number represents. Layout-aware parsing and context-aware chunking are designed to reduce that problem by keeping structural relationships available during retrieval.
A practical delivery package may contain the visual searchable PDF, a page-delimited text export, structured table files for selected high-value sections and a simple index connecting filenames to titles and editions. Before loading the full collection, test several real questions whose answers depend on numbers or tables and verify the returned answer against the source page.
What Should You Ask an OCR Scanning Provider?
Will you test representative pages before processing the full manual?
How will you distinguish searchable OCR from structured table extraction?
How are low-confidence numbers, symbols and table cells identified?
Will page order and page counts be reconciled against the original?
Can you provide searchable PDF, page-delimited text and selected CSV or Excel outputs?
How will merged cells, multi-page tables and repeated headers be handled?
Will blank pages be reviewed before deletion?
What sample results must be approved before production begins?
For a broader explanation of preparing ordinary PDFs for text recognition, see eRecordsUSA’s guide to making PDFs searchable with OCR. Projects requiring reusable fields or structured output can also review the company’s OCR data extraction capabilities.
Turn complex manuals into dependable searchable files
Plan the sample, OCR outputs and validation criteria before full-volume scanning begins.
Sample testing and project-specific quality review
Frequently Asked Questions
Can OCR recognize numbers accurately?
OCR can recognize clear printed numbers, but decimals, symbols, small type and low-contrast pages require validation. Numeric fields should be tested against representative source pages.
Does OCR preserve table rows and columns?
Basic OCR may only produce searchable text. Preserving rows, columns and merged cells requires layout-aware table recognition and a structured output workflow.
Can scanned tables be exported to Excel?
Yes, when tables are extracted as structured cells. Excel or CSV delivery needs stronger cell-level validation than a visual searchable PDF.
What causes OCR to misread decimal points?
Small type, faint printing, skew, compression and background noise can make decimal points disappear or merge with nearby characters.
Should blank pages be deleted automatically?
Only under an approved rule. Numbered blanks, separators and faint reverse sides should be reviewed before removal so page sequence and meaning remain intact.
Office relocation shredding helps businesses review, separate, and securely destroy eligible paper records before they move into a new location. For HR and financial files, the process should begin with retention review, department approval, controlled staging, chain-of-custody documentation, and a Certificate of Destruction.
The risk is not just the number of boxes. A move can expose payroll records, employee files, tax documents, invoices, audit files, contracts, banking records, and duplicate archives that have been sitting in cabinets or storage rooms for years. Some records still need to be retained. Others may be expired, duplicated, or safe to destroy. Treating all records the same can create avoidable privacy, compliance, and audit risk.
Government records-management guidance says office moves create logistical challenges around access, security, and record integrity, but they also create an opportunity to reduce the volume of records being moved. The same guidance warns that waiting until after the move can lead to misplaced records, security breaches, and accidental destruction of official records.
Retention rules also vary by record type. The U.S. Department of Labor says employers must preserve payroll records for at least three years, while wage-computation records such as time cards and wage tables should be retained for two years. The EEOC says personnel or employment records are generally kept for one year, and payroll records under ADEA and FLSA-related requirements are kept for three years. The IRS says employment tax records should be kept for at least four years after filing the fourth quarter for the year.
That is why a 20-pallet cleanup should not be handled as a last-minute moving task. IBM’s 2025 Cost of a Data Breach Report puts the global average cost of a data breach at $4.4 million, which makes uncontrolled handling of sensitive paper records a real business concern during relocation. For records containing consumer report information, the FTC Disposal Rule also requires reasonable disposal measures that protect against unauthorized access or use.
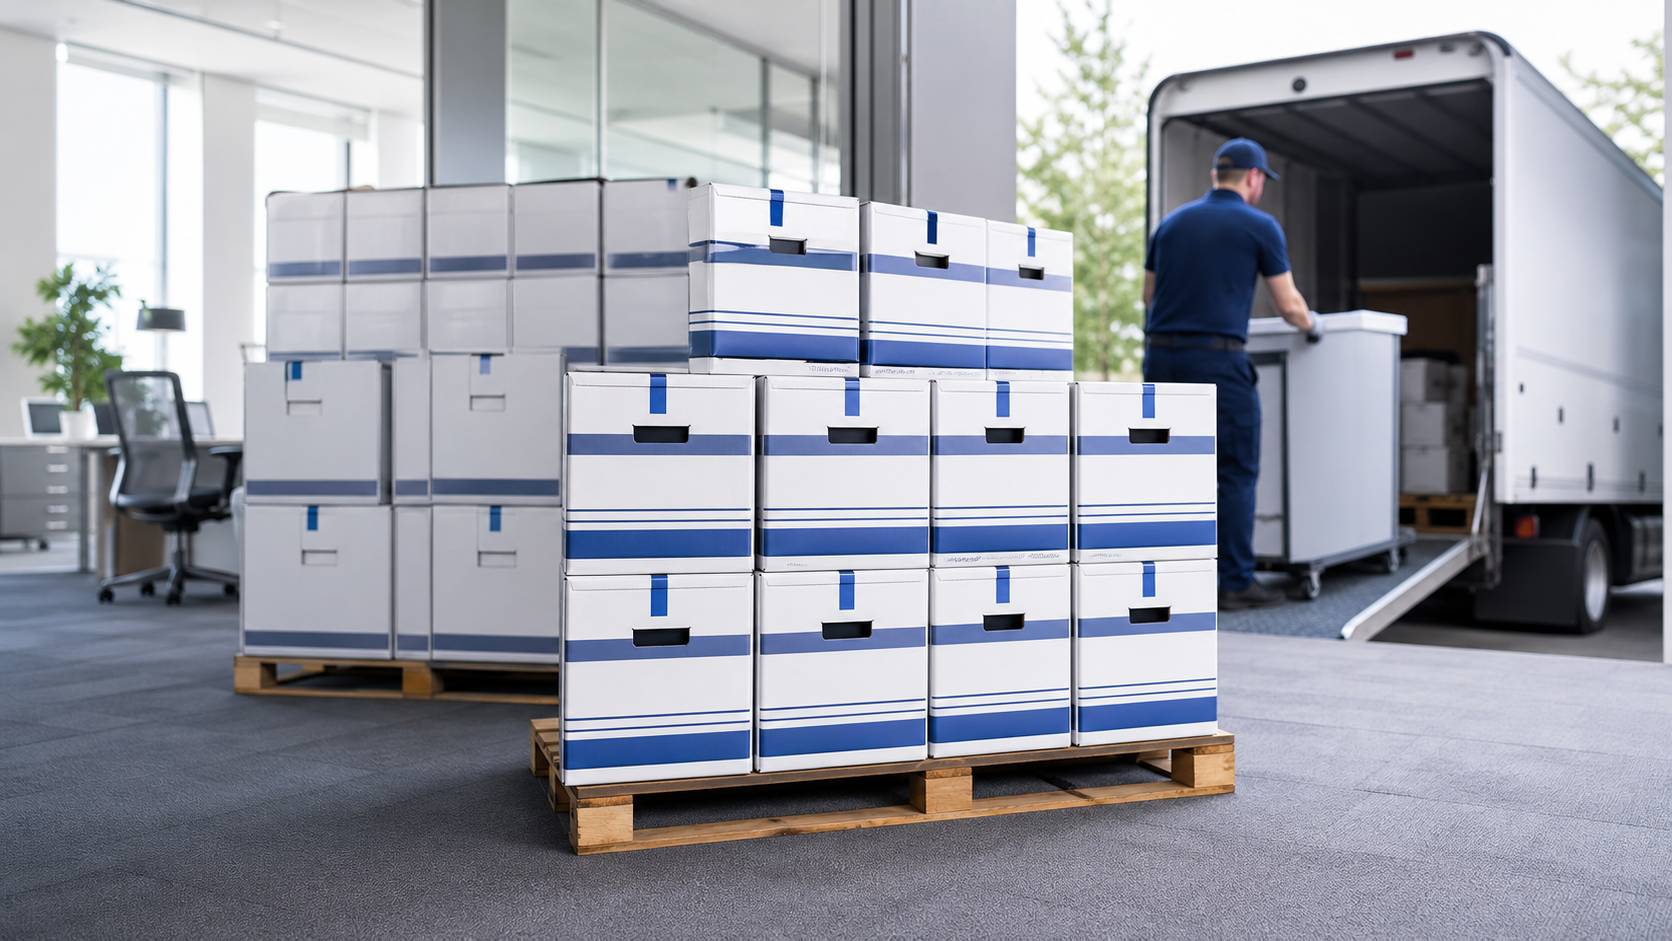
Before move week, HR and finance records should be reviewed, separated, labeled, and staged in a restricted area.
Why Office Moves Create a Records-Disposal Risk
An office move creates a records-disposal risk because old paper files are removed from normal storage controls at the same time movers, contractors, IT vendors, cleaners, and building staff may be active on-site. Confidential records that were previously locked in cabinets can become exposed during packing, staging, loading, and transport.
The safest relocation plan separates records into three groups: records to move, records to store, and records approved for secure destruction. This prevents expired paper files from being carried into the new office simply because nobody had time to review them.
For large offices, relocation can uncover:
Employee files, payroll forms, benefits records, and termination documents
Tax records, invoices, audit binders, payment files, and bank statements
Vendor contracts, customer files, internal reports, and legal correspondence
Duplicate copies, convenience printouts, outdated binders, and unknown boxes
The goal is not to shred everything. The goal is to identify which records have met retention requirements, confirm they are not on hold, and destroy them through a documented process before they create risk in the new location.
What Retention Rules Should You Check Before Shredding?
Before shredding HR or financial records, businesses should check federal retention rules, state-specific requirements, internal policies, audit needs, and any litigation or investigation holds. A relocation deadline should never replace a records-retention review.
Key retention checks include:
Record category
Common requirement to verify
Why it matters before shredding
Payroll records
DOL and EEOC guidance commonly point to at least 3 years
Payroll records may be needed for wage, hour, and employment-law review.
Wage computation records
DOL guidance commonly points to 2 years
Time cards, wage tables, and schedules can support how pay was calculated.
Personnel records
EEOC guidance generally requires 1 year for covered employers
Employee files may relate to employment decisions or claims.
Employment tax records
IRS guidance says at least 4 years after filing Q4 for the year
Background checks and similar records may require secure destruction controls.
State rules, contract terms, insurance requirements, grant requirements, and industry rules may require longer retention. If a file is connected to an audit, employee dispute, investigation, tax matter, lawsuit, or pending request, it should be placed on hold rather than included in the shredding pallet.
Which HR and Financial Records Need Controlled Destruction?
HR and financial records need controlled destruction when they contain personal, payroll, tax, account, vendor, payment, or business-sensitive information. These files should not be mixed with ordinary office cleanup material during relocation.
High-risk HR records often include employee files, payroll forms, benefits documents, onboarding records, background-check material, disciplinary records, termination files, and medical or leave-related documents. Financial records may include invoices, bank statements, tax files, audit documents, expense reports, payment records, vendor contracts, and accounting files.
These files may contain Social Security numbers, addresses, salary details, tax identifiers, banking information, insurance details, signatures, vendor pricing, or client billing information. During a move, these documents should remain in a restricted workflow from review to pickup.
Controlled destruction protects the document lifecycle after retention has been satisfied. It does not replace the retention decision itself.
How to Classify Records Before a Bulk Shredding Pickup
Records should be classified before pickup so approved destruction files do not get mixed with active, unknown, or hold-status documents. Classification gives HR, finance, legal, compliance, and operations teams a clear decision path.
Use four working categories:
Expired: records past the required retention period and approved for destruction.
Active: records still needed for business, HR, finance, legal, or operational use.
On hold: records connected to audits, litigation, investigations, employee matters, tax reviews, contracts, or pending requests.
Unknown: records with unclear ownership, missing dates, or incomplete retention status.
Unknown records should not be shredded during move pressure. Assign them to a department owner, confirm date ranges, and document the final decision. For a 20-pallet project, this step prevents accidental destruction and gives the business a defensible internal record.
A defensible bulk shredding project connects internal approval, secure staging, chain of custody, and final destruction documentation.
How to Prepare 20 Pallets for Secure Document Shredding
A 20-pallet shredding project needs staging discipline, clear labels, and basic internal tracking before the shredding provider arrives. The larger the volume, the easier it is for unapproved boxes to be moved accidentally.
Prepare the pallets by:
Labeling each pallet by department, record group, approval status, and pickup location.
Separating active, unknown, and hold-status files from destruction-ready pallets.
Restricting the staging area to approved staff and authorized shredding personnel.
Confirming loading dock access, elevator use, parking clearance, building security rules, and pickup timing.
Keeping an internal log with pallet count, department owner, record type, approval contact, pickup date, and special handling notes.
For relocation projects, the staging area should be set up before movers begin handling furniture, equipment, IT assets, or general supplies. Confidential records should not sit in hallways, open loading zones, or shared workspaces.
What Chain of Custody Should Prove During Pickup
Chain of custody should prove who handled the records, when they were collected, where they were staged, how many pallets or boxes were transferred, and how the destruction job was tracked. It gives the business a documented handoff instead of relying on informal assurances.
A strong pickup record should include:
Authorized contact and service date
Pickup location and staging area
Pallet, box, or container count
Department or record-group reference
Secure loading confirmation
Job number, service ticket, or destruction reference
Link to the final Certificate of Destruction
This documentation matters because office relocations introduce more people and movement than normal business operations. HR and financial records should not move through the same workflow as desks, monitors, chairs, and general packing material.
What a Certificate of Destruction Should Include
A Certificate of Destruction should connect the business’s internal approval record with the final destruction event. It is the closing document that supports audit files, compliance records, and relocation documentation.
For bulk office relocation shredding, the certificate should include:
Certificate item
Why it matters
Company name and service address
Confirms whose records were destroyed and where pickup occurred.
Destruction date
Shows when the approved records were destroyed.
Vendor information
Identifies the destruction provider.
Quantity destroyed
Connects the certificate to pallet, box, container, or volume records.
Destruction method
Shows how records were destroyed.
Job or service reference
Links pickup, chain of custody, and destruction documentation.
Authorized signature or confirmation
Supports internal audit and recordkeeping.
The certificate does not decide whether records were eligible for destruction. It documents that approved records were destroyed after the business made that decision.
On-Site vs Off-Site Shredding for Office Relocation
The right shredding method depends on volume, timing, privacy requirements, building access, and whether the business needs witnessed destruction. Both on-site and off-site shredding can support secure disposal when the process is documented.
Factor
On-site shredding
Off-site shredding
Best fit
Smaller batches or witnessed destruction
Large pallet-level projects with scheduled removal
Space needs
Requires room for a shredding truck
Requires secure staging before pickup
Disruption
May create noise, parking, and access coordination issues
Reduces on-site activity after pallets are collected
Timing
Useful when immediate destruction is required
Useful when records must be removed efficiently before move week
Oversight
Destruction may be observed on location
Pickup and destruction are documented through service records
For a 20-pallet relocation project, off-site shredding is often more practical when the business needs bulk removal with less disruption to staff, movers, IT teams, and building operations. On-site shredding may be preferred when company policy requires witnessed destruction or when the volume is easier to process at the current location.
Moving offices with pallets of confidential records?
Plan secure bulk shredding, controlled pickup, and audit-ready destruction proof before move week.
Relocation shredding fails when it is treated as a move-week cleanup task instead of a controlled records project. Most problems begin before the shredding provider arrives.
Avoid these mistakes:
Waiting until move week to review retention and schedule pickup.
Mixing approved destruction records with active or unknown records.
Skipping HR, finance, legal, compliance, or operations sign-off.
Labeling pallets only as “old files” or “shred” without record-group context.
Leaving confidential documents in open hallways or loading areas.
Moving expired records “just in case” and recreating storage risk in the new office.
Forgetting to connect the Certificate of Destruction with the internal approval log.
The practical fix is to assign ownership early. Every pallet should have a department owner, record category, approval status, pickup location, and final documentation path.
Relocation Shredding Checklist for HR and Finance Teams
HR and finance teams should use a final control checklist before bulk records leave the office. The checklist keeps retention decisions, pickup logistics, and audit proof connected.
Before pickup, confirm that:
Destruction lists are approved by the right department owners.
Legal, audit, tax, investigation, and employee-matter holds are excluded.
Active and unknown records are physically separated from shredding pallets.
Pallets are labeled by department, record group, and pickup area.
Pallet counts are recorded in an internal log.
Staging access is restricted to approved staff and authorized shredding personnel.
Pickup is scheduled before mover traffic creates access and security issues.
Pickup records will be matched to the final Certificate of Destruction.
This checklist gives the business one final checkpoint before confidential records leave the current office.
How eRecordsUSA Supports Bulk Shredding Before Office Moves
eRecordsUSA helps businesses turn relocation cleanouts into controlled, documented document-destruction projects. For companies with pallet-level HR, finance, legal, or business-sensitive records, the value is secure handling, coordinated pickup, chain-of-custody awareness, and destruction documentation.
For office relocation shredding, eRecordsUSA can support:
Bulk document pickup for large-volume records, including pallet-level projects.
Confidential handling for HR, financial, legal, and business-sensitive documents.
Chain-of-custody coordination from pickup through destruction.
Certificate of Destruction for audit and internal recordkeeping.
Related records services, including document scanning, OCR, and secure digital conversion when files should be retained digitally instead of destroyed.
eRecordsUSA brings more than 20 years of records experience, a Bay Area presence, and documented project experience across complex records collections. Businesses can review eRecordsUSA’s document shredding services, related document scanning services, certifications and compliance information, and case studies when planning a larger records transition.
Need audit proof after a records cleanout?
eRecordsUSA helps HR, finance, legal, and operations teams separate eligible records, schedule secure pickup, and retain destruction documentation.
? Pallet-level bulk projects
? Confidential HR and finance files
? Documented destruction records
Need to clear pallets of confidential records before a move? eRecordsUSA can help plan secure bulk shredding, controlled pickup, chain-of-custody documentation, and Certificate of Destruction support for HR, finance, legal, and operations teams.
FAQs About Bulk Document Shredding Before an Office Move
How far in advance should bulk shredding be scheduled before an office move?
Bulk shredding should be scheduled before packing begins. Pallet-level projects need time for retention review, department approval, staging, pickup coordination, and destruction documentation.
Can HR and finance records be shredded together?
Yes, if each department has approved its records for destruction. For audit clarity, label pallets by department or record group before pickup.
What records should not be shredded during relocation?
Do not shred active records, legal-hold files, audit-hold files, tax-review documents, investigation records, or boxes with unclear ownership or retention status.
What should a Certificate of Destruction prove?
A Certificate of Destruction should prove that approved records were destroyed, when destruction occurred, who performed it, and what job or service record connects to the pickup.
Is off-site shredding safe for pallet-level office cleanouts?
Off-site shredding can be appropriate for large cleanouts when records are staged securely, picked up by authorized personnel, tracked through chain of custody, and documented after destruction.
What should a public library do when its local newspaper archive is already online, but the collection still needs to move, expand, and stay searchable?
This is a serious planning issue because public libraries serve large community audiences.
The Institute of Museum and Library Services reports that U.S. public libraries serve 297.6 million people, equal to 96.4% of the U.S. population (Source).
At the archive level, scale grows quickly: the Ocean Exchange Report notes that National Digital Newspaper Program applicants typically convert about 100,000 newspaper pages over two years, primarily from microfilm (Source).
Chronicling America has also digitized more than 20 million historic newspaper pages, with over 3,000 digitized newspapers represented in its map and timeline (Source).
For a county or city library, the challenge is often continuity. Existing TIFF files, OCR text, issue dates, page sequences, title metadata, remaining microfilm, and historic books all need to stay connected when an archive moves to a new vendor.
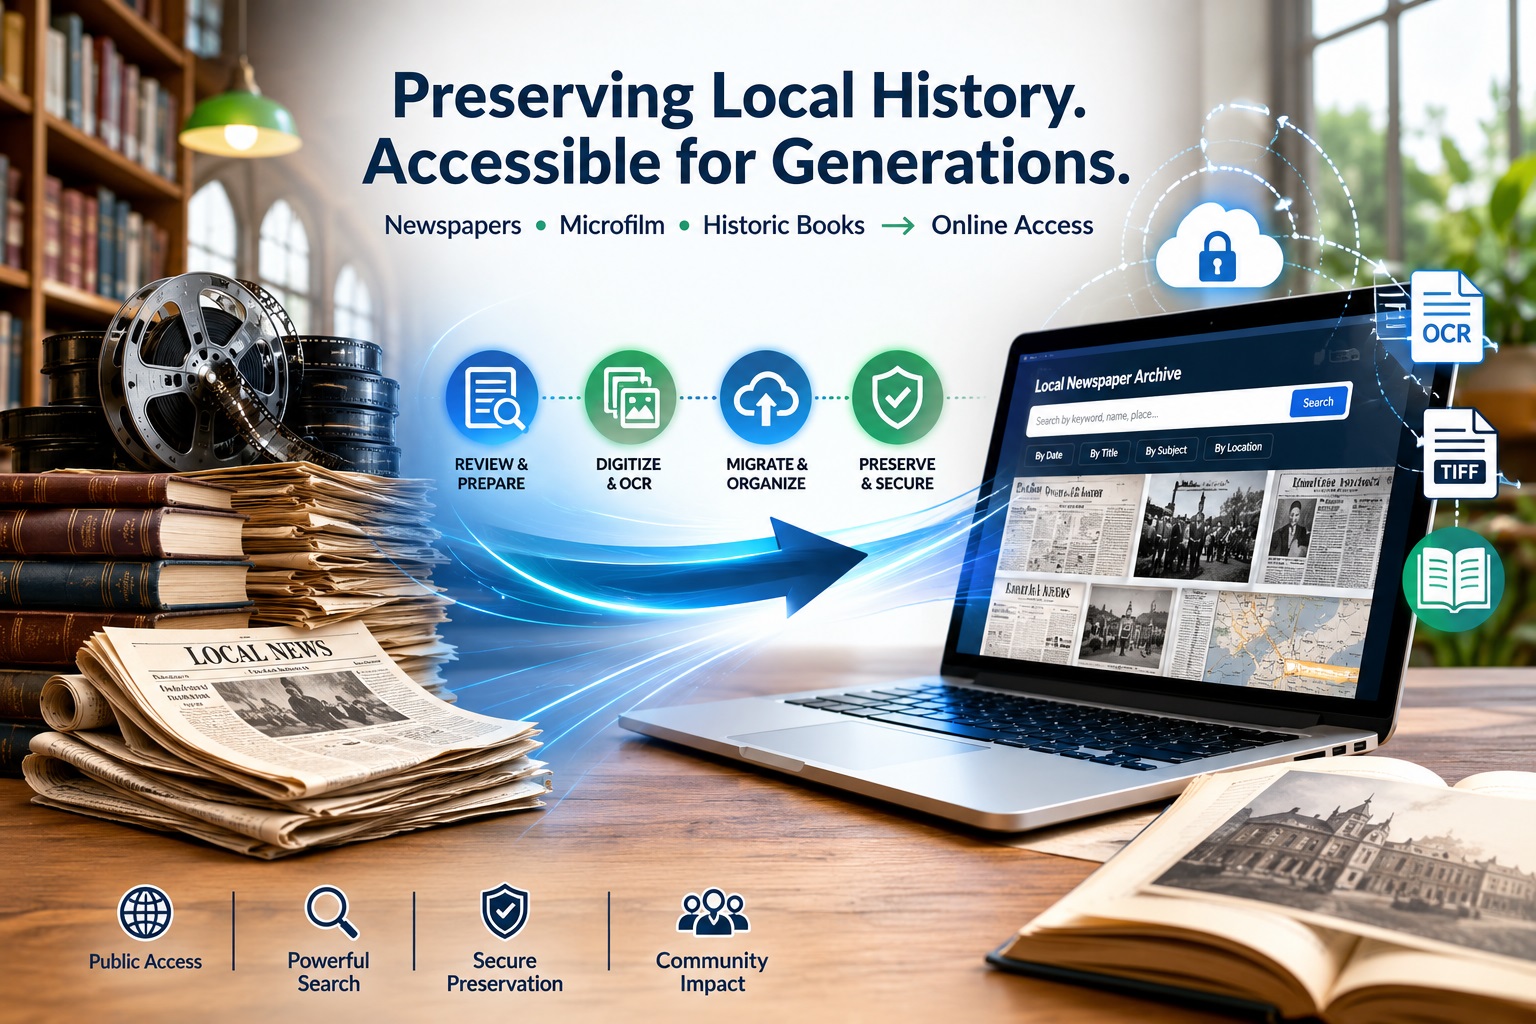
The goal is not just file transfer. A public library needs an archive model that preserves existing digital assets, supports new microfilm scans, maintains metadata consistency, and keeps local history accessible online.
Why Public Libraries Reevaluate Digital Newspaper Archive Vendors?
Public libraries usually reconsider a digital newspaper archive vendor when the existing platform no longer supports how the collection is used, expanded, or managed. The issue is often not the presence of a digital archive. The issue is whether the archive can continue serving researchers, residents, staff, and future digitization projects without creating access or preservation gaps.
Q: Why do public libraries reevaluate their digital newspaper archive vendor?
A: Six common triggers:
Search fails: OCR exists, but users can’t find names, places, or obituaries
Metadata locked: Can’t correct titles, dates, volume numbers, or export records
Export blocked: No clean access to TIFFs, OCR text, or platform-ready packages
Growth stalled: Can’t add new microfilm, historic books, or community publications
Costs rising: Hosting/search/storage fees exceed budget or usage value
Integration broken: Archive doesn’t connect to the library catalog or the public website
For public libraries, vendor evaluation should focus on continuity. Existing newspaper TIFFs, OCR text, title metadata, page sequences, and access records must remain usable after migration. New microfilm scans and historic books should also fit into the same structure instead of becoming separate digital silos.
A better vendor model should help the library preserve local-history context, keep public access stable, and support future archive growth without losing control of files, metadata, or search quality.
What Must Be Preserved During Archive Migration?
A public library archive migration should protect more than visible newspaper images. It should preserve the file, metadata, and issue-level structure that makes the collection searchable, citable, and usable in a new system.
The most important elements to protect include:
Preservation files: Existing TIFF masters, file naming patterns, folder structures, and checksum or fixity records.
Access files: Web images, PDFs, thumbnails, and other derivatives used for public viewing.
OCR text: Searchable text linked to the correct title, issue, page, and article context.
Metadata records: Descriptive fields, subject terms, place names, rights/collection notes, and source-format details.
Public access continuity: Search behavior, browse paths, citation links, catalog references, and any URLs that may need redirects.
This matters because one TIFF file may represent a single newspaper page, but that page belongs to an issue, title, date, edition, and local publication history. The same principle applies to historic books and local-history publications, where files should remain connected to title records, authors, publication dates, subject headings, page order, and access notes.
A strong migration plan starts with a file and metadata audit. Before moving platforms, the library should know which assets exist, which records are missing, which files need cleanup, and how the new vendor will receive the collection.
How Existing TIFF Newspaper Files Should Be Reviewed Before Moving Vendors?
Before changing archive vendors, a public library should treat its TIFF collection as a migration dataset, not just a folder of image files. The review should identify whether the files are complete, consistently named, export-ready, and aligned with the library’s public access goals.
Start by checking whether each TIFF file can be traced to a specific newspaper title, issue date, and page number. This confirms that the new vendor can rebuild browse paths, search filters, citation details, and issue-level navigation without guessing from file names alone.
The review should also flag technical and structural issues that may affect migration:
Unclear file names: Files that do not show title, date, page, or sequence clearly.
Page-level gaps: Missing pages, duplicate pages, or pages stored out of order.
Mixed derivatives: preservation TIFFs stored together with PDFs, thumbnails, or web images.
OCR mismatch: Text files that do not clearly match the correct TIFF page.
Metadata gaps: Missing location, date, publication title, source format, rights notes, or collection identifiers.
No integrity record: Missing checksums or fixity logs for long-term file verification.
This review helps the library decide what can move directly, what needs cleanup, and what should be repackaged before the new archive is built. It also gives the vendor a clearer starting point for migration planning, metadata mapping, OCR alignment, and platform-ready delivery.
How Remaining Microfilm Fits Into an Existing Digital Archive?
Remaining microfilm should be treated as a gap-completion project, not a separate digitization effort. Before scanning begins, the library should compare the unscanned reels against the existing online archive to identify missing titles, date ranges, issues, editions, and page sequences.
A practical microfilm-to-archive plan should answer four questions:
What is missing? Identify which newspaper titles, years, months, or issues are not yet available online.
Where does each reel belong? Map every reel to the correct title history, publication location, issue range, and existing archive structure.
How should new scans match older files? Align file naming, OCR output, metadata fields, derivatives, and delivery folders with the current or future archive model.
What requires review before upload? Flag damaged frames, poor exposures, missing pages, duplicate issues, title changes, or unclear reel labels.
This approach keeps new microfilm scans from becoming a disconnected add-on. If a library already provides access to the Napa Valley Register, St. Helena Star, Weekly Calistogan, American Canyon Eagle, or other local newspapers, new scans should extend those title records rather than create separate collections.
The goal is continuity. Researchers should be able to browse a newspaper title across old and newly added issues without noticing where the original TIFF collection ended, and the new microfilm batch began.
How Local Newspaper Titles Should Be Organized for Public Access?
A public newspaper archive should support both search and browsing. Keyword search helps users find names, places, events, obituaries, businesses, advertisements, and civic records. Browsing helps users move through a publication by title, date, issue, and page order.
For local-history collections, the archive should organize each newspaper title with clear descriptive fields:
Field
Why It Matters
Newspaper title
Separates publications such as local registers, city papers, community weeklies, and regional editions.
Issue date
Supports date-based browsing and citation accuracy.
Volume and issue number
Helps researchers verify references when citing an issue.
Page number and sequence
Keeps articles, ads, notices, and images in the original publication context.
Location or coverage area
Connects the publication to a city, county, neighborhood, or region.
OCR text
Enables keyword search across pages and issues.
Rights or access note
Clarifies whether the item can be viewed, downloaded, reused, or restricted.
Source format
Shows whether the digital item came from microfilm, TIFF files, print originals, or another source.
Collection notes
Document title changes, publication gaps, merged papers, special editions, or known limitations.
This structure helps different users reach the same collection in different ways. A genealogist may search for a family name. A student may browse a specific decade. A local historian may trace a business, neighborhood, wildfire, election, festival, or public project across multiple titles.
For libraries, the best archive design keeps search results useful without breaking the original newspaper context. A user should be able to find a keyword result, open the matching page, navigate the full issue, and identify which publication, date, location, and collection the page belongs to.
How Historic Books Fit Alongside Newspaper Collections?
Historic books should be managed as companion assets to newspaper archives, not as newspaper-style records. Newspapers are usually organized by title, issue date, page sequence, and OCR text. Books need item-level records, bibliographic metadata, page order, table of contents access, and preservation files for the full volume.
For public libraries, these materials may include county histories, city directories, anniversary books, yearbooks, local biographies, civic reports, school publications, church histories, and commemorative volumes. They often serve the same researchers who use newspaper archives, but they require different descriptions and access rules.
A historic book record should identify:
Title and subtitle
Author, editor, or issuing organization
Publication year
Subject headings or local topics
Page sequence
Table of contents or chapter structure
Rights or public access notes
Source condition or handling notes
This keeps historic books searchable without forcing them into a newspaper issue model. For a local-history portal, the strongest structure keeps newspapers, microfilm-derived files, historic books, and community publications distinct in format but connected through search, metadata, and collection relationships.
What Libraries Should Ask Before Choosing a New Archive or Digitization Vendor?
A public library should evaluate a vendor based on how well they can support archive continuity, not just new scanning. The right partner should be able to work with legacy files, incomplete microfilm holdings, mixed collection types, and the technical requirements of a future access platform.
Key questions to ask include:
Can you assess our existing digital archive before migration? The vendor should be able to review legacy files, identify cleanup needs, and explain what is ready for transfer.
Can you prepare files for our next archive platform? Ask whether they can create platform-ready delivery packages with preservation files, access files, OCR text, metadata, derivatives, and required folder structures.
Can you integrate the remaining microfilm into the same collection model? New scans should be mapped to the library’s established titles, dates, issue ranges, and public access structure.
Can you support multiple local-history formats? Public libraries may need newspapers, microfilm-derived files, historic books, directories, photographs, and community publications handled under one archive plan.
Can you document quality and file integrity? Reports for missing files, naming issues, scan quality, OCR alignment, metadata gaps, and checksum validation help reduce migration risk.
Can the project be phased around funding or grants? Many libraries need to separate archive migration, microfilm scanning, OCR cleanup, metadata repair, and book digitization into manageable stages.
The strongest vendor model helps the library understand what it already has, what needs to be added, what requires cleanup, and how the full collection will remain searchable after migration.
A Practical Migration Readiness Checklist for Public Library Archives
Before moving a local newspaper archive to a new platform, the library should confirm that internal decisions are clear. This prevents the migration from becoming delayed by unresolved ownership, access, funding, or review questions.
Use this checklist before vendor work begins:
Assign project ownership: Identify who will approve metadata decisions, review sample outputs, coordinate vendor communication, and sign off on delivery.
Confirm access goals: Decide whether the archive is intended for public browsing, staff research, genealogy use, local-history discovery, or all of these.
Set collection priorities: Rank the titles, date ranges, microfilm reels, or historic books that should move or be added first.
Define review responsibilities: Decide who will check sample files, metadata, OCR usability, public display, and issue navigation before full migration.
Align funding phases: Separate migration, new microfilm scanning, metadata cleanup, OCR improvement, and historic book digitization according to budget or grant timing.
Plan public communication: Prepare for archive downtime, link changes, updated catalog records, or announcements to local researchers.
Document final acceptance criteria: Define what the library must receive before the project is considered complete.
This checklist keeps the project focused on governance and readiness, while the earlier sections cover files, metadata, microfilm, and vendor requirements.
5-Step Pre-Migration Readiness Checklist
Libraries can use this exact sequence before vendor work begins:
Audit files: Run checksum validation on all TIFFs; flag corrupted files
Map metadata: Create a spreadsheet of title → date → volume → issue → page sequences
Identify gaps: Compare microfilm reels against online archive; list missing titles/years
Define ownership: Assign one person to approve metadata, review outputs, and sign delivery
Plan communication: Draft researcher notices for downtime, link changes, and catalog updates
How eRecordsUSA Supports Public Library Archive Continuity?
Public library archive projects often involve legacy files, unscanned source materials, and platform-specific delivery requirements. Following the preservation standards established by the Institute of Museum and Library Services (IMLS) and the National Digital Newspaper Program (NDNP), eRecordsUSA supports these projects through preservation-focused workflows that prepare collections for organized transfer, archive expansion, and long-term access.
For libraries evaluating a new archive model, eRecordsUSA can help with:
Collection assessment: Reviewing current digital assets, remaining source materials, and platform delivery needs before production begins.
Microfilm and newspaper digitization: Converting additional reels or newspaper materials into structured files that align with the library’s archive plan.
OCR and metadata support: Preparing searchable text and descriptive records without separating them from the correct title, issue, page, or item.
Platform-ready delivery: Organizing preservation files, access copies, derivatives, naming structures, and supporting records for ingest into a new archive system.
These workflows are supported by in-house processing, chain-of-custody practices, confidential handling, and preservation-grade attention to institutional collections. For public libraries, the value is controlled archive preparation that helps local-history materials remain usable beyond one vendor platform.
Conclusion: Build a Local Archive That Can Move, Grow, and Stay Searchable
A public library’s local-history archive should not depend on one vendor, one file structure, or one incomplete collection cycle. Existing newspaper files, newly scanned microfilm, historic books, OCR text, metadata, and public access records should work together as one managed archive.
When migration is planned correctly, the library can protect preservation files, improve discoverability, add remaining materials, and keep local newspapers and historic publications accessible for future researchers.
For public libraries evaluating a new archive model, aligned with Library of Congress Chronicling America standards and NDNP digitization best practices, eRecordsUSA can help assess the collection, prepare structured files, support preservation-ready outputs, and organize materials for long-term online access.
FAQs About Public Library Newspaper Archive Migration
Who owns the digital files after a library archive migration?
The library should retain ownership or long-term control of its preservation files, metadata, OCR text, and access copies. Vendor agreements should clearly define export rights, file delivery, and future reuse.
How can libraries reduce public access disruption during migration?
Libraries can plan a phased migration, test sample records first, and prepare notices for researchers before switching platforms. Redirects, catalog updates, and backup access copies help reduce downtime.
Should public libraries review copyright before publishing historic newspapers online?
Yes. Libraries should review publication dates, rights status, publisher agreements, and local access policies before making materials public. Some items may be searchable internally but restricted from public download.
Can a library archive support accessibility needs?
Yes. Searchable text, readable page images, structured metadata, descriptive titles, and clear navigation can improve accessibility. OCR quality and platform design both affect how usable the archive is for patrons.
How should libraries measure whether a new archive model is successful?
Success can be measured through search accuracy, patron usage, staff retrieval time, metadata quality, uptime, citation reliability, and the ability to add future collections without rebuilding the archive.
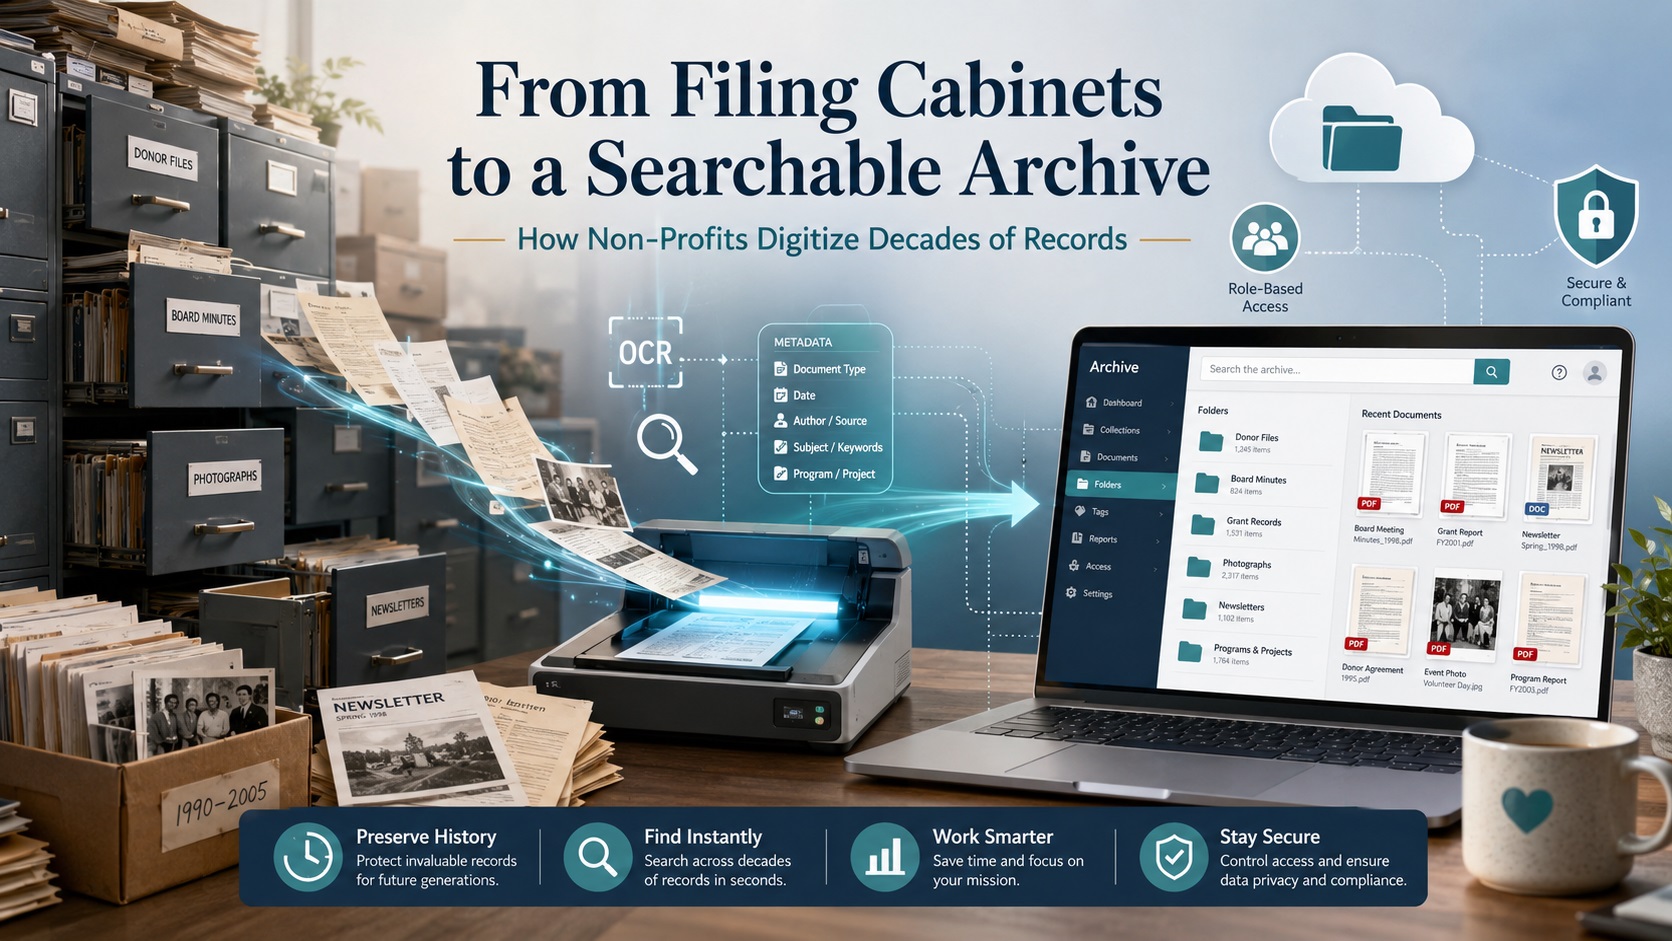
What happens when a non-profit founded in 1970 has decades of records spread across 50 filing cabinets and 250 fully packed drawers?
At that scale, digitization isn’t just a storage solution; it’s an institutional memory preservation project.
A single digital educational portal from the National Archives launched with roughly 3,000 documents, images, and recordings from their holdings. (Source).
The challenge isn’t just scanning that volume; it’s keeping records searchable, secure, and connected to their original context.
A searchable online archive works only when digitization is planned before scanning begins: audit cabinets, preserve folder structure, apply OCR, add metadata, assign access levels, and organize by record type, date, department, donor, grant, program, and retention category. Without this structure, you replace 250 drawers of paper with thousands of disconnected PDFs. With the right plan, those records become a trusted archive that reduces storage pressure, protects institutional memory, and gives staff faster access to critical information.
Why Non-Profits Are Still Buried in Paper Records?
Most long-standing non-profits did not create large paper archives by choice. Filing cabinets were once the simplest way to store donor records, board minutes, grant files, financial documents, volunteer forms, program reports, newsletters, photographs, and correspondence. Over the decades, those records became the organization’s working memory. Over time, staff turnover, inconsistent folder names, and changing retention practices make older filing systems harder to search and govern.
The problem begins when the archive outgrows the people who understand it.
That creates three common problems:
Records become hard to find. Staff may need to search by donor name, grant cycle, board decision, program year, event, or department, but paper folders rarely support fast retrieval.
Important context gets lost. A file may make sense only when it stays connected to its cabinet, drawer, folder label, date range, and record category.
Storage becomes expensive and risky. Filing cabinets take up office space, slow down audits, limit remote access, and expose aging records to moisture, pests, fire, fading, or handling damage.
For non-profits, this is not just an administrative issue. That is why a successful nonprofit records digitization project begins with archive planning, records assessment, metadata strategy, and access control before the first page is scanned.
What Types of Non-Profit Records Should Be Digitized?
Digitize records that support governance, funding, compliance, operations, and institutional memory. Priority depends on access needs, protection requirements, retention length, and preservation value.
For long-standing non-profits, the most valuable records fall into these categories:
Category
Record Types
Priority Considerations
Governance
Board minutes, bylaws, articles of incorporation, committee notes, policies, and strategic plans
Permanent preservation; may need restricted access
Volunteer forms, staff records, training files, contracts, insurance, vendor records
Tight privacy controls; retention review required
These categories shouldn’t be treated as one flat scanning pile. Group records by four questions:
What must be kept for legal, tax, or governance reasons?
What is frequently needed by staff, volunteers, auditors, or board members?
What contains sensitive donor, financial, personnel, or beneficiary information?
What has long-term historical or mission value?
This classification determines scanning priority, file naming rules, OCR requirements, metadata fields, access permissions, and whether paper originals should be returned, retained, or destroyed after digitization.
Digitization Is More Than Scanning: The Real ROI for Non-Profits
The return on investment for non-profit record digitization is usually measured in reduced storage pressure, faster retrieval times, better audit readiness, and lower dependence on staff memory. A searchable archive also helps non-profits avoid repeated manual searches across filing cabinets, off-site storage facilities, or legacy folder systems that slow down daily operations.
Digitization can support ROI in four practical ways:
Space recovery: Eliminate the need for physical filing cabinets, dedicated archive rooms, or off-site storage facilities. This frees up valuable office space that can be repurposed for staff workspaces, meeting rooms, or program activities, while also reducing monthly rent or storage facility costs.
Staff efficiency: Enable faster access to donor files, board minutes, grant reports, financial records, and program documents. Staff no longer waste time searching through physical cabinets or requesting files from off-site storage. A searchable archive allows any team member to retrieve documents instantly from their desk, reducing administrative overhead by 30–50% and freeing up time for mission-critical work.
Risk reduction: Lower exposure to misfiling, physical damage, lost records, and uncontrolled access. Paper records face constant threats from moisture, pests, fire, fading, and handling damage. Digitization creates secure backup copies that survive physical disasters. Role-based access controls also prevent unauthorized viewing of sensitive donor, financial, or beneficiary information.
Records control: Enable clearer retention review, secure destruction decisions, and long-term archive planning. Metadata fields track retention categories and review dates, making compliance audits easier. The archive identifies which records are active, historical, or ready for secure destruction, helping non-profits meet legal requirements while avoiding unnecessary storage of outdated documents.
Step-by-Step Process for Digitizing Non-Profit Records
To digitize decades of records, follow this workflow before the first page is scanned:
Audit the records: Count cabinets, drawers, boxes, folders, oversized items, and fragile materials. Note record type, date range, condition, and confidentiality level.
Sort by record category: Group board minutes, donor files, grant documents, financial records, program files, HR records, photographs, newsletters, and historical materials.
Define retention and access rules: Identify which records must be kept, restricted, shared internally, made public, or reviewed for secure destruction after scanning.
Prepare documents for scanning: Remove staples, clips, binders, rubber bands, and sticky notes while preserving folder labels and original order where needed.
Scan at the right quality level: Use standard document scanning for routine files; higher-quality imaging for fragile, historic, photographic, or public archive materials.
Apply OCR: Make printed or typed text searchable by names, dates, grant titles, board actions, program terms, and donor references.
Add indexing and metadata: Tag files by record type, year, department, donor, grant, program, folder title, confidentiality level, and retention category.
Run quality control: Check for missing pages, unreadable scans, wrong file names, duplicate files, poor OCR output, and indexing errors.
Upload to a secure archive: Store final files in a cloud repository, document management system, archive platform, or internal records system with access permissions.
Train staff on retrieval: Document how users should search, download, restrict, update, and request records.
For a 250-drawer archive, this order matters. If files are scanned before folder structure, metadata fields, and access rules are defined, you’ll end up with thousands of searchable but poorly organized PDFs. The best workflow preserves useful original order while improving inconsistent filing.
How OCR Turns Paper Files Into Searchable Records?
OCR, or optical character recognition, converts printed or typed text in a scanned image into machine-readable text. Without OCR, a scanned document may look digital but still behave like a photograph. Staff can open it, read it, and store it, but they may not be able to search inside it.
For non-profits, OCR is useful because it helps teams search across decades of records by:
donor names
grant titles
board decisions
program names
campaign dates
invoice numbers
event names
committee references
locations or service areas
OCR is especially valuable when records are spread across hundreds of folders. Instead of opening one PDF at a time, staff can search for a keyword, name, date, or phrase across the archive.
However, OCR is not perfect. Accuracy depends on the condition and format of the original record. Clean typed pages usually produce better results than faded photocopies, handwritten notes, carbon copies, stained documents, folded pages, or records with unusual fonts. Older non-profit archives often contain all of these formats, so OCR output should be checked during quality control.
OCR also does not replace indexing or metadata. A searchable PDF may help users find words inside a document, but indexing tells them what the document is, where it belongs, who should access it, and how long it should be retained.
For example, a scanned grant agreement may include searchable text, but it still needs structured details such as:
funder name
grant year
program name
document type
reporting period
confidentiality level
retention category
The strongest nonprofit digital archives use OCR for full-text search, indexing for retrieval, and metadata for long-term records control. Together, these layers turn scanned paper into searchable records that staff, board members, auditors, and future leaders can actually use.
How to Build a Searchable Online Archive for Non-Profits?
A searchable archive should help users find records by meaning, not just file name. Strong archive structure includes three layers:
Layer
Purpose
Example
Folder taxonomy
Main hierarchy grouping files
Governance → Board Minutes → 1990–1999
Metadata fields
Structured details for search/filter
Donor name, grant year, board meeting date, document type
Searchable text
OCR-generated full-text search
Keyword, name, date, phrase, or reference number
Example archive structure:
Governance → Board Minutes → 1990–1999
Grants → Funder Name → Grant Year → Reports
Development → Donor Records → Campaign Name → Year
Programs → Program Name → Reports → Photos
Historical Archive → Newsletters → Decade
Access Control Matrix
Build access control from the start. Not every record should be available to every user:
Access Level
Record Types
Who Can Access
Public
Newsletters, annual reports, photos, press clippings, and approved historical materials
Everyone
Internal Staff
Program reports, administrative files, policies, and non-sensitive working records
Beneficiary records, personnel files, sensitive donor communications, legal disputes, insurance claims, and records involving minors
Executive team only
The archive must be consistent enough that future staff can understand the system without relying on one person’s memory. Success means users can quickly answer: Where is the 2008 grant report? Which board meeting approved this policy? What photos exist from a past event?
Security, Privacy, and Compliance for Non-Profit Records
Non-profit archives often contain donor information, financial files, employee records, grant documents, board materials, legal records, and beneficiary details. These records should be classified before scanning begins, using the access control matrix above.
Security should be built into the digitization workflow, not added after scanning. Each record group should be tracked from intake through scanning, indexing, quality review, delivery, and final disposition. Professional scanning helps protect the chain of custody, indexing accuracy, confidential handling, and quality control.
Should Non-Profits Digitize Records In-House or Outsource?
Small scanning jobs can be handled internally when records are recent, low-risk, and easy to organize. Large archive projects are different. A 250-drawer filing cabinet collection may include donor files, grant records, board minutes, financial documents, photographs, fragile papers, and confidential materials that require controlled handling.
Factor
In-House Scanning
Professional Scanning Service
Best fit
Small, active, low-risk files
Large archives, mixed records, confidential files, historical materials
Staff time
High internal time required
Lower internal burden after planning
Equipment
Office scanner or copier
High-volume scanners and specialty workflows
OCR and indexing
Basic or inconsistent
Structured OCR, indexing, metadata, and file naming
Quality control
Depends on staff availability
Checks for image quality, missing pages, file names, and indexing accuracy
Security
Requires internal controls
Chain-of-custody, controlled access, and secure delivery
Archive structure
Can become inconsistent
Planned around record groups, permissions, and retrieval needs
Outsourcing is usually more practical when the project includes hundreds of drawers or boxes, confidential records, fragile materials, mixed formats, OCR, indexing, metadata, or limited internal staff time.
The right approach is to define the archive plan first, then decide which records can be scanned internally and which require professional support.
What Pricing Factors Determine ROI for Non-Profit Record Digitization?
The cost of digitizing non-profit records depends on the size, condition, structure, and complexity of the archive. A few organized folders are simple to scan. A 250-drawer archive with mixed records, fragile materials, donor files, grant documents, photographs, and inconsistent folder labels requires more planning and quality control.
Key cost factors include:
Record volume: number of cabinets, drawers, boxes, folders, and pages.
Document preparation: removal of staples, clips, binders, sticky notes, and damaged folders.
Record condition: fragile paper, faded ink, torn pages, poor photocopies, or mixed-size documents.
Scanning requirements: standard PDF scanning, searchable PDF output, high-resolution imaging, or preservation-grade capture.
OCR needs: full-text search for names, dates, grants, board actions, donor references, and program terms.
Indexing depth: basic folder-level naming versus detailed metadata by donor, department, grant, year, program, or retention category.
Final archive format: cloud folders, document management system, archive platform, or internal records repository.
The return on investment is usually measured in reduced storage pressure, faster retrieval, better audit readiness, and lower dependence on staff memory. A searchable archive also helps non-profits avoid repeated manual searches across cabinets, off-site storage, or legacy folder systems.
Digitization can support ROI in four practical ways:
Space recovery: fewer filing cabinets, archive rooms, or off-site storage needs.
Staff efficiency: faster access to donor files, board minutes, grant reports, financial records, and program documents.
Risk reduction: lower exposure to misfiling, physical damage, lost records, and uncontrolled access.
Records control: clearer retention review, secure destruction decisions, and long-term archive planning.
The lowest scanning price is not always the lowest project cost. If files are scanned without OCR, metadata, indexing, or quality checks, the organization may still pay later through staff time, rework, duplicate scans, or a poorly organized digital archive.
For non-profits, the better question is not “How cheap is scanning?” It is “Will the final archive help our team find, protect, govern, and preserve records for the next decade?”
What Are the 7 Most Common Mistakes to Avoid When Digitizing Non-Profit Archives?
Digitization fails when records are scanned without a clear plan. Avoid these critical errors:
Scanning without an archive map: Organize by record type, department, year, donor, grant, program, or collection before scanning.
Ignoring folder context: Cabinet, drawer, folder label, date range, and original order matter for governance, grant history, and donor records.
Relying only on OCR: OCR enables full-text search but doesn’t replace indexing, metadata, file naming, or access rules.
Using inconsistent file names: Mixed naming formats make records harder to sort, search, migrate, or audit.
Mixing public and confidential files: Donor records, HR documents, financial files, and legal records need restricted access.
Destroying paper too soon: Review retention rules, scan quality, archive completeness, and legal needs before discarding originals.
Choosing storage before structure: Cloud folders or archive software must support your planned taxonomy, permissions, and search needs.
The main risk isn’t poor scanning; it’s creating a digital archive that looks complete but cannot be searched, governed, or trusted.
Why Professional Scanning Matters for Large Non-Profit Archives?
A few folders can be scanned internally. A 250-drawer filing cabinet archive needs a controlled workflow.
Large non-profit collections often include mixed paper sizes, fragile records, donor files, board minutes, grant documents, financial records, photographs, newsletters, bound materials, and confidential files. These materials require more than page capture. They need organized intake, careful preparation, OCR, indexing, metadata, quality checks, and secure delivery.
Professional scanning helps protect four parts of the project:
Structure: cabinets, drawers, folders, labels, dates, departments, donors, grants, and programs remain connected during conversion.
Searchability: OCR, file naming, indexing, and metadata make records easier to find after scanning.
Security: chain-of-custody, controlled handling, and secure transfer reduce the risk of misplaced or exposed records.
For non-profits, the main value is not only reducing storage. It is converting decades of paper into a trusted archive that staff, board members, auditors, development teams, and future leaders can use without depending on physical cabinets.
eRecordsUSA supports this type of project through in-house document scanning, organized intake, confidential handling, OCR, indexing, metadata planning, and preservation-focused workflows. For large collections, that level of control helps prevent a common failure: creating thousands of digital files that are scanned but not truly organized.
Conclusion: From Filing Cabinets to Institutional Memory
A non-profit archive should not become harder to use simply because it has grown over time. Filing cabinets may have protected decades of donor files, board minutes, grant records, program reports, financial documents, photographs, and historical materials, but paper storage eventually limits access, increases risk, and slows down daily work.
Digitization gives those records a stronger future when it is planned around structure, searchability, security, and preservation. The goal is not to create thousands of PDFs. The goal is to build a searchable online archive where records remain connected to their purpose, date, department, donor, grant, program, access level, and retention category.
For non-profits with decades of filing cabinet records, eRecordsUSA can help plan and complete a secure scanning project that preserves archive structure, supports OCR and indexing, protects confidential materials, and prepares records for long-term digital access.
FAQs about Non-Profit Document Scanning & Archive Digitization
How long does a large non-profit digitization project take?
A large project timeline depends on record volume, document condition, preparation needs, indexing depth, OCR requirements, and review cycles. A 250-drawer archive should be planned in phases rather than treated as a single scanning batch.
Can volunteers help before professional scanning begins?
Yes. Volunteers can help identify record groups, label boxes, flag fragile materials, and separate public-facing files. They should not handle confidential donor, HR, financial, legal, or beneficiary records without clear access rules.
What file formats are best for non-profit digital archives?
Searchable PDFs are practical for everyday access, while TIFF or other preservation-friendly image formats may be used for historically important records, photographs, and archival materials. The best format depends on access, preservation, and storage goals.
Should a non-profit digitize inactive records first or active records first?
Start with records that are frequently requested, legally important, at physical risk, or difficult to retrieve. Many non-profits prioritize board minutes, grant files, donor history, financial records, and fragile historical materials first.
Can handwritten non-profit records become searchable?
Handwritten records can be scanned, preserved, and indexed, but OCR accuracy is less reliable than with typed text. For handwritten minutes, notes, captions, or correspondence, folder-level indexing and metadata are often more dependable.
Glass plate negative scanning converts photographic images from fragile glass substrates into high-resolution digital files. These images come primarily from wet collodion and gelatin dry plates. Production of these plates occurred between 1851 and the early 1900s. The process supports long-term preservation and access.
Glass plate photography was not designed to be fragile. Its adoption across the second half of the nineteenth century stemmed from the stability and dimensional accuracy that glass offered. This outperformed every competing medium. Yet, the photographic collections recorded on it are deteriorating. The pace outstrips the resources most institutions, estates, and private collectors can direct toward preservation.
Did you know that the Harvard College Observatory photographed the night sky on glass plates from the 1880s through 1992, accumulating over 500,000 plates? Its DASCH (Digital Access to a Sky Century at Harvard) digitization program took two decades to complete, and converted 435,763 plates into digital equivalents, finishing its final scan on March 28, 2024. (Source)
If it required twenty years and the resources of one of the world’s leading research universities to digitize a single institutional collection, the arithmetic for the millions of glass plate negatives held in smaller institutions, private estates, and uncatalogued collections worldwide is sobering. Most of those plates have no digitization program. They lack conservation budgets and timelines. They are deteriorating now, in whatever environment they currently occupy. erecordsusa.com offers accessible scanning solutions to help preserve these at-risk negatives.
What are Glass Plate Negatives? A Primer on 19th Century Photographic Technology
Glass plate negatives are 19th-century photos on glass sheets coated with light-sensitive emulsions like collodion, gelatin, or albumen. They capture images in reverse (negative) tones for printing positives. Fragile and fading, they need expert digitization.
Understand the three main formats next. Each has unique looks, handling, and risks. Collections often mix them up, unlabeled.
1. Formats at a Glance
Format
Period
Appearance
Key Risks
Wet Collodion
1851–1890s
Milky brown/amber; varnished
Edge cracking, brittleness
Gelatin Dry Plate
1880s–1920s+
Clear neutral tones; matte
Delamination, silver mirroring, mold
Albumen on Glass
1850s
Warm amber/yellowish; textured
Emulsion fragility, texture loss
2. Wet Collodion: First Practical Process
Frederick Scott Archer launched it in 1851. Coat glass with collodion. Sensitize with silver nitrate. Expose wet. Develop in 15 minutes. Portable darkrooms required. Mathew Brady: Civil War. Timothy O’Sullivan: West surveys. Roger Fenton: Crimea. Ruled 1850s–1880s.
3. Gelatin Dry Plate: Scalable Shift
Richard Leach Maddox, 1871. Store and process dry plates later. Factory-coated. Ended the wet era by the 1880s. Signs: Clear tones, matte surface, blue sheen (mirroring), machine edges.
Despite flexible film becoming commercially available in the 1880s, glass plates remained the preferred medium for scientific and astronomical photography well into the twentieth century for one reason: dimensional stability.
Glass stays rock-steady. Film warps. Key differences:
Humidity: Glass ignores it – no expansion or contraction. Film shifts measurably.
Temperature: Glass holds firm. Film distorts.
Precision: Glass excels in astronomy, microscopy, and cartography. The film falls short of exact measures.
Post-1903: Glass for science and archives. Film for everyday snaps.
Now, let’s explore the reasons of glass plate negatives deterioration in the nest section.
How Glass Plate Negatives Deteriorate & Why Time Is a Factor?
The deterioration of glass plate negatives is not a slow, uniform process. It is a cascade of interacting mechanisms:
Some driven by the chemistry of the emulsion,
Some by the glass substrate itself, and
Some by the storage environment that can accelerate dramatically under the wrong conditions.
Gelatin Plate Delamination – The Role of Humidity Fluctuation
The gelatin binder is hygroscopic, it absorbs moisture and swells, then contracts as humidity drops. Repeated cycles weaken adhesion between the emulsion layer and the glass surface. When RH rises above 70% at temperatures above 22°C, conditions become favorable for fungal growth that physically consumes the gelatin.
⚠️ Warning sign: Delamination often produces no visible warning until the emulsion begins to lift, blister, or peel. At that point, standard scanning becomes impossible without specialist conservation intervention. (Source)
Silver Mirroring – What It Looks Like and What It Signals
Silver mirroring appears as a blue-metallic, mirror-like sheen, most visible at oblique angles, concentrated in shadow areas and edges where silver density is highest.
How it forms:
Silver ions migrate from within the emulsion to the image surface
They are reduced to metallic silver in a very thin reflective layer
Scanning implication: Mirrored areas can be captured digitally — but the scanning setup must account for specular reflection. Standard flatbed scanning under diffuse illumination frequently causes mirrored areas to read as blank or washed out.
Collodion Edge Cracking and Irreversible Image Loss
Wet collodion plates are subject to network cracking, concentrated at edges and corners where the collodion layer is thinnest. Once cracks propagate across the image field, the photographic information in those areas is permanently lost.
Causes of collodion cracking:
Natural brittleness of aged collodion
Physical stress from inadequate housing
Internal tension from original drying and varnishing
Scanning protocol: Stable cracks can often be scanned safely. Actively flaking collodion plates require conservation stabilization (humidification and consolidation) before any scanning or handling is attempted.
Mold on Gelatin Binders — Identification and Isolation
Mold presents as irregular, circular, or radial staining, haze, or discrete colonies visible under raking light. Unlike silver mirroring (a chemical process), mold is biological — it physically consumes the gelatin. Active mold spreads from plate to plate, requiring rapid isolation upon discovery.
Chemically Unstable 19th Century Glass — The Underreported Threat
This deterioration factor appears in no standard handling guide, and it is missed in virtually every competing resource on glass plate care.
Nineteenth-century glass manufacturing was not standardized. Some glass produced during this period, particularly used for certain collodion plates is chemically unstable. As it deteriorates, it produces decomposition products that deposit on the plate surface.
RH Condition
What Happens to Unstable Glass
Below ~40% RH
Decomposition products form crystalline deposits on the non-image surface
Above ~40% RH
Deposits dissolve into the solution and migrate into the image layer, causing silver deterioration and promoting binder/varnish flaking
This is not emulsion deterioration caused by the glass — it is deterioration of the glass itself, expressing outward through the image.
Identifying Your Glass Plate Collection Before Scanning
Audit first to scope projects and spot conservation needs.
Mammoth (18×22+ in): Landscapes; 1860s–1880s.
⚠️ 8×10+ inches: Use two hands—high fracture risk.
3. Condition Triage
Scan‑ready: Stable emulsion, no flaking or active mold, edge cracks only – suitable for standard scanning.
Scan‑with‑care: Evidence of silver mirroring, minor cracks, or deposits – adjust lighting, document condition, and consider conservation consultation.
Conserve first: Flaking emulsion, propagating cracks, active mold, or obvious chemically unstable glass – require professional conservation before scanning.
Bulk audits enable realistic time and cost estimates for estates or large institutional projects.
Glass Plate Negative Scanning: Techniques, Equipment, and FADGI Standards
Pro glass plate negative scanning matches equipment to collection type. It follows handling protocols for fragile formats like wet collodion or gelatin dry plates. Decades of experience shape glass plate digitization practices. Know them to evaluate professional scanning services and documentation.
1. Flatbed vs DSLR Glass Plate Scanner Comparison
Factor
Flatbed Glass Plate Scanner
DSLR/Mirrorless + Lightbox
Throughput
High—automated high-volume scanning
Lower—manual per glass negative
Max Size
Up to 8×10 in
Unlimited (mammoth plate scanning)
Light Control
Fixed diffuse
Adjustable for damaged negatives
Best For
Stable archival glass plates
Oversized/mirrored glass negatives
Newton’s Rings
Risk—needs mitigation
Eliminated
Calibration
Low
High—precise TIFF master files
💡 Hybrid best practice: Flatbed for standard glass plate negatives. DSLR for oversized or damaged. Optimizes digitization throughput and quality.
2. Newton’s Rings in Glass Plate Scanning: Causes and Prevention
Iridescent patterns from glass-platen contact. Ruins negative detail. Unfixable in post.
Pro glass plate scanning fixes:
Anti-Newton textured platens.
Elevated holders.
Camera capture—no contact.
3. Emulsion-Side Placement for Glass Negatives
Place emulsion down on flatbed or facing lens in copy stand for sharp glass plate scans.
Placement
Effect on Glass Negative
Digitization
Emulsion down
(correct)
Direct light—max sharpness, low risk
Emulsion up
(wrong)
Softens detail; damages flaking emulsion
Spot emulsion side: Matte under raking light, textured, tacky on gelatin plates.
4. Cold Light Sources for Safe Glass Plate Scanning
Tungsten heat softens emulsions, causes delamination in glass negatives.
Standard: Cold LEDs, fluorescents, diffused daylight. No IR. For deteriorated plates: Fast shutters, single-pass flatbed scanning.
5. FADGI Standards for Glass Plate Negative Digitization
Library of Congress FADGI guidelines for archival scanning.
Scan Purpose
Min PPI
Recommended PPI
Access files
400
600
Archival masters
600
1200+
Mammoth/scientific plates
1200
2400–4000
Why Preservation Standards Exist: File Formats, Resolution, and Metadata in Historical Context?
The technical specifications that govern archival glass plate digitization were not invented arbitrarily. They emerged from decades of institutional experience with format obsolescence, data loss, and the practical requirements of long-term digital stewardship.
1. Output Format Comparison
Format
Compression
Data Loss
Best Use
Institutional Standard
Uncompressed TIFF
None
None
Archival master file
✅ Primary — LOC, NARA, FADGI
LZW-compressed TIFF
Lossless
None
Master file (space-saving compromise)
✅ Accepted
JPEG2000 (lossless)
Lossless
None
Large institutional archives, DAM ingestion
✅ Accepted (not universal)
JPEG
Lossy
Permanent on every save
Access copies, web delivery only
❌ Not for masters
PNG
Lossless
None
Web access copies
❌ Not standard for archival
Why uncompressed TIFF? The Library of Congress’s Recommended Formats Statement identifies uncompressed TIFF as the preferred format for still image preservation – open, non-proprietary, lossless, and independent of any decompression algorithm that could become unavailable in future software environments.
2. 8-Bit vs. 16-Bit — What Tonal Information Is at Stake
Specification
8-Bit
16-Bit
Tonal values per channel
256
65,536
Used in
Consumer photography
Archival scanning
Shadow/highlight detail
Discarded in extreme ranges
Fully captured
Post-processing flexibility
Limited — lost data cannot be recovered
Maximum — full range available for derivative production
File size (approx. 4×5 plate at 4000 PPI)
~300–400 MB
600–800 MB
A 16-bit master file is scanned once for permanence. Access derivatives – 8-bit JPEGs, web-optimized copies can be regenerated from it indefinitely. An 8-bit master cannot be upgraded after the fact.
3. Metadata Schemas – Choosing the Right Standard
Digitization without metadata produces image files that cannot be searched, sorted, or retrieved. For collections numbering in the hundreds or thousands, metadata is what transforms a set of files into a functional archive.
Schema
Best For
Field Depth
Interoperability
Dublin Core
Cross-institutional sharing, aggregator ingestion (Digital Public Library of America)
15 core elements
Highest — universal
IPTC
Rights management, photographer attribution, keyword-rich cataloging
Rich — location, copyright, caption, keywords
High — embedded in TIFF/JPEG
Custom institutional
Museum databases, archival management software, library cataloging platforms
Unlimited — project-specific fields
Internal — mapped to existing system
💡 For institutional clients with existing collection management systems, the metadata schema must be mapped to your data architecture at the project design stage, not retrofitted after scanning is complete.
Planning a Bulk Glass Plate Scanning Project – Scope, Timelines, and Logistics
For estates, institutional archivists, and private collectors managing significant glass plate holdings, a bulk digitization project involves decisions that shape cost, timeline, and quality long before any plates are scanned.
Scope Document Checklist
Before engaging a digitization service, a scope document should specify:
☐Total plate count (estimated or exact)
☐Estimated format distribution — collodion/gelatin / albumen
☐Confidentiality or donor restriction requirements
Questions to Ask a Digitization Provider Before Committing
Is all scanning performed in-house, or is any work subcontracted?
What temperature and humidity standards are maintained in the scanning environment?
How are plates identified during intake as requiring conservation attention handled?
What is the QC review process, and who reviews completed scans?
What metadata schema options do you support, and can custom fields be accommodated?
What secure transport and insurance protocols are used during transit?
What chain-of-custody documentation is provided at project close?
Conclusion: Preserve Your Glass Plate Negatives Before It’s Too Late
Glass plate negatives are among the most fragile and historically significant photographic records ever made. Whether you manage an inherited estate, an institutional archive, or a private family collection, the time to act is now before delamination, silver mirroring, cracking, or mold permanently erase the images.
erecordsusa.com specializes in glass plate negative scanning with conservation‑aware workflows, ISO‑aligned practices, and preservation‑grade TIFF masters tailored to archival and scientific needs. We combine flatbed and camera‑based capture, rigorous metadata, and chain‑of‑custody documentation to ensure your collection is digitized once correctly and preserved for generations.
👉 Start your project today: Call us at 1.510.900.8800, or write us at he***@*********sa.com to get a free bulk estimate and a no‑obligation consultation.
Let’s secure your glass plate negatives before deterioration makes the decision for you.
FAQs About Glass Plate Negatives Scanning
Q1: How much does glass plate negative scanning cost?
A: Glass plate negative scanning costs vary by plate size, condition, resolution, and volume. Professional services typically charge per plate. Bulk collections and estates qualify for discounted rates. Factors include conservation triage, metadata, and file delivery format.
Q2: Can glass plate negatives be scanned at home without professional equipment?
A: Glass plate negatives can be scanned at home using a flatbed scanner with a transparency unit. However, home setups lack cold light sources, anti-Newton’s ring platens, and emulsion-safe handling. Deteriorated or mold-affected plates require professional conservation-grade equipment.
Q3: What is the difference between a glass plate negative and an ambrotype?
A: A glass plate negative produces a transparent image used for printing positives. An ambrotype uses the same wet collodion process but is intentionally underexposed and backed with dark material to appear as a positive. Ambrotypes are direct positives; glass plate negatives are not.
Q4: How do I print or reproduce images from scanned glass plate negatives?
A: Scanned glass plate negatives are delivered as digital TIFF files, which are inverted to positive images during processing. These files can be printed via any professional photo lab, published digitally, or ingested into a digital asset management system for institutional access.